Experimenting with Audiences
In this guide you will learn how to use audiences to create experiments that deliver custom data to clients based on their progress through the game. To accomplish this, you will:
- Create a custom event
- Create an audience
- Send the event from the client
- Create an experiment
- Create variants of the experiment
Creating a custom event #
Start by creating a custom event: firstLevelCompleted. This event is used to indicate to Satori that a particular identity has participated in and completed the first level of the game.
- Navigate to the Settings -> Events screen in the Satori Console.
- Click the Create New Event button.
- For Event Name enter:
firstLevelCompleted. - For Type leave it as
string, there will be no associated value beyond the time the event occurred.

Creating the audience #
Next create an audience that segregates players based on whether or not they have recently (in the last 7 days) completed the first level.
- Navigate to the Audiences screen.
- Click Create New Audience.
- For Audience Name enter
Recent-First-Level-Completersand give it an appropriate Description. - Click Create.

- On the next screen, enter the appropriate filter. This filter should check that the
firstLevelCompletedevent occurred at least once within the last 7 days.
firstLevelCompletedLastSeen computed property that indicates when the firstLevelCompleted event last occurred for the identity.Now() - PropertiesComputed("firstLevelCompletedSeenLast", 0) < Duration("7d") and PropertiesComputed("firstLevelCompletedCount", 0) > 0
Sending the event from the client #
An identity must send a firstLevelCompleted event to Satori to be added to the new audience. This should be done via the client:
| |
audience.processor_interval_sec configuration parameter.Creating an experiment #
Experiments allow you to deliver variant data to identities in your audiences. They also provide you with valuable metrics that can be used to determine the success and impact of the variants you make available as part of them.
You can use experiments and variants to deliver different data values to different users in the audiences you have selected, based on a random distribution.
Defining the metric #
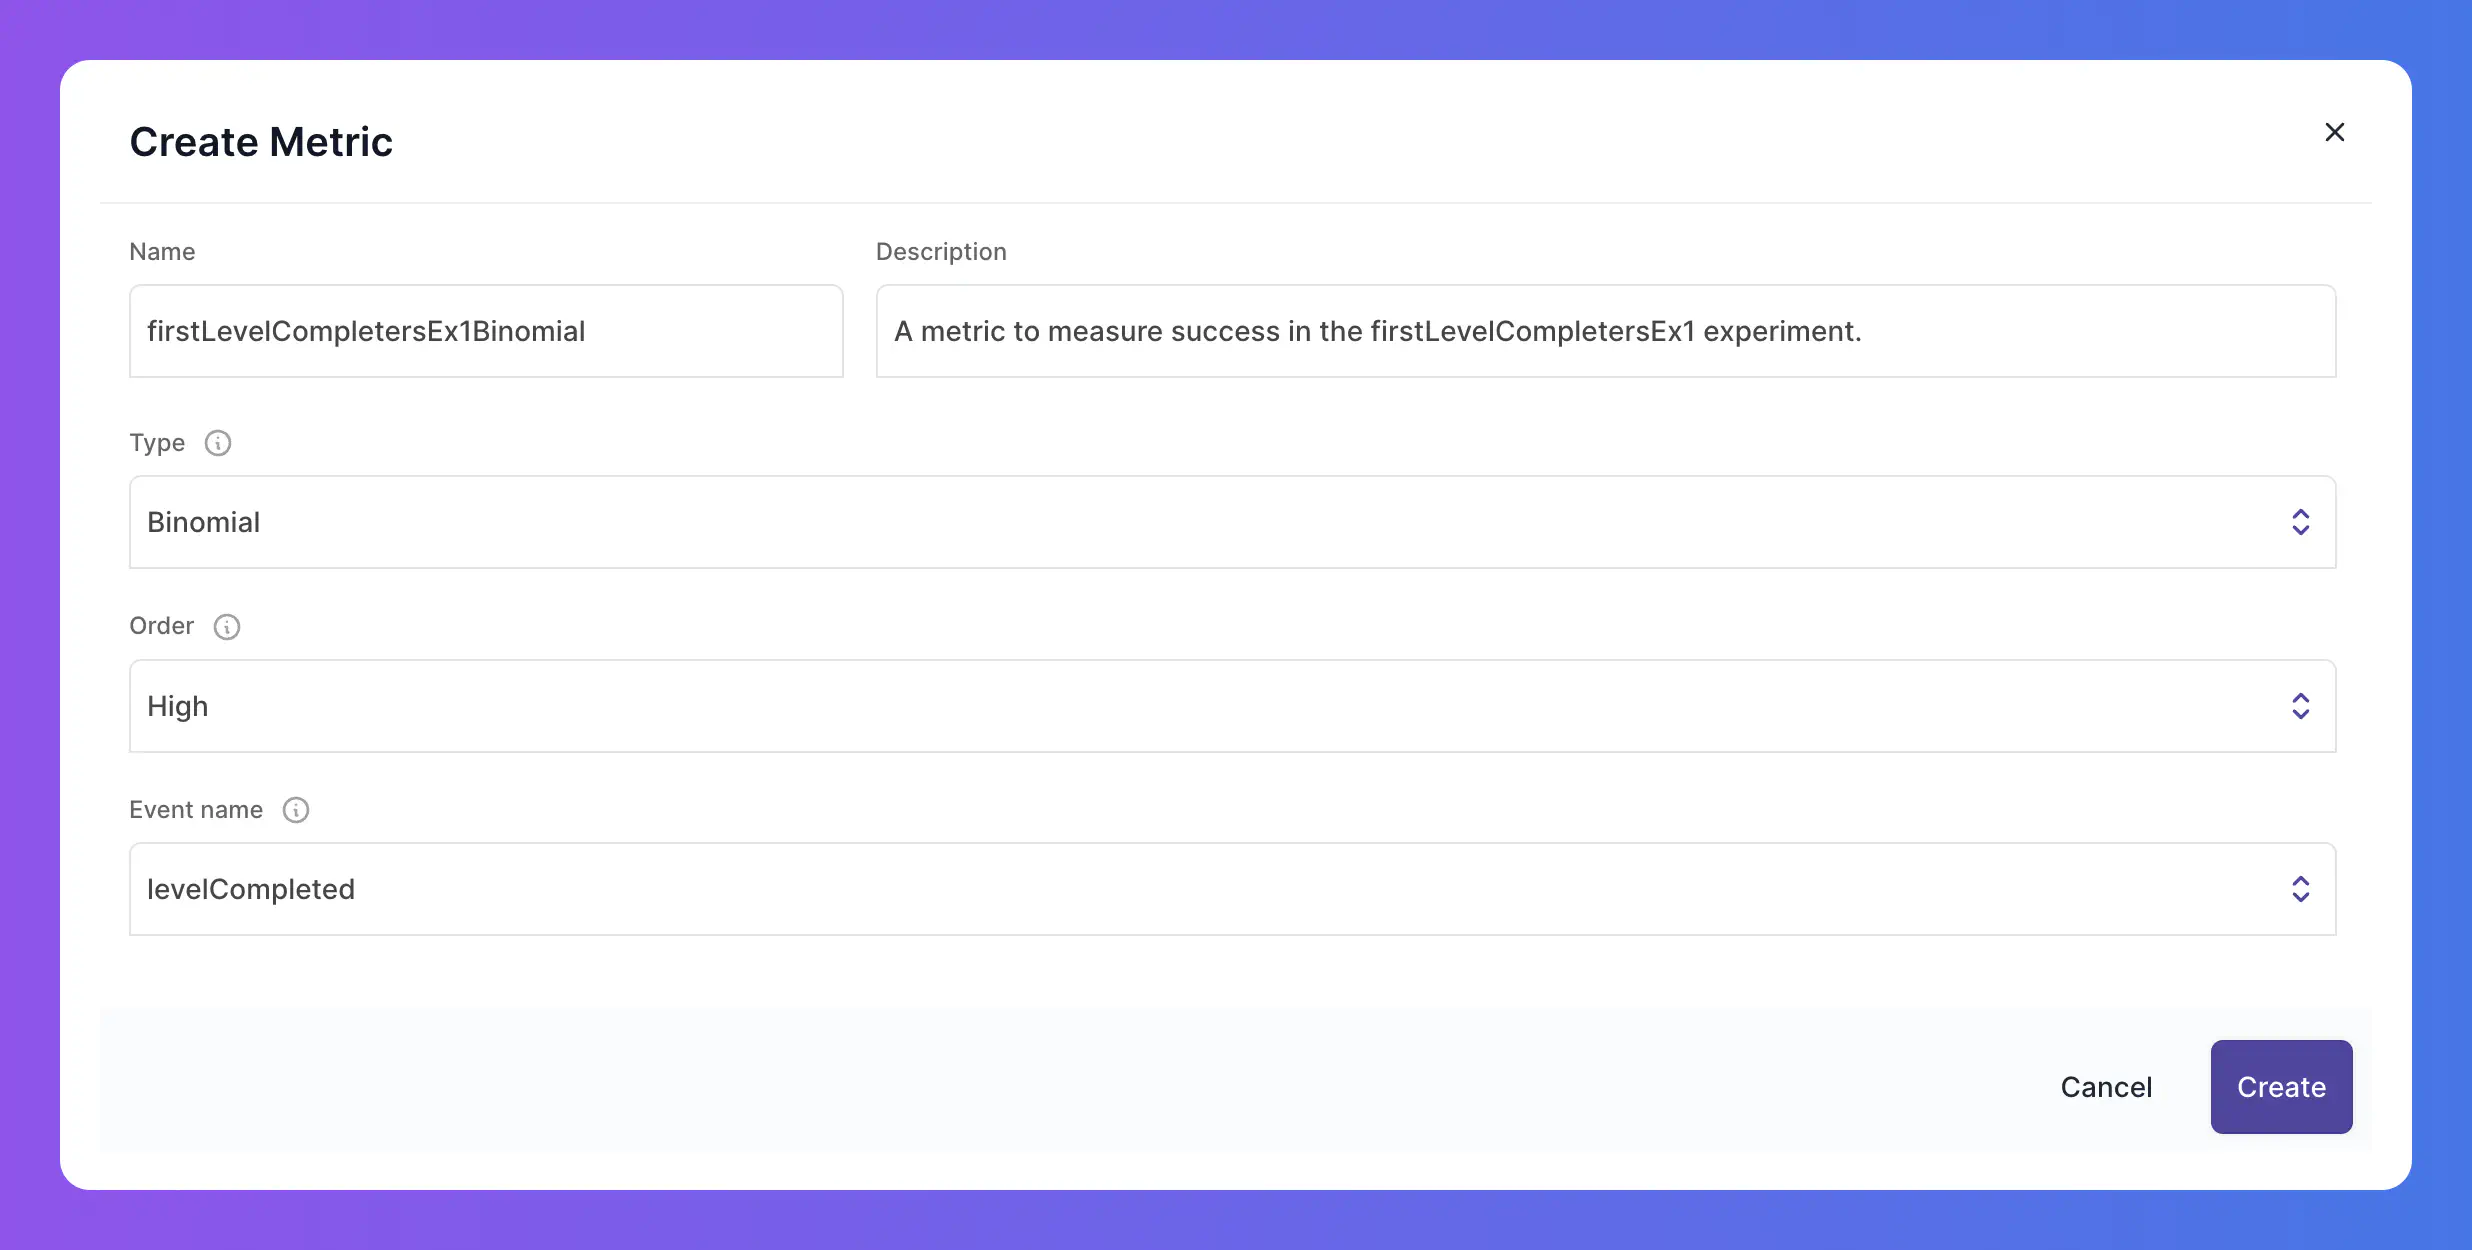
Create a new metric you will use to measure the effect of the experiment.
- Navigate to the Metrics screen.
- Click on Create New Metric
- For Name enter
firstLevelCompletersEx1Binomialand provide a meaningful Description. - For Type select
Binomial. - For Order select
High.
Defining the experiment #
Next we’ll create an experiment that measures player engagement with various in-app purchase offers (either a booster or a coin pack) after they have recently completed the first level.
- Navigate to the Experiments screen.
- Click Create New Experiment.
- For Name enter
firstLevelCompletersEx1and provide a meaningful Description. - For Audience select the audience you created earlier:
Recent-First-Level-Completers. - For Goal Metric select the metric you created earlier:
firstLevelCompletersEx1Binomial. - Click Create.
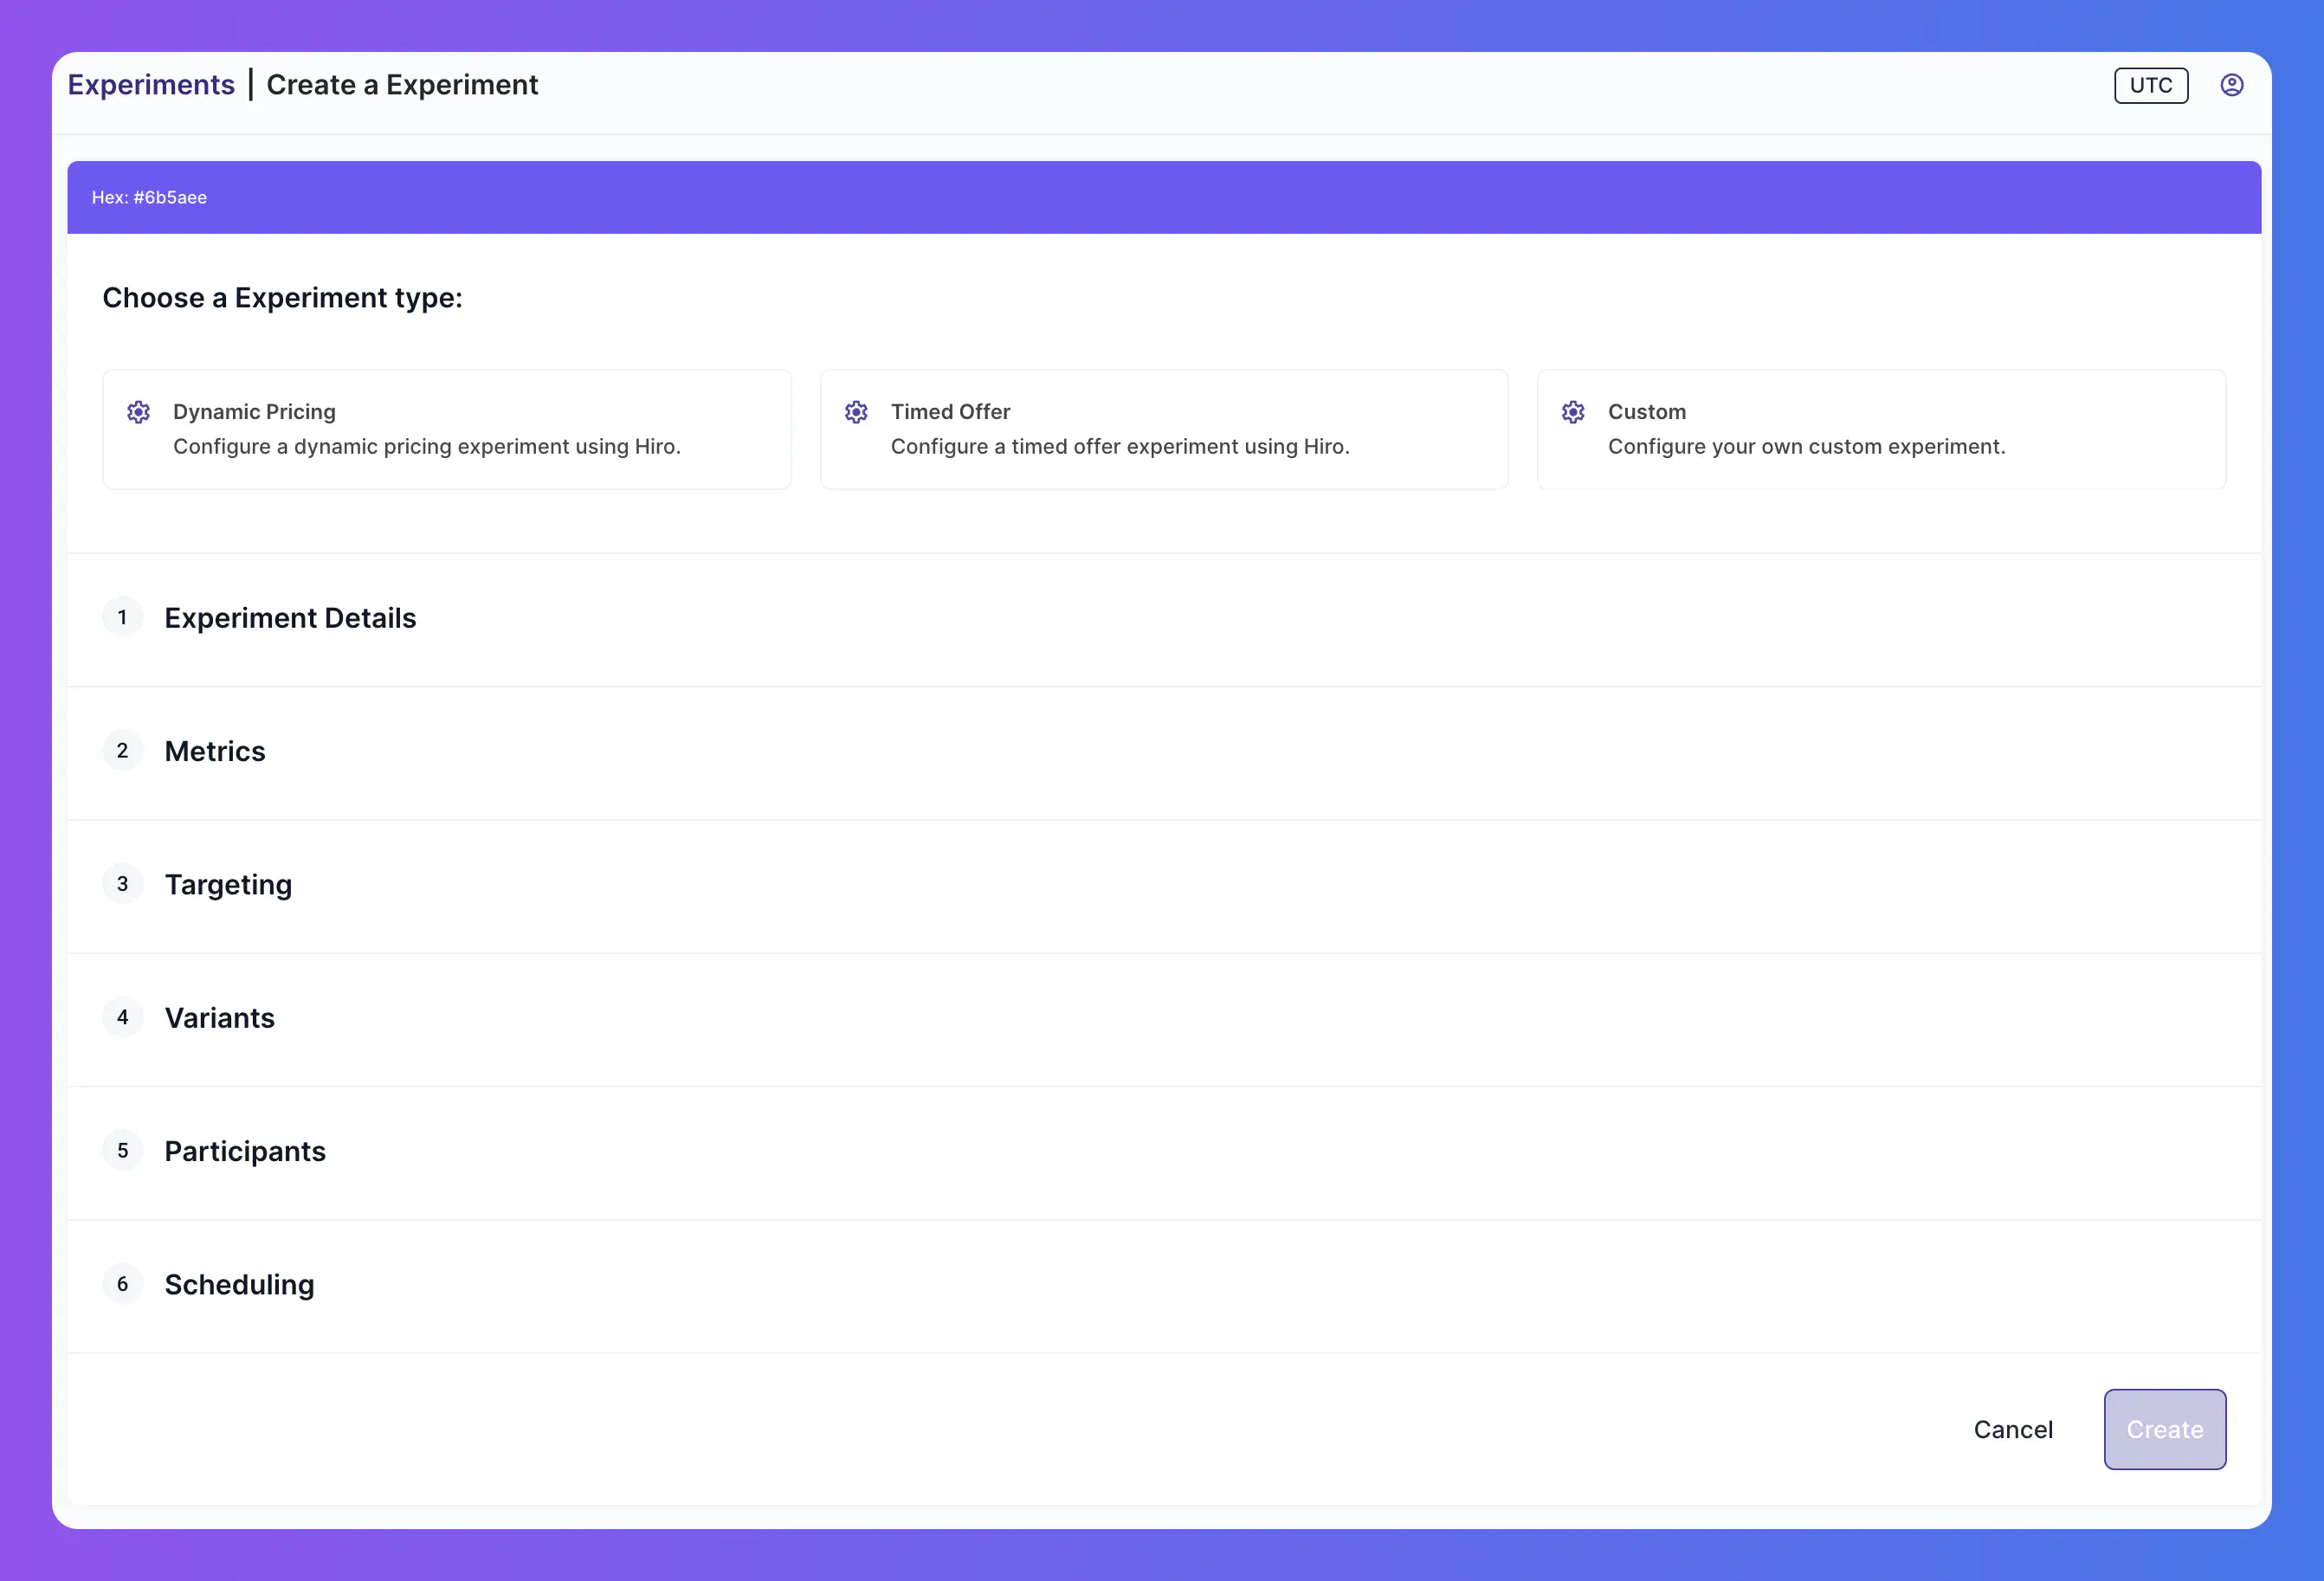
Once created, click the experiment to see the experiment details screen.
Defining the variants #
Variants define the different values that can be delivered to users as part of an experiment. One value will be chosen for each participating identity as defined by the random split distribution configured in the active phase (see next section).
This variant will define which IAP offer the player receives after completing the first level, either a Booster or a Coin Pack.
Create two new variants: booster and coinPack.
- Click on the Variants tab.
- Click Create New Variant.
- For Name enter
Boosterand for Value enterbooster. - Click Create.
- Repeat steps 2-4 to create a second variant with the name
CoinPackand valuecoinPack.
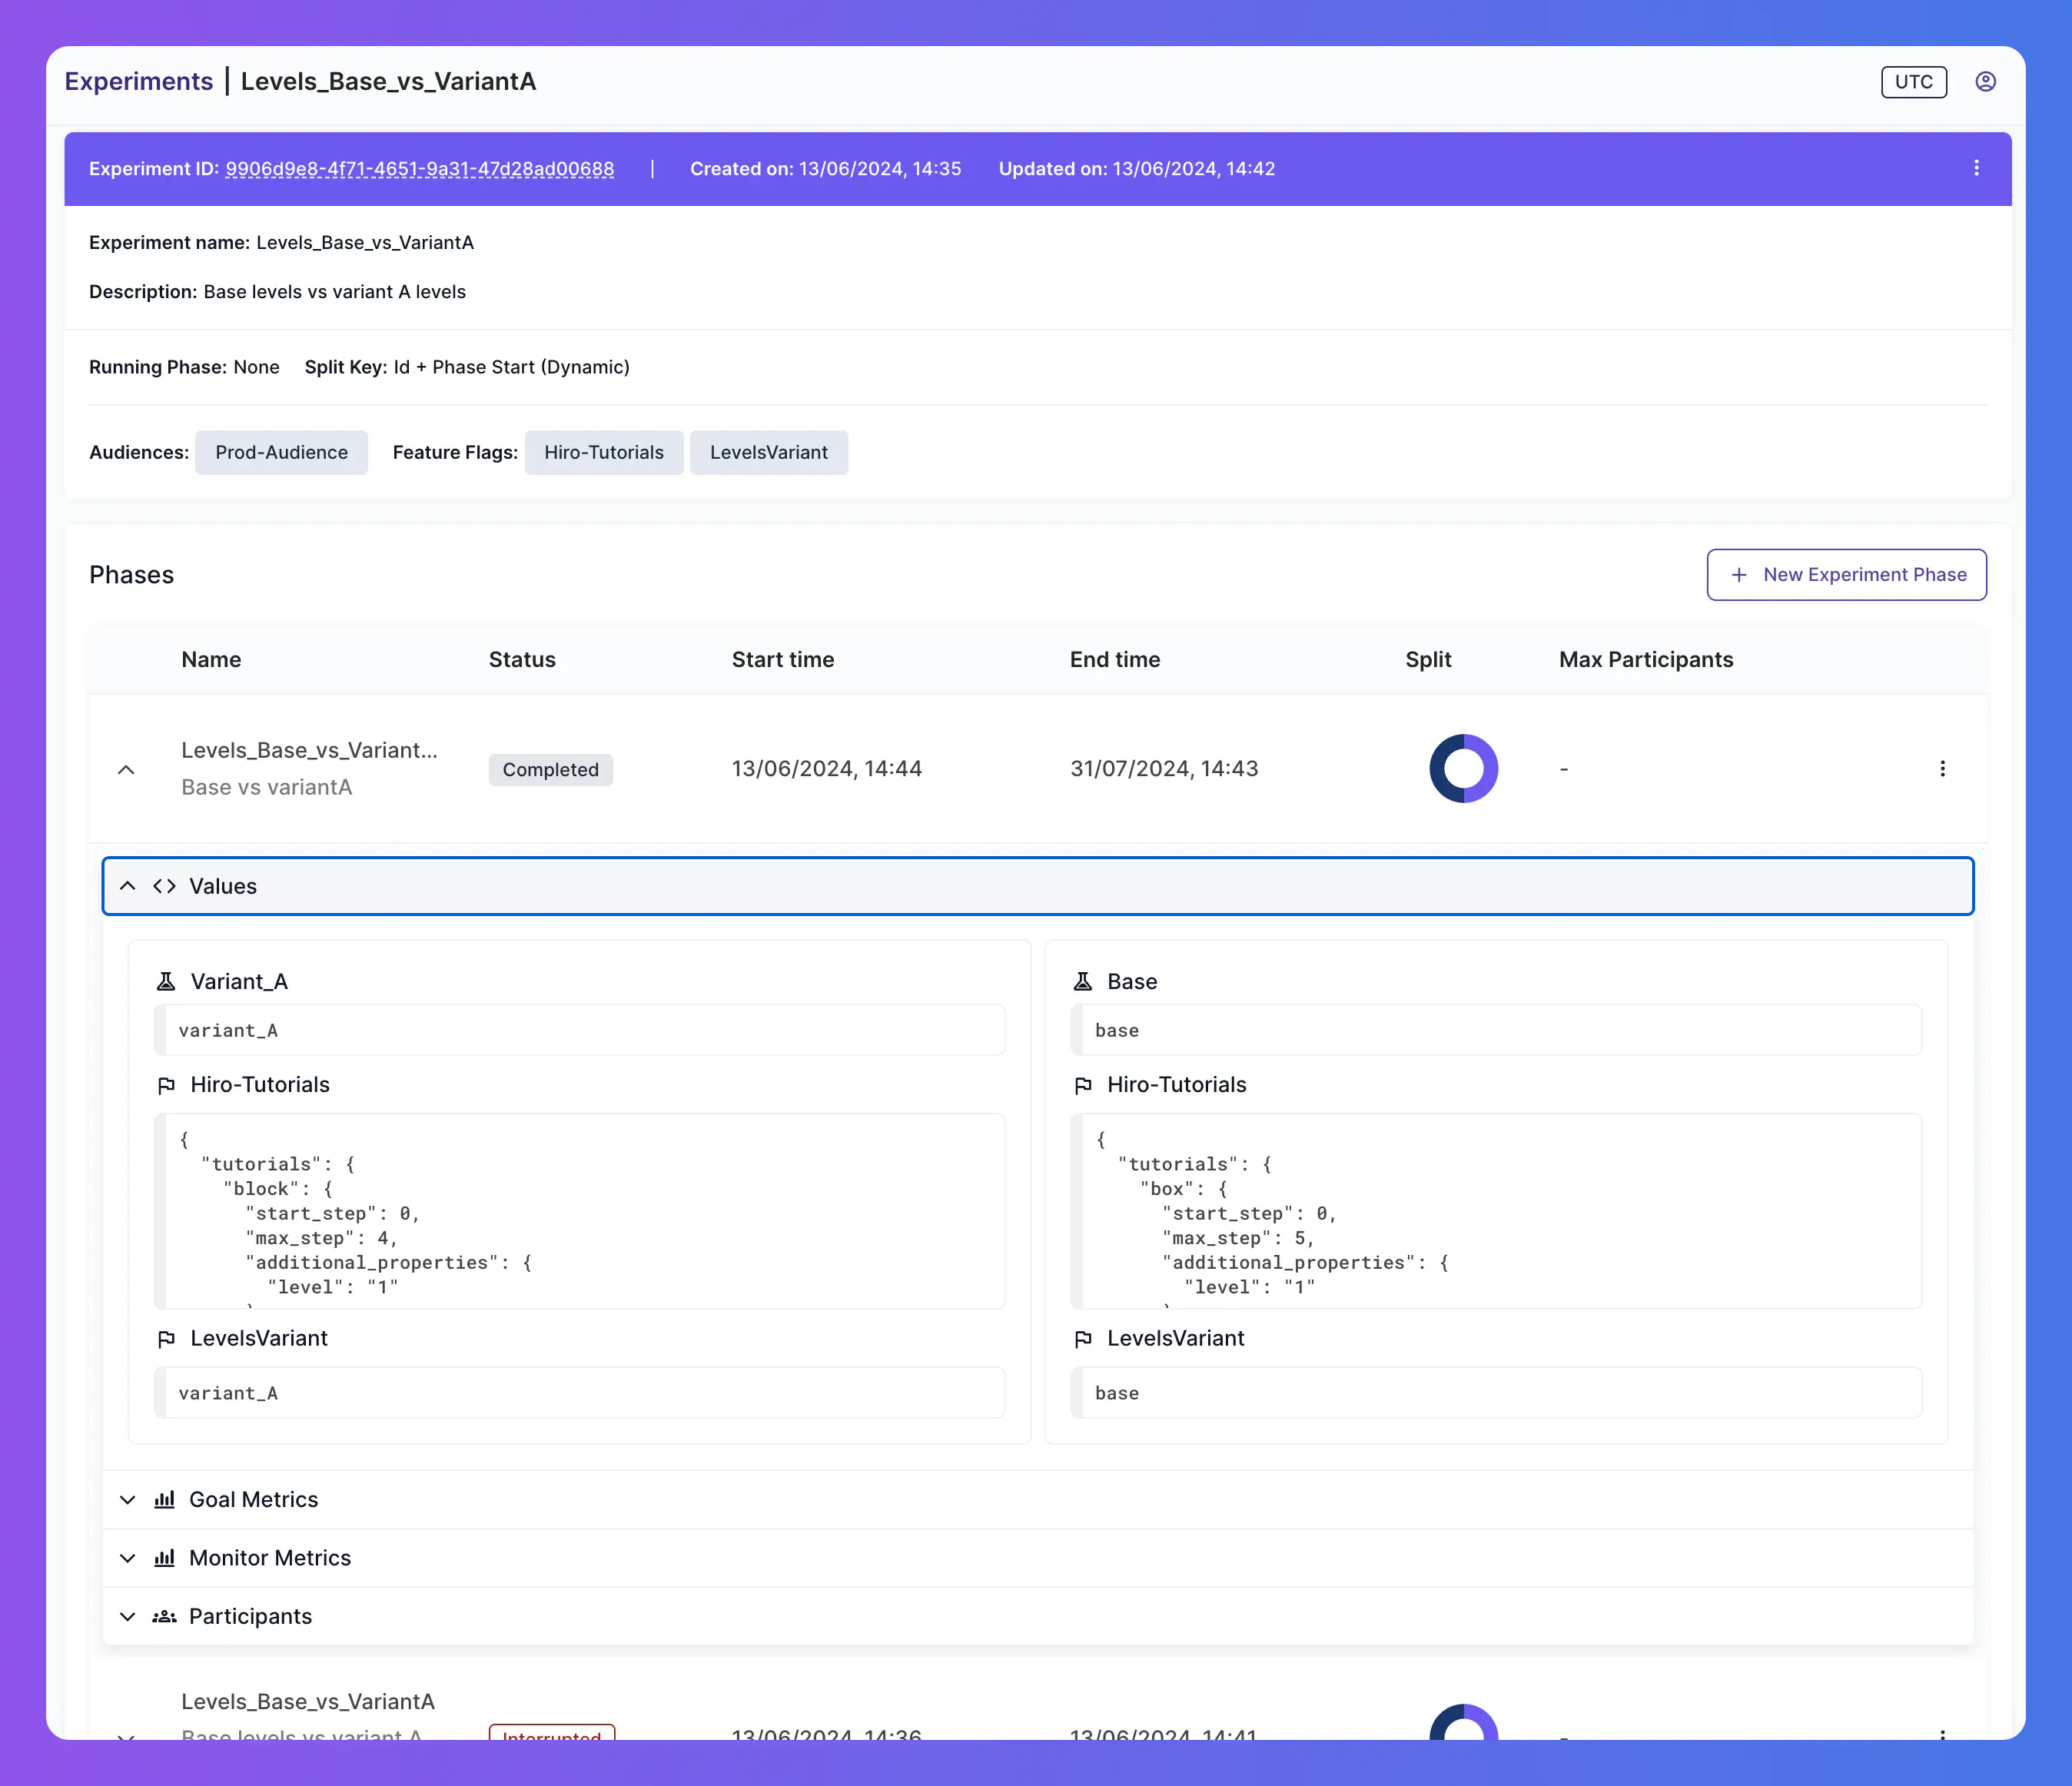
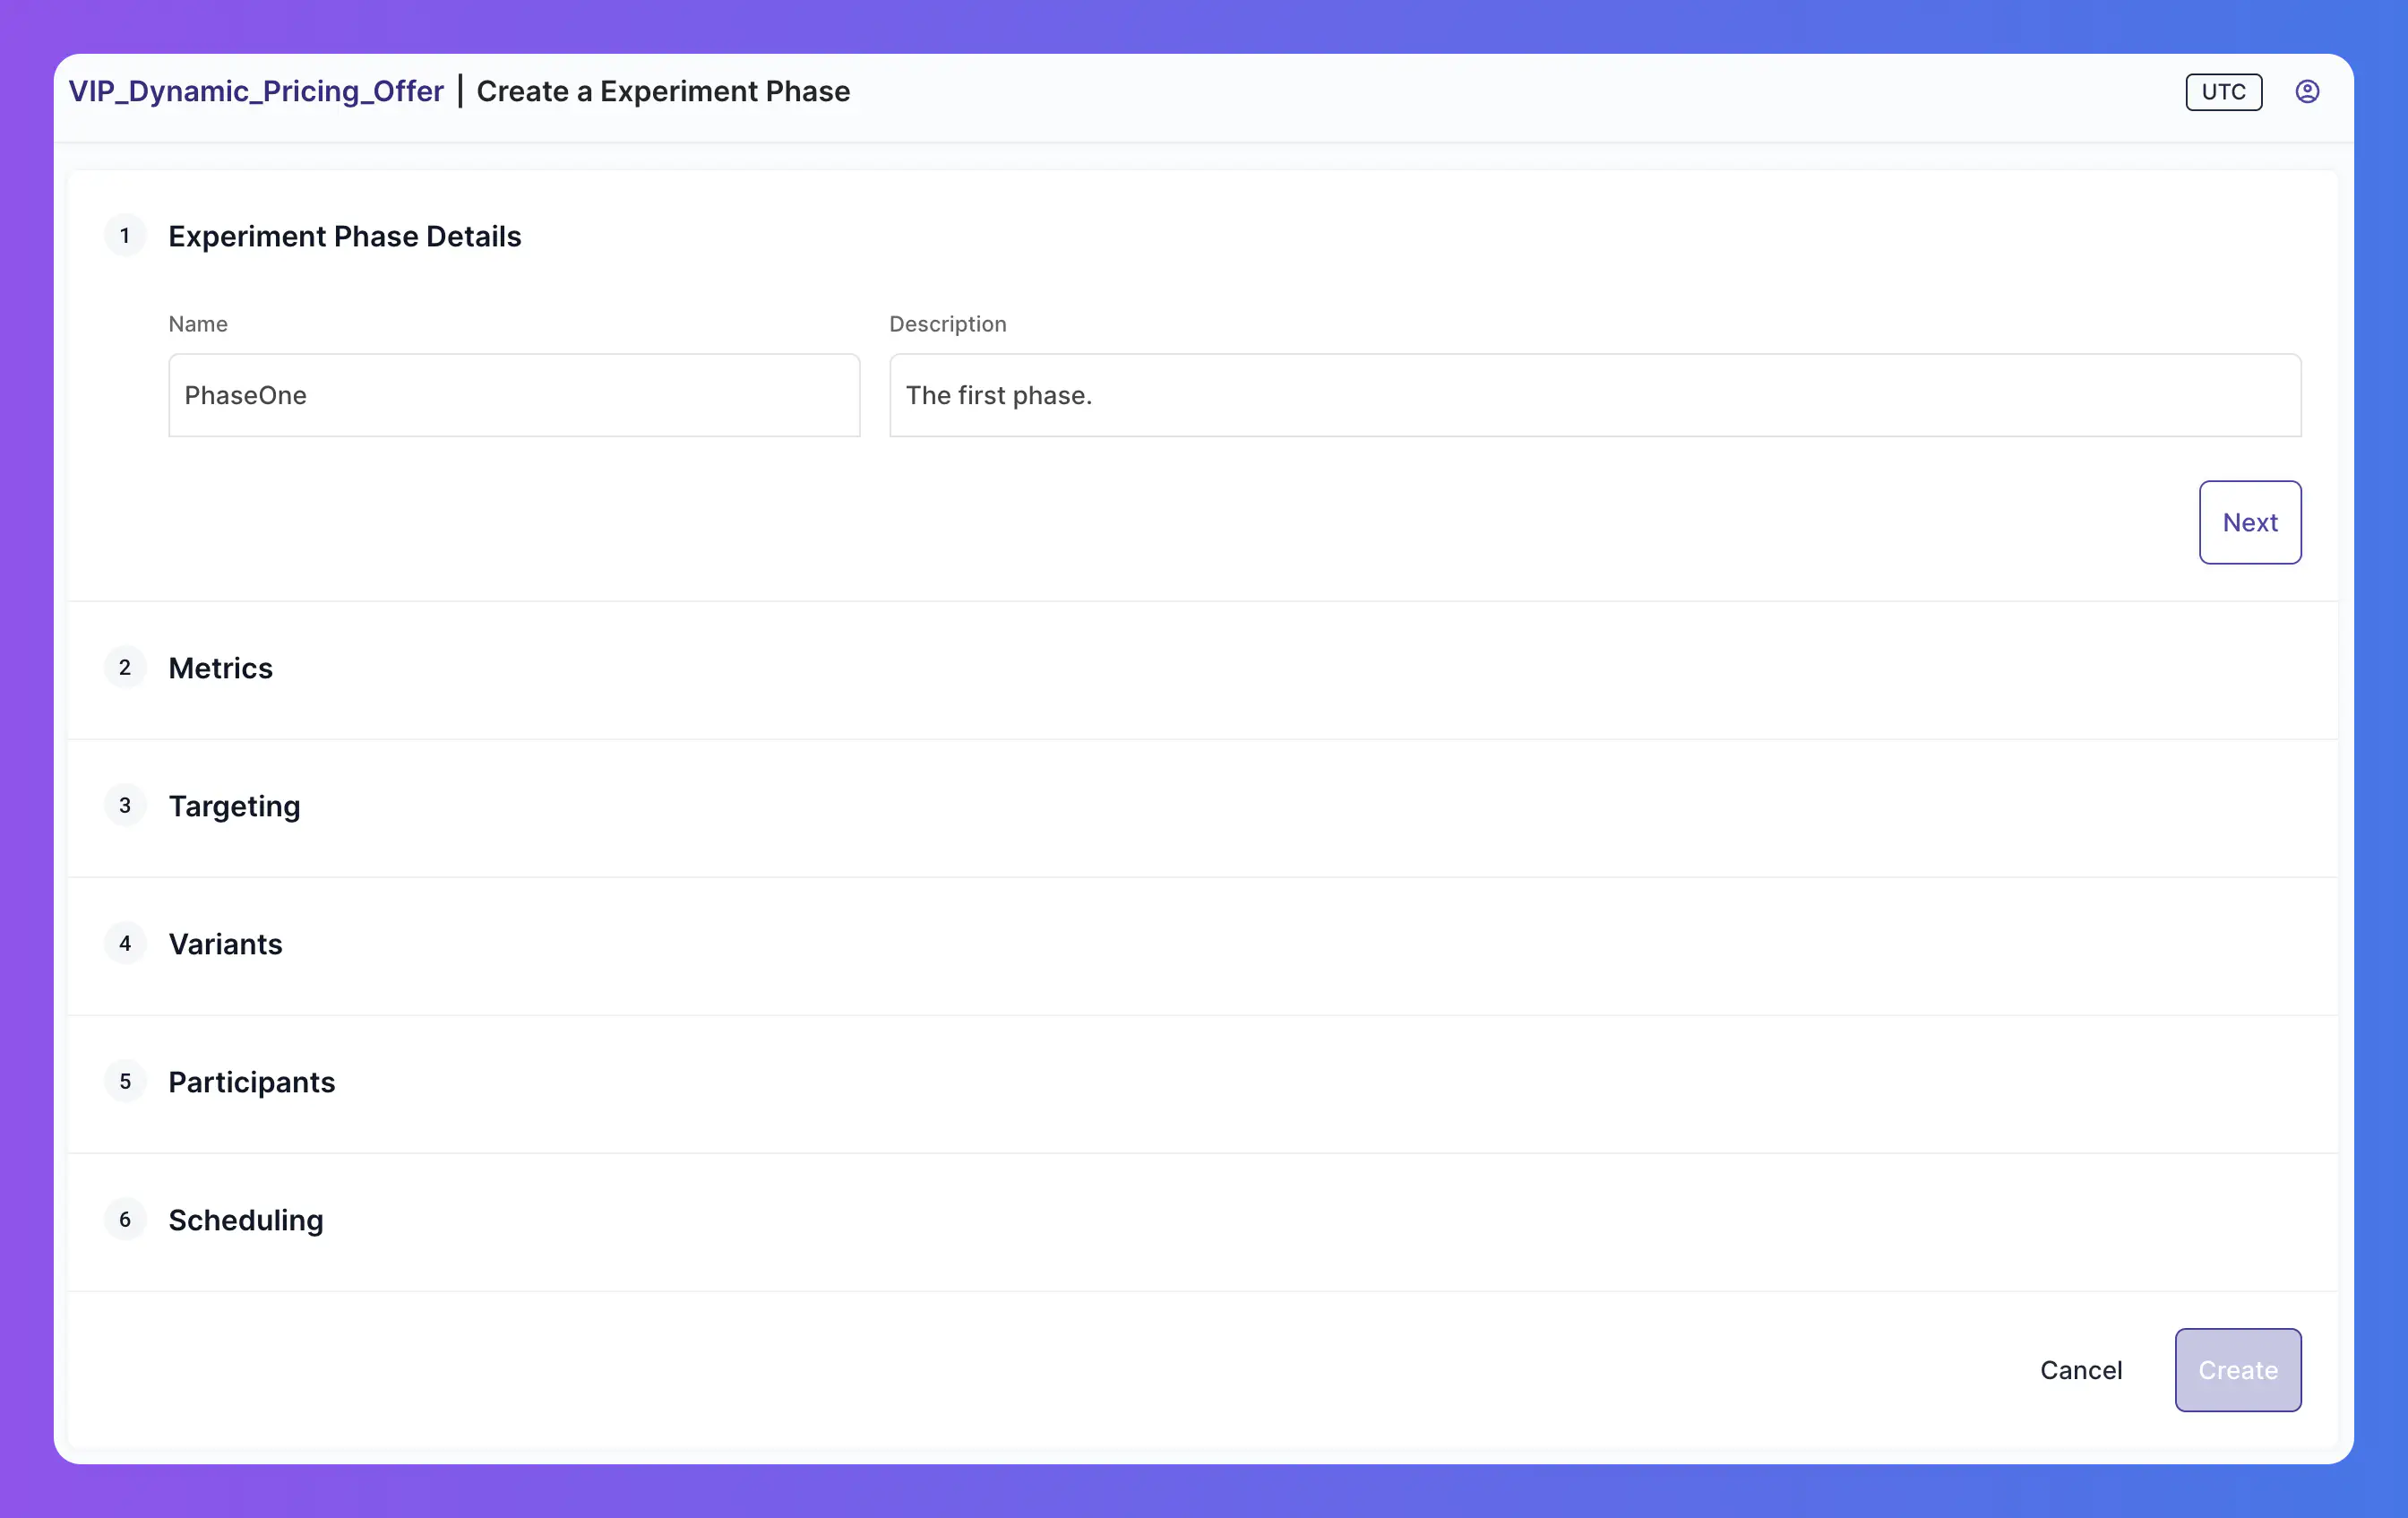
Defining the phases #
Experiments can consist of one or more phases. Phases are fixed time periods where different variants can be tested and measured against the specified metric.
We’ll create a single phase for this experiment that will last for one week. This phase configures a 50/50 split between the two variant values, meaning 50% of users will receive the value booster and 50% will receive the value coinPack when they request the value of this experiment.
- Navigate to the Phases tab.
- Click Create New Phase.
- For Phase Name enter
PhaseOneand provide a meaningful Description. - Under Variant, enter a Split % value of
50for both theboosterandcoinPackvariants. - For Start Date enter the date and time you want the phase to start.
- For End Date enter the date and time you want the phase to end.
- Click Save.
With the phase created, the experiment is now active and players can begin receiving their assigned variant value.
Receiving the experiment variant value #
From the client, check if the user is part of this experiment and if so get the variant value.
| |
Evaluating experiment metrics #
Once the phase is finished you can inspect the associated metrics by clicking into the phase from the Phases tab.
Here you will be presented with a table that represents how the users in your experiment interacted with the associated variant values and how those interactions impacted the assigned metrics.
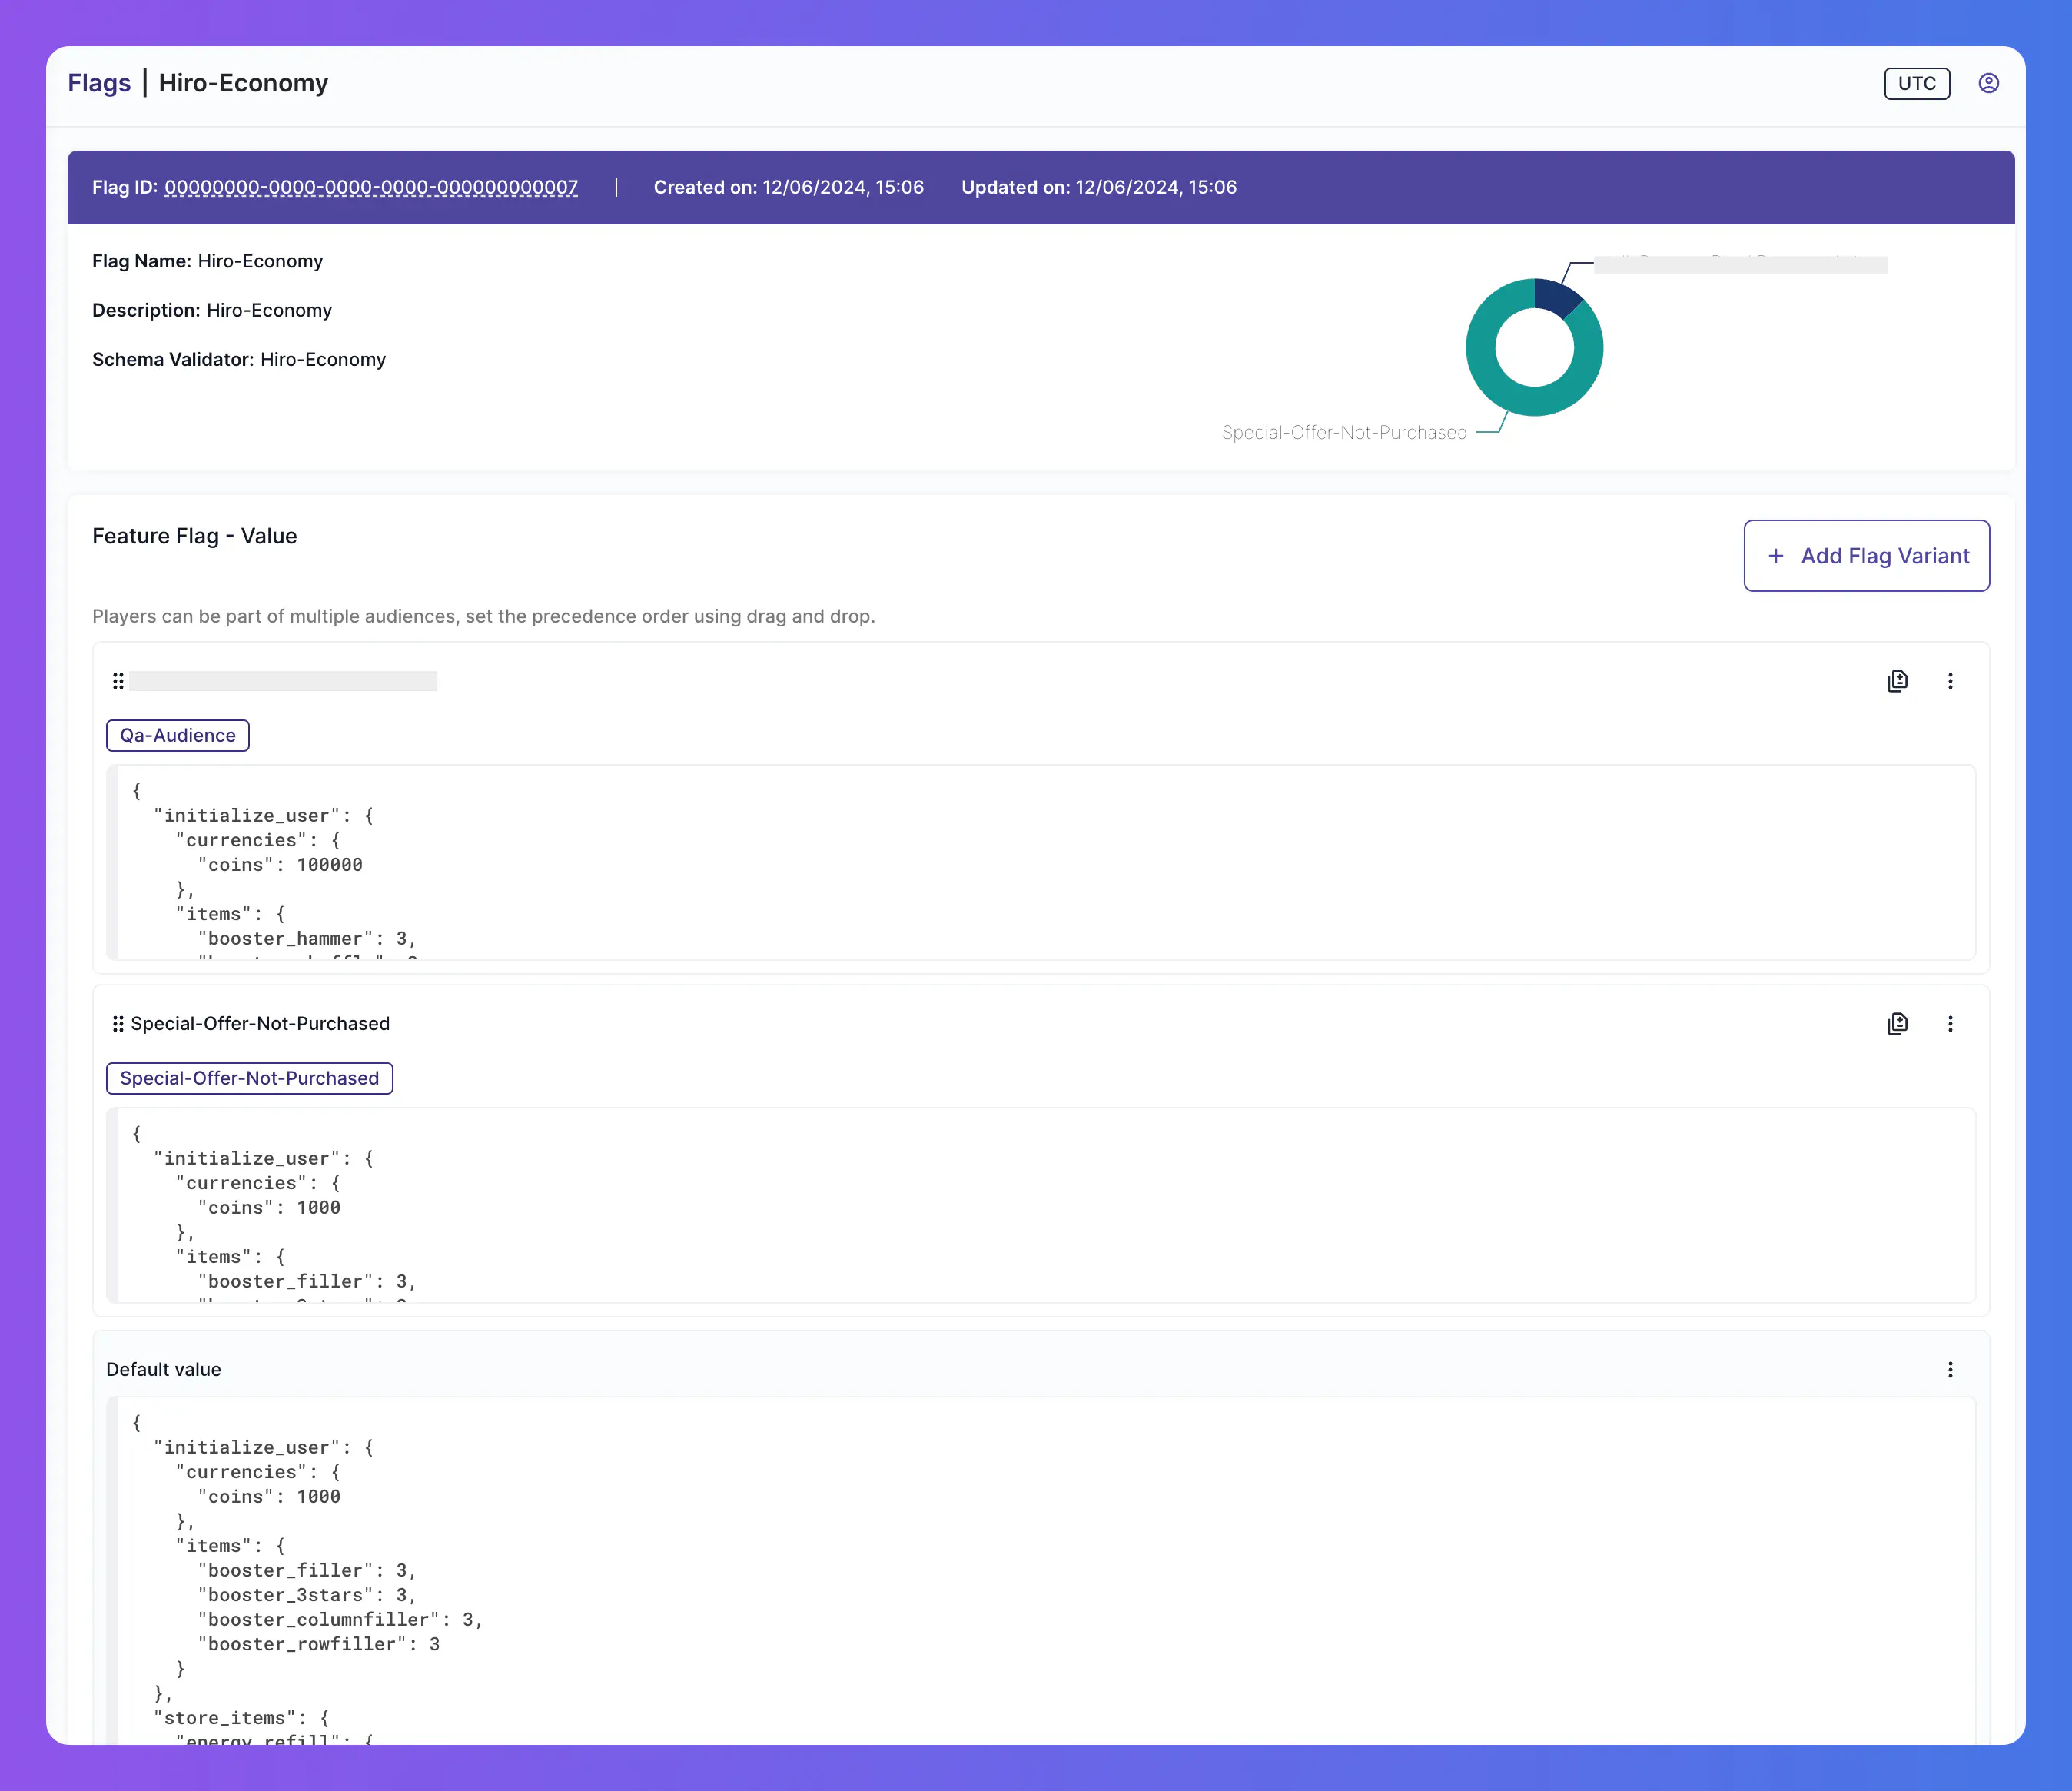
Examples of experiment variants #
The above example demonstrates how you can offer different IAP discounts to your users. However, variants are not limited to simple string values but can contain entire JSON objects, allowing you to get creative with what data to present to users taking part in your experiments.
Available store items #
These variants allow you to change the order that items are displayed in an In-App Store, or change the available items completely.
Variant 1 - ConsumablesFirst
| |
Variant 2 - CurrenciesFirst
| |
Variant 3 - ExtraCurrencies
| |
Available tournaments #
These variants allow you to offer different tournaments to users.
Variant 1 - Default
| |
Variant 2 - VIP
| |
UI Themes #
These variants allow you to change the theme of the game’s UI.
Variant 1 - Default
| |
Variant 2 - Christmas
| |
Variant 3 - Halloween
| |
