Live Events
Overview #
Live events are time‑bound experiences you can schedule to boost player engagement, increase retention, and drive monetisation. They create moments of excitement—whether it’s a weekend challenge, a seasonal tournament, a limited‑time shop rotation, or a special themed event—giving players reasons to return and participate.
Common examples include battle passes, leagues, tournaments, weekend boost events, seasonal celebrations, special offers, rotating dungeons or modes, and recurring in‑game messages or push notifications that highlight timely content.
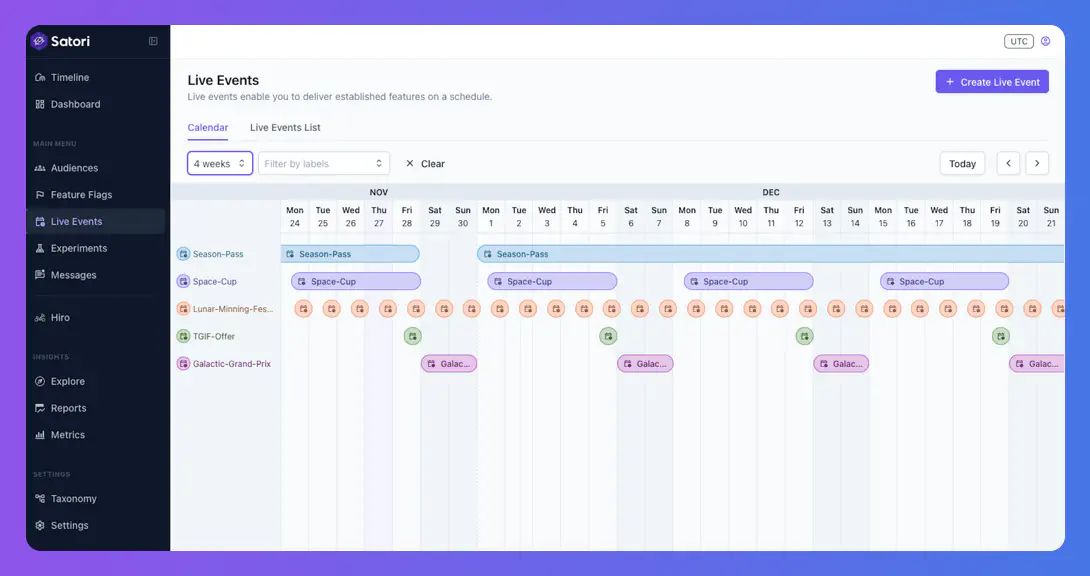
Planning a live event calendar requires balancing event variety, player availability, and fatigue, as well as avoiding overlap with other internal or external events. Satori gives you a clear overview of what’s running and when. The Live Events page in the Satori dashboard lets you create, update, and manage events using either a calendar timeline or a simple list view.

Creating events #
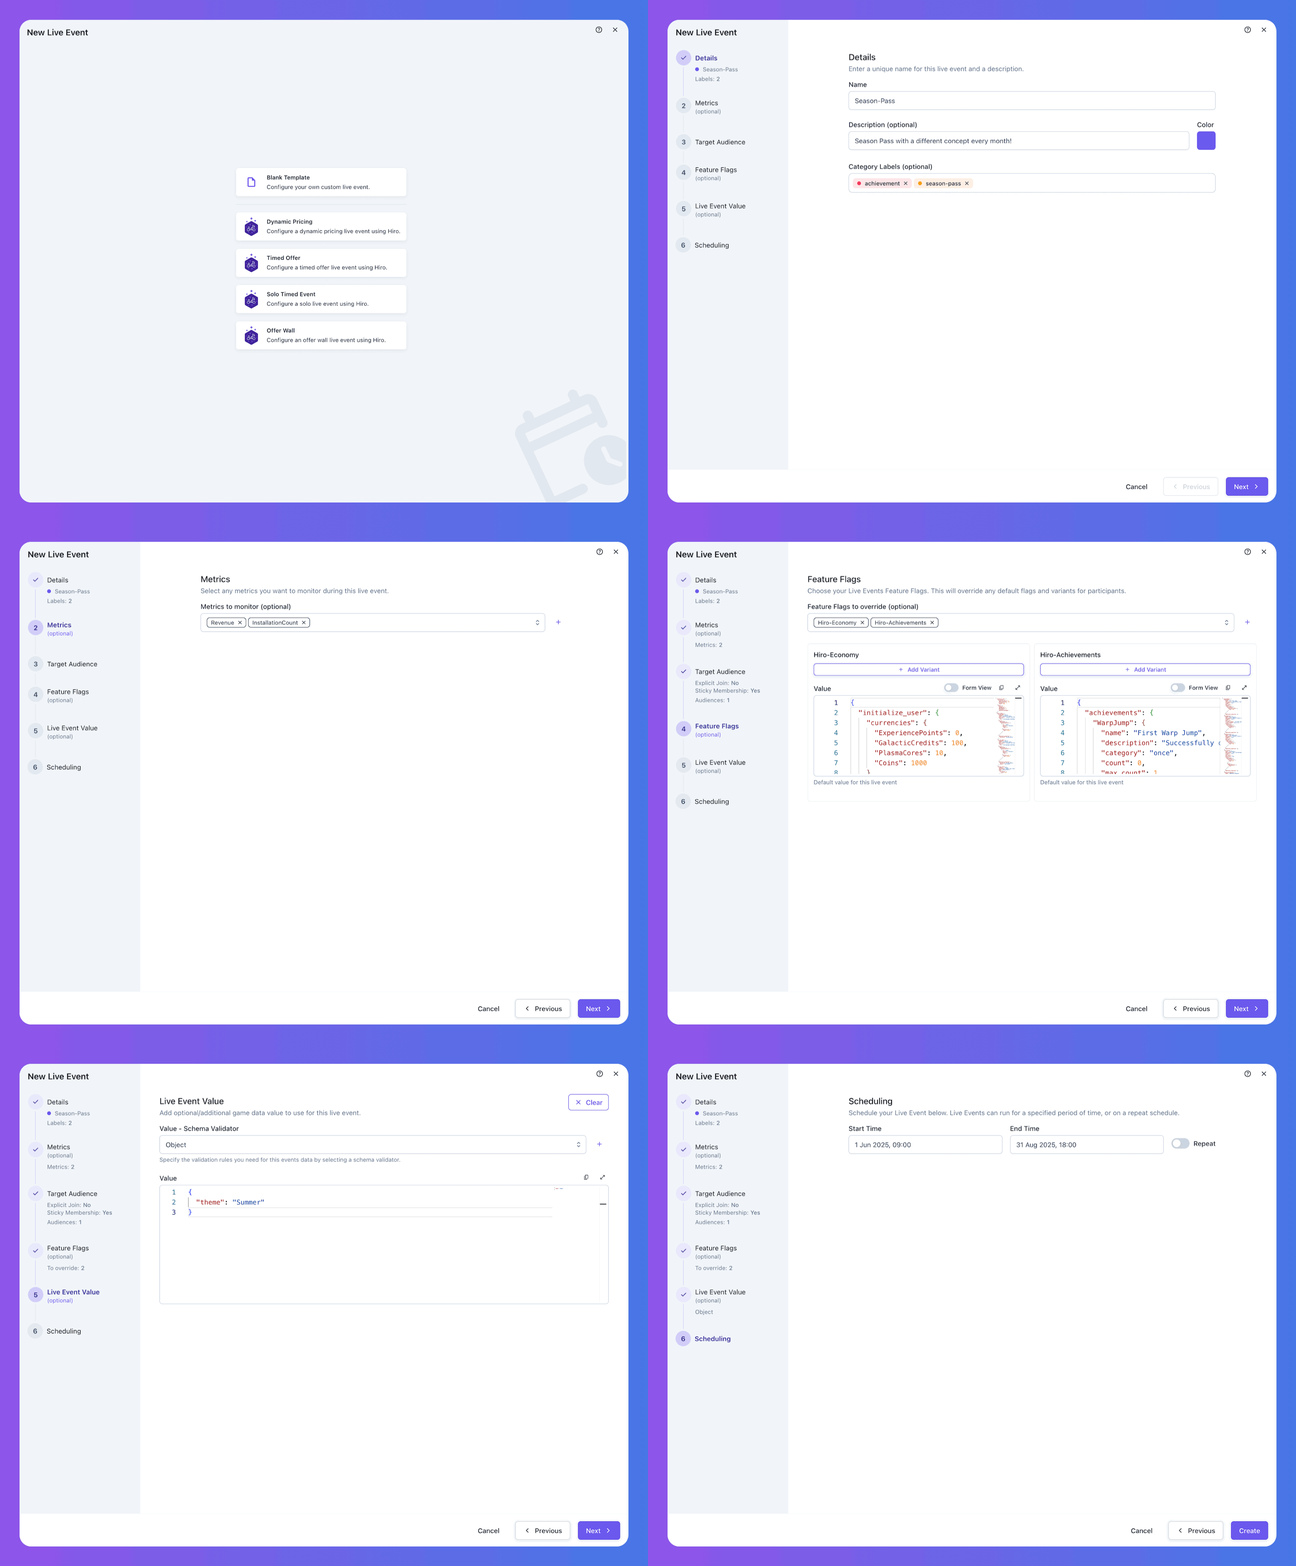
Select + New Live Event to start the Create Live Event wizard.

Choose a live event template
- Dynamic Pricing: Test different pricing strategies.
- Timed Offer: Run limited‑duration offers.
- Solo Timed Event: Create one‑time, single‑player timed events.
- Offer Wall: Build and schedule offer walls.
- Blank Template: Start from scratch for custom features or configurations.
Enter event details
- Name: Provide a unique event name.
- Description: Summarize the event’s purpose.
- Category labels: Add optional labels to organize your events.
Select metrics
- Metrics to monitor: Choose which metrics to track. You can create a new metric or reuse an existing one.
Configure the target audience
- Audiences: Choose the audiences that should participate, or create a new one.
- Exclude audiences: Remove specific audiences when needed.
- Explicit join: Require players to opt in before joining. Use this if you want players to choose between events or explicitly tap Join / Play.
- Sticky membership: Keep players in an event until it ends—even if they no longer match the audience criteria. Disable this to remove players dynamically.
Override feature flags Adjust feature flags for all event participants or define variants for different audiences.
Set event values Assign game‑specific data for your event—like assets, content sets, or themes—to help your client display the correct experience.
Schedule the event
- Start time: When the event begins.
- End time: When it ends.
- Repeat event: Automatically repeat the event using a preset frequency or custom CRON expression.
Copying events #
Use the three‑dot menu in the event details page to duplicate an existing event. You can review and adjust all fields before creating the new copy.
Updating events #
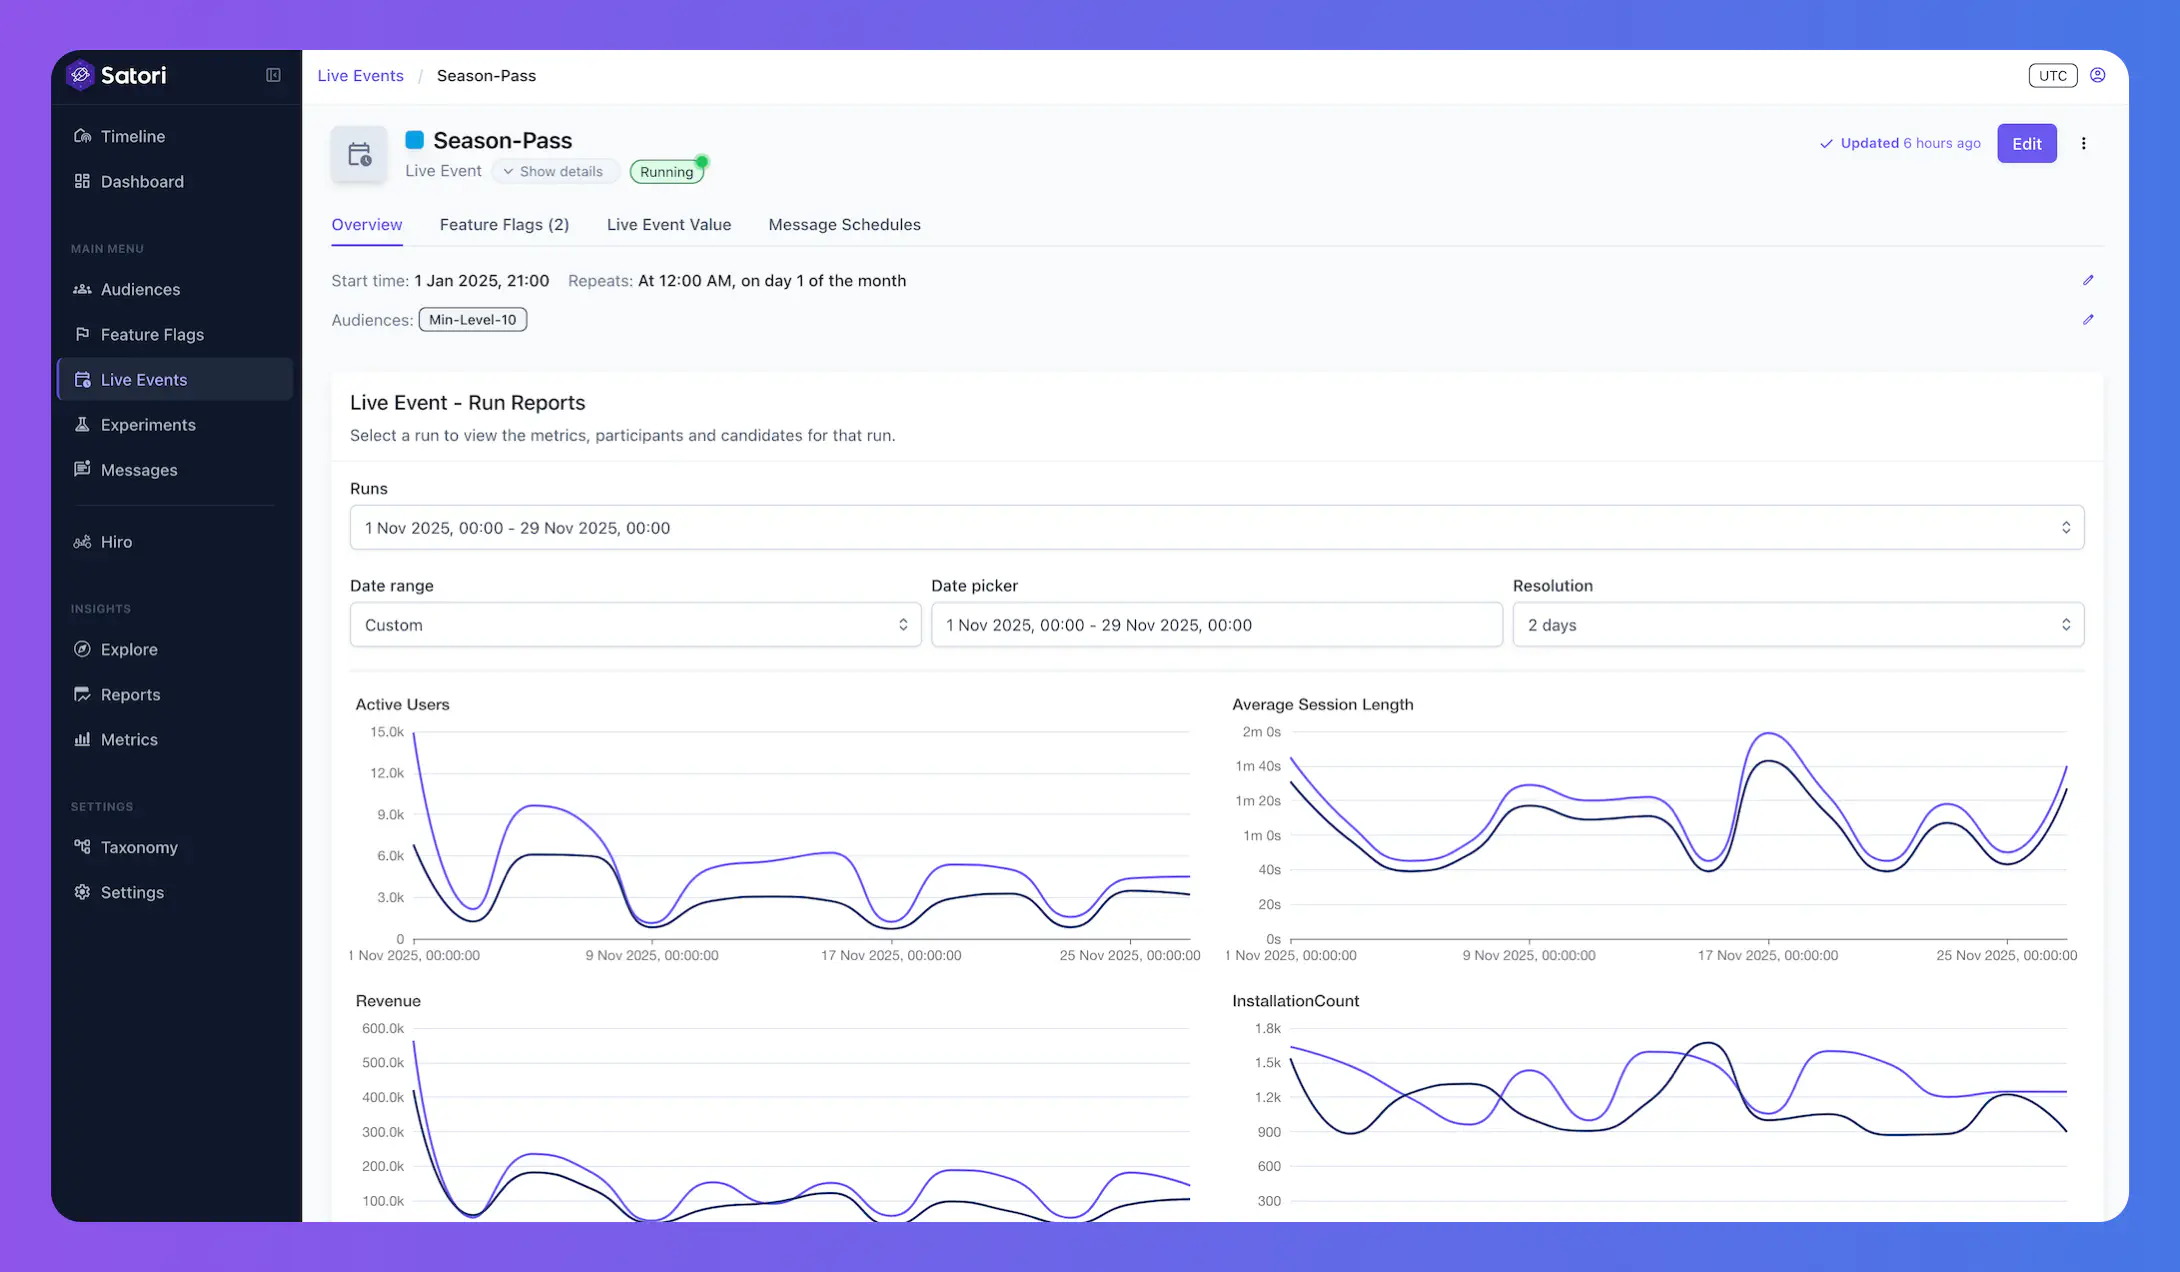
From the Calendar or List view, select an event to open its details. Here you can review its type, description, targeting, metrics, configuration, and scheduling. Select Edit to make changes.

Message schedules #
The Message Schedules tab lists all message schedules linked to the event. You can add, update, or delete schedules.
To create a message schedule:
- Name: Give the schedule a unique name.
- Template: Pick a message template.
- Reference point: Trigger messages
On startorOn end. - Offset: Set when the message should send relative to the reference point (for example, 30 minutes after start).
Select Create to save it.
Webhooks #
Use webhooks to receive real‑time notifications when a live event starts or ends, allowing your backend or tools to react immediately.
Past and future events #
Satori shows completed, active, and upcoming events in both the Timeline and Calendar views. You can also switch between previous Runs of an event to compare their performance.
You can also fetch past or upcoming events, along with your active runs, to display in your game using the Satori client SDK or Nakama Runtime. Use the Get Live Events API to request a set number of completed (pastRunCount) or upcoming (futureRunCount) events. You can filter results by name, label, start time, or end time.

