Storage
For most games, it is necessary to keep track of important player data (e.g. inventory or game stats). In a single-player game this can be done by storing information locally on the client, but for multiplayer games data often needs to be sent to multiple clients at the same time, or protected against tampering.
The Nakama Storage Engine makes it easy to securely store and access per-user information on the server
In this section, we’ll explore how to:
- Read and write from the server database
- Create a wallet for holding virtual currencies
- Manage transactions with a wallet ledger
- Include custom metadata in wallets
Collections #
In Nakama, custom user data is organized into collections which contain groups of objects that hold some data for a particular user. This structure allows us to store similar information together for easy access.
In Pirate Panic, each player holds a deck of cards to bring into battle:
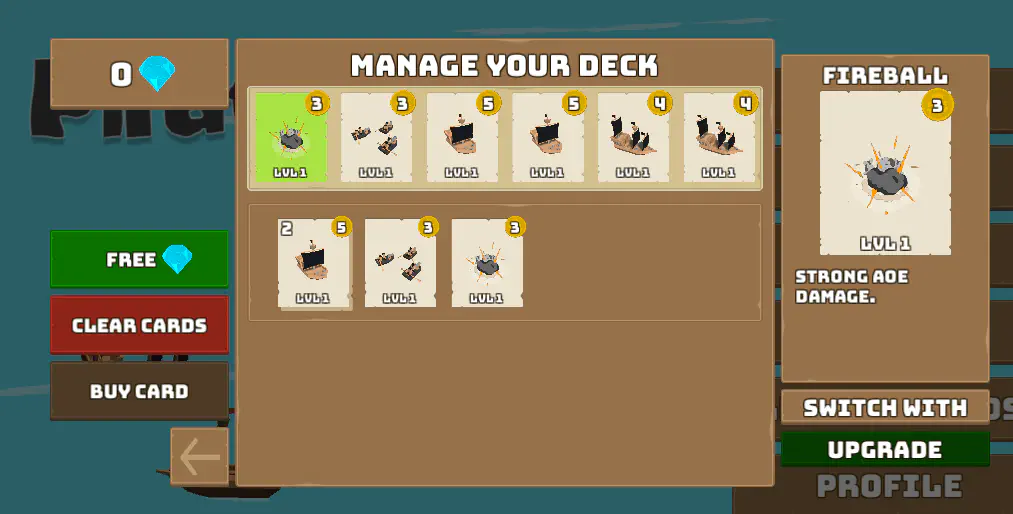
We want to store the state of this deck on the server so that each user has their own deck that gets saved even if they close the game and re-join later.
Read and write from server #
First, let’s set up a way to give each player some cards to start:
deck.ts
| |
Here, our original deck data was represented as an array of object literals. Each object contains two numeric properties: what type of card it is and the level it has been upgraded to.
The details of what type and level represent are specific to Pirate Panic, so your game will likely have its own custom information to store. For example, each object could also include the date obtained, special variants, or anything else players might want to know.
We then need to convert the data into storage objects by assigning each one a unique ID using the uuidv4() function. This is necessary to keep track of cards that might be otherwise identical.
Once we have this deck, we can store it using the storageWrite function:
deck.ts
| |
This will create a collection that has the following structure:
| |
Now, if we want to access these cards in the future, we can call storageRead using a request object:
deck.ts
| |
Multiple requests can be made at the same time using a single storageRead call by appending multiple StorageReadRequests to the array in storageRead.
Read and write from client #
For interfacing with collections from the Unity client we use RPCs like we did with finding friends. This helps us control the types of requests users can make, and keeps all sensitive operations strictly on the server.
It is also possible for the local player to read their data using the function ReadStorageObjectsAsync directly:
ProfilePanel.cs
| |
Here we pass in a Collection, UserId, and Key property into a StorageObjectId struct which is used to identify the object we’re looking for.
Adding permissions #
Nakama supports handling of read and write permissions from the database to prevent unauthorized access of sensitive data.
Objects can be protected for reads with three different permissionRead levels:
0: Nobody can read the object (except for the server)1: Only the user that owns this object (theuserIdmatches) can read it2: Anybody can read this object
Writes have two levels, 0 for no writes allowed or 1 for owner writes allowed. As with the reads, the server bypasses these permissions and can write to any object. Level 0 is often used so that write requests can be checked on the server rather than letting users edit their data themselves.
For example, we want user stats to be able to be seen by everyone but they can’t be changed except by the server:
| |
Conditional reads and writes #
Multiple users may need to access (and possibly write to) the same object.
In order to make sure that modifications don’t conflict, you can pass in a version property into any write request. For this use either writeStorageObjects on the server or WriteStorageObjectsAsync on the client and the write will only be accepted if the version inputted matches the version stored in the database.
This feature is not showcased in Pirate Panic, but you can learn more about the conditional storage and implement it in your own games.
Wallet #
On top of normal collections, Nakama also has a wallet feature that specifically supports storing and making transactions with a currency in-game.
In Pirate Panic, this currency comes in the form of Gems that can be used to purchase new cards.

Updating wallet amounts #
Unlike collections, wallets can only be directly updated from the server to make it more difficult for unintended or exploitative transactions to occur.
Changing the value in the wallet server-side can be done using walletUpdate, which takes four parameters:
- The user ID of the wallet to change
- An object containing key-value pairs matching every currency name with an amount to update by
- A metadata object
- Boolean that tells the server whether it should update the ledger
Since we only have one currency in Pirate Panic it is convenient to write a helper function so that we can just pass in a number rather than reconstructing changeset every time we want to add some gems:
economy.ts
| |
Note is that amount is how much we want to change the current wallet balance by and does not completely replace the current balance. For example, if our wallet had 900 gems and updateWallet is called with amount 100, then we can expect the new balance to be 1000 (not 100).
We can then wrap this in an RPC to let the Unity client add gems in certain situations. For example, let’s say we’re feeling generous and want to make a button that gives free gems:

The RPC would look like:
| |
And to call it from Unity:
| |
We can also subtract gems from a player’s wallet by simply passing in a negative amount. For example, if we want to buy a card using 100 gems we could call updateWallet(nk, ctx.userId, -100, {});.
Custom metadata #
The metadata object enables you to put in any custom information into each wallet transaction. Every item in walletLedgerList will then have this information carried with it so it can be referenced in the future.
For example, we might want to tag each reward with its match ID so we can make sure they are all coming from the same place and print out the total reward for players to see:
| |
Fetching wallet amounts #
On the client side wallet information is stored in connection.Account.Wallet, where connection.Account is an IApiAccount instance of the GameConnection class that holds the connection information we established while setting up authentication.
Once we get this Wallet variable, which comes in the form of a stringified JSON object, we can extract the number of gems in the wallet using the following code:
| |
In Pirate Panic, since we created GameConnection, we can call GetGems using:
| |
Transaction ledgers #
There is one final parameter, updateLedger, that we set to true above.
Every time walletUpdate is called with updateLedger set to true, a new ledger entry is created. This allows us to go through all previous transactions and see their details.
To do so call walletLedgerList which by default will grab a list of all of the transactions sorted from least to most recent.
We can then use the cursor to skip to any entry desired. For example, if we want to get the latest cursor update:
match.ts
| |
This is useful, for example, to skip to the current match rewards. If we set the initial reward to have a cursor update, and continue listing incremental updates (like tower capture) with no cursor update, we can then get a list of all transactions in the latest match using this strategy.
