Clans
Nakama enables the ability to create groups, also known as clans, which are small communities for players to team up or hang out together.
With Pirate Panic, we’ll learn how to enable players to:
- Create new clans
- Join or disband existing clans
- Search public clans
- Customize shared clan information, such as the name and emblem
- Chat with other members in the clan
This tutorial does not cover private groups, which require new players to submit join requests before being allowed to join. You can learn more about this at the official Nakama documentation .
Clans server module #
Before jumping into the Unity client implementation, let’s take a look at the server side.
Like other modules, we can register custom server behaviors for particular events, such as when someone creates a new clan. For groups, we’re focusing on the following:
registerAfterJoinGroupregisterAfterKickGroupUsersregisterAfterLeaveGroupregisterAfterPromoteGroupUsersregisterAfterAddFriendsregisterBeforeDeleteGroup
See the full list of these events .
Sending notifications #
As an example, a function to send a notification to everyone in the clan when a new player joins would look as follows:
clans.ts
| |
Here we create custom notification codes to differentiate different types of notifications. These can be any positive numbers. We then obtain a list of all of the members using groupUsersList, and for each user in the list, we’ll fetch their ID using user.user.id and send a NotificationRequest to them.
Setting up runtime hooks #
Now, we need to call the function we just created in a way that Nakama will automatically call it every time someone joins a group:
clans.ts
| |
Here we are handling a JoinGroupRequest, which contains a groupId that we can use to figure out where this notification should be sent.
We can use similar code to extend the notification functionality to other events, for example, notifying everyone in the group if someone was kicked:
clans.ts
| |
Registering the hooks #
The final step in getting our functions to work as intended is to register them in our main module. For each of the functions we just created, we can add them as follows:
main.ts
| |
Here each register function is from the list of runtime events
and the parameter we pass in is one of the functions we just created in clans.ts.
Creating the client #
Next we’ll create an interface in Unity for players to interact with the server. In Pirate Panic it will look like this:
This tutorial does not cover the creation of Unity UI components in detail. See the official Unity UI tutorial to learn more about this.
Full code examples for clans can be found in the Pirate Panic project .
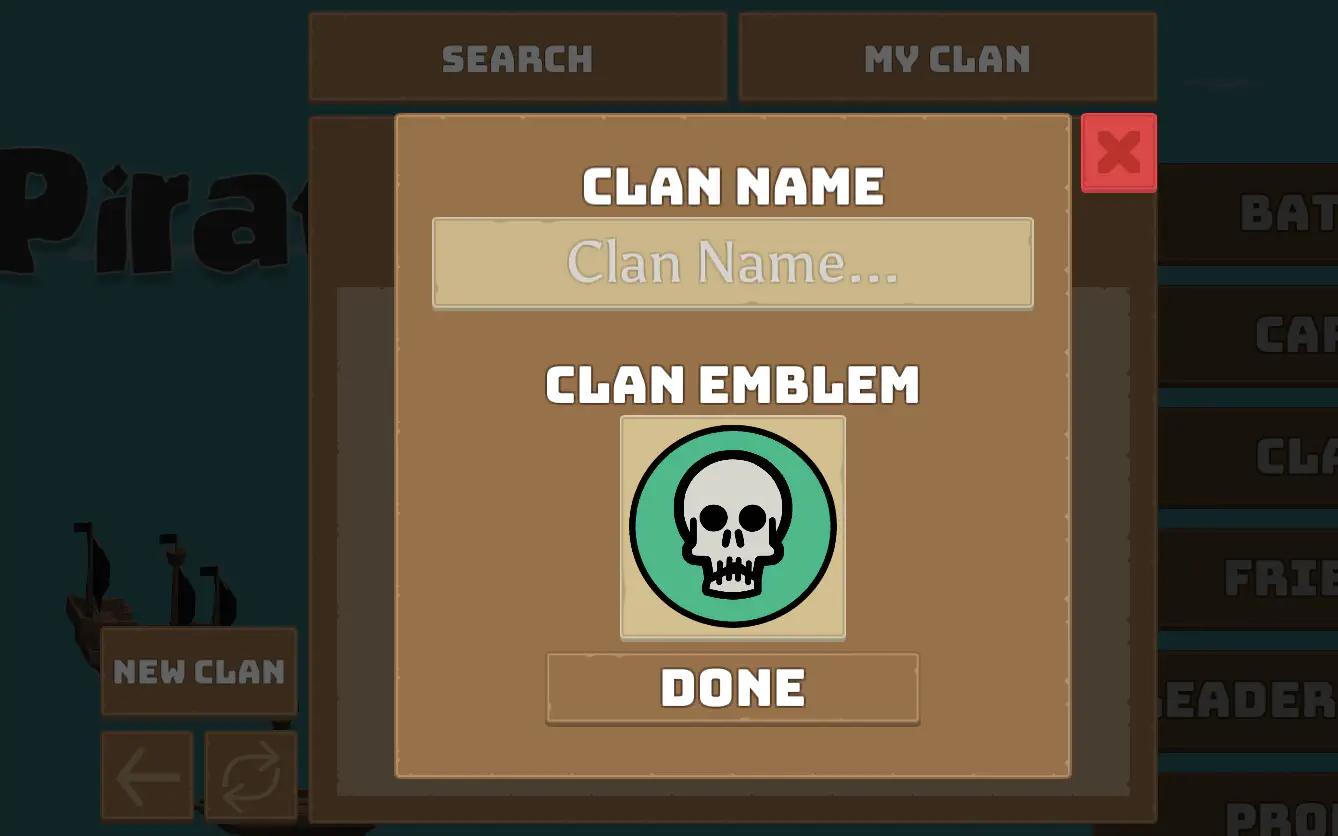
Creating a clan #
To create a new clan we use the CreateGroupAsync(session, name, ...) function, where session is a server connection and name is the new clan. This function also takes in additional optional parameters which we can use to store information, such as a description or avatar image.
For the Pirate Panic clan creation panel, this looks like:
ClanCreationPanel.cs
| |
In the snippet above:
_clanName: A Unity textbox where players can enter the new clan’s name. We are fetching its text here._connection: TheGameConnectionobject initialized earlier in the code.- Two optional parameters provided are a description and avatar name.
- Once the clan is created the
OnClanCreatedfunction is called. This property was assigned onAwakein [ClansMenuUI.cs].
Finally, we wrap this async function around a function and bind that to a button action:
ClanCreationPanel.cs
| |
Clan chat #
We can create a channel for an entire group to chat with one another. In Pirate Panic it looks like:
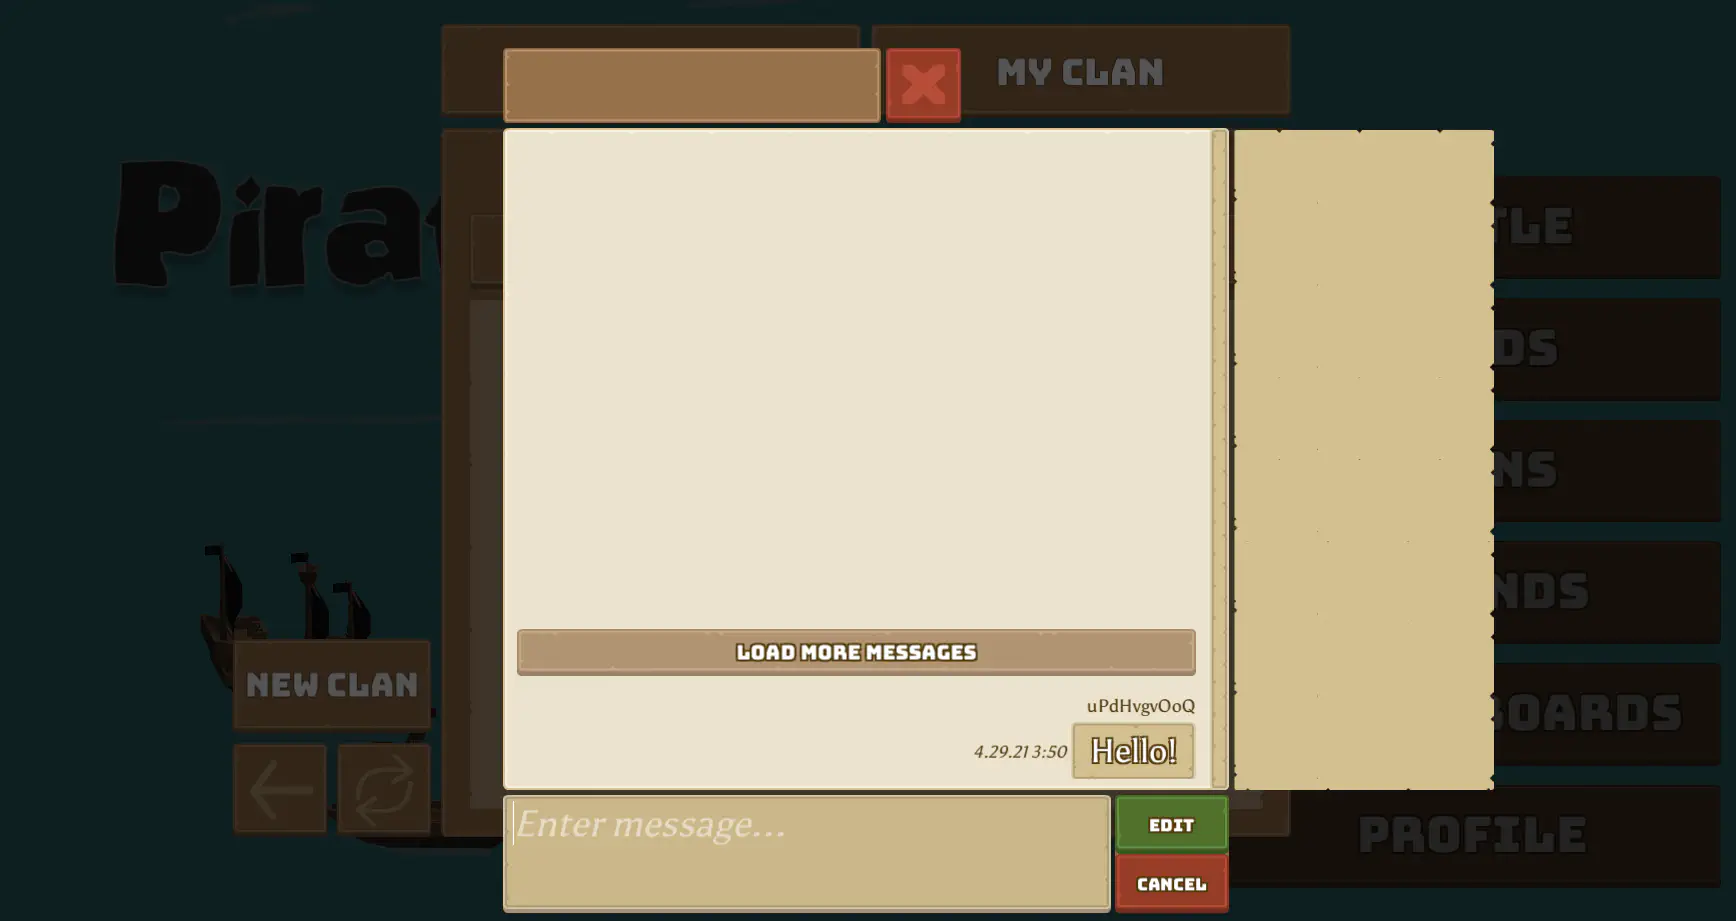
For clan chat we pass in the clan’s group ID from above when joining a chat channel, so that everyone in the clan will end up in the same channel.
To join a chat channel, we use JoinChatAsync:
ClansMenuUI.cs
| |
Here we join a group channel of ID state.UserClan.Id.
This channel is persistent, meaning messages get saved to the database and will show up even if you disconnect and reconnect. And the player joins as a hidden member, meaning they won’t show up in the member listing.
These settings can be configured for different types of rooms. Learn more about different settings in the Real-time Chat documentation .
Once a player has joined a chat channel, sending and receiving messages is done in the same manner as with direct messages .
Leaving or disbanding a clan #
When a player no longer wants to be part of their clan, there are two possible actions: leave or disband.
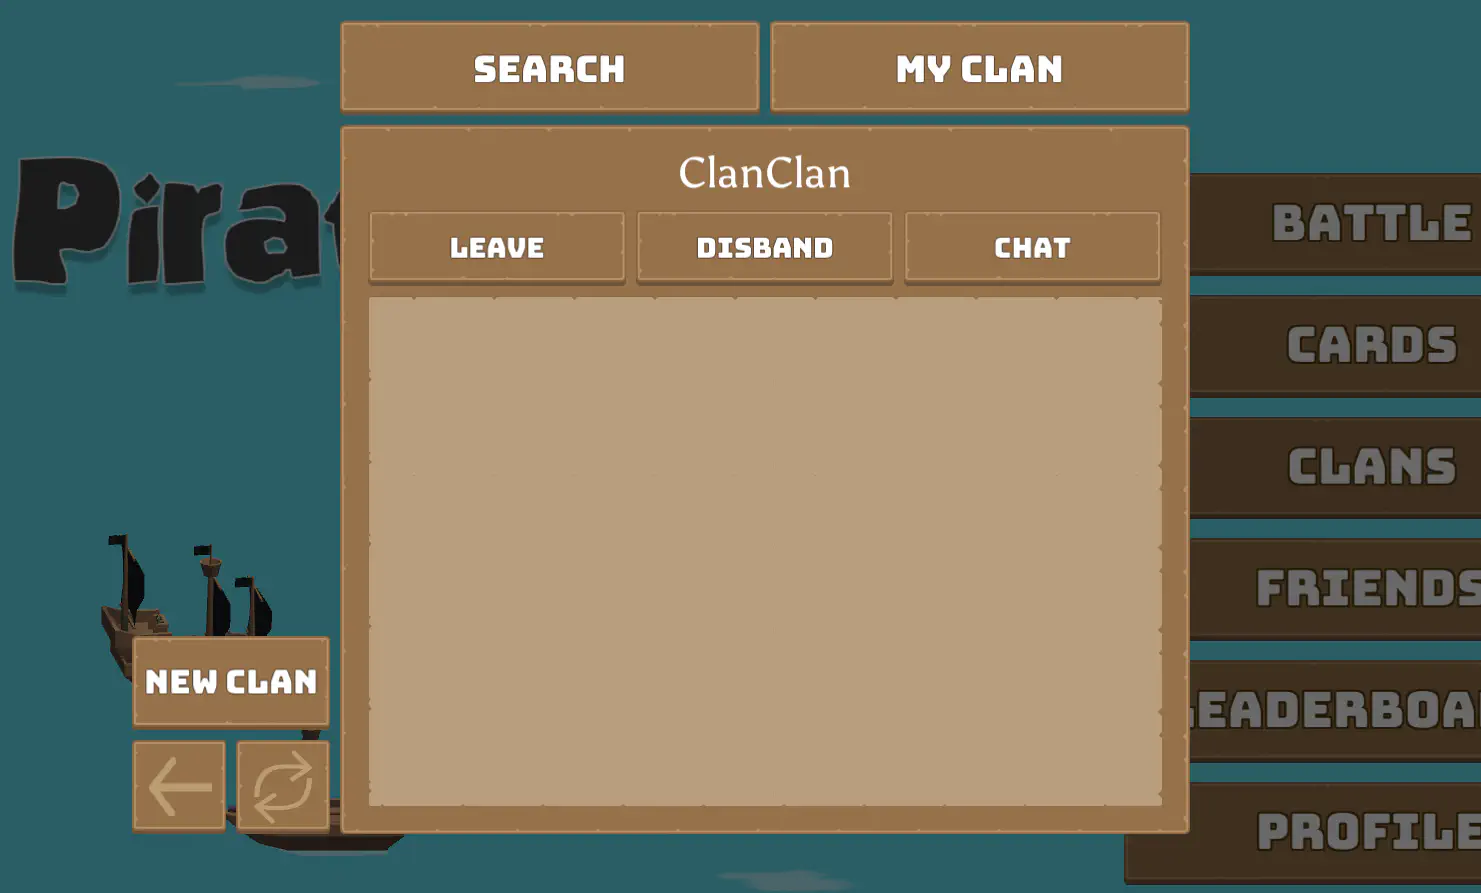
Leaving a clan keeps it active, and can only be done if there is another superadmin (owner) still in the clan. Disbanding a clan will delete it from the server and remove all members.
For example, to leave a clan:
ClansMenuUI.cs
| |
Here, _state_ is a ClansMenuUIState, a custom class (defined in ClansMenuUIState.cs) that contains information about what is currently on the player’s screen. And DisplayedClan.Id is the ID of the clan the player wants to leave.
To disband a clan:
ClansMenuUI.cs
| |
