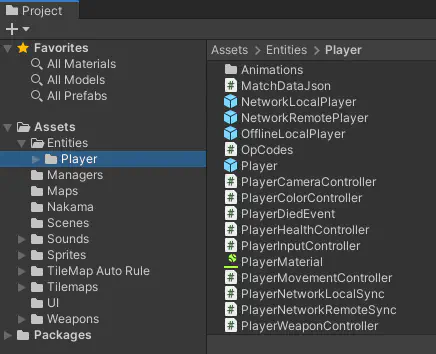
위의 자산 계층에서 보다시피, Fish Game 프로젝트에는 이미 NakamaConnection 클래스와 LocalNakamaConnection 자산이 포함되어 있습니다.
NakamaConnection은(는) Unity의 ScriptableObject 클래스에서 승계하여 프로젝트에서 NakamaConnection 클래스 인스턴스를 생성할 수 있고, 게임에서 다른 스크립트의 종속성으로 전달되는 자산으로 저장할 수 있습니다.
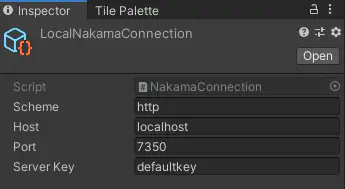
Nakama 서버로 연결하는 방법을 알아보려면 NakamaConnection.cs 파일을 열어보십시오. NakamaConnection 클래스를 선언한 후, 해당 연결 개체를 연결해야 하는 Nakama 서버를 지정할 수 있도록 일부 공용 변수를 정의하였습니다:
여기 에서 PlayerPrefs로부터 인증 토큰을 받기 위해서 시도합니다. 인증 토큰을 찾은 경우, Nakama.Session.Restore 함수를 호출하고 인증 토큰으로 전달하여 Session 개체를 검색합니다. 이미 세션이 만료되지 않았는지 확인 작업을 실시합니다. 세션이 만료되지 않은 경우, 이 세션 개체를 개인적인 Session 변수로 지정합니다. 그렇지 않은 경우, 새로운 세션을 생성하기 위해서 재인증해야 합니다.
이러한 작업은 Session 변수가 null인지 확인하는 if 구문에서 이루어집니다:
NakamaConnection.cs
1
2
3
4
5
6
// If we weren't able to restore an existing session, authenticate to create a new user session.if(Session==null){stringdeviceId;// ...
이것은 두 가지 잠재적인 경로를 표시합니다. 사용자가 이전에 게임을 플레이하여 장치의 고유 식별자를 저장하였거나 사용자가 이번에 처음으로 게임을 플레이하여 Nakama 서버에서 장치를 인증하기 위해서 고유한 식별자를 얻어야 한다는 의미입니다.
이전 플레이어의 경우, PlayerPrefs에서 DeviceIdentifierPrefName 키에 해당하는 값이 이미 존재하는지 확인합니다. 해당 값이 있는 경우, 나중에 함수에서 사용할 수 있도록 deviceId 변수에 저장합니다:
NakamaConnection.cs
1
2
3
4
5
// If we've already stored a device identifier in PlayerPrefs then use that.if(PlayerPrefs.HasKey(DeviceIdentifierPrefName)){deviceId=PlayerPrefs.GetString(DeviceIdentifierPrefName);}
새 플레이어의 경우, SystemInfo.deviceUniqueIdentifier에서 장치의 고유 식별자를 얻으려고 합니다. 적절한 식별자 값을 반환하지 않을 경우, SystemInfo.unsupportedIdentifier의 값을 반환합니다.
반환된 값을 확인하고, 해당 값이 반환된 경우 나중에 사용할 수 있게 PlayerPrefs에 저장하기 전에 가이드를 사용하여 고유한 식별자를 생성합니다:
NakamaConnection.cs
1
2
3
4
5
6
7
if(deviceId==SystemInfo.unsupportedIdentifier){deviceId=System.Guid.NewGuid().ToString();}// Store the device identifier to ensure we use the same one each time from now on.PlayerPrefs.SetString(DeviceIdentifierPrefName,deviceId);
이제 Nakama 서버로 인증을 진행하고 인증 토큰을 PlayerPrefs(으)로 저장할 수 있습니다:
NakamaConnection.cs
1
2
3
4
5
// Use Nakama Device authentication to create a new session using the device identifier.Session=awaitClient.AuthenticateDeviceAsync(deviceId);// Store the auth token that comes back so that we can restore the session later if necessary.PlayerPrefs.SetString(SessionPrefName,Session.AuthToken);
Nakama 세션이 유효한 상태이기 때문에 Socket을(를) 엽니다:
NakamaConnection.cs
1
2
3
// Open a new Socket for real-time communication.Socket=Client.NewSocket(true);awaitSocket.ConnectAsync(Session,true);
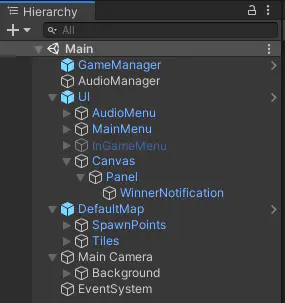
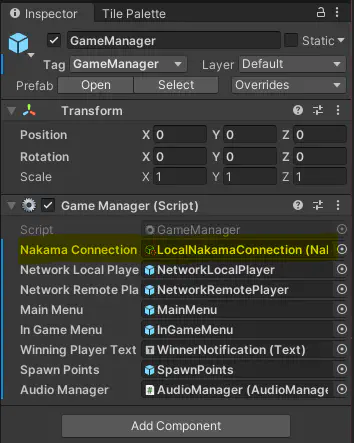
이로써 Nakama 서버와 게임에 연결된 다른 플레이어와 의사소통을 시작할 수 있습니다. Fish Game에서 이 연결에 대한 호출은 GameManager 개체를 통해 실행됩니다:
Fish Game에서 매치메이킹이 어떻게 이루어지는지 검토하기 위해서 GameManager, NakamaConnection, MainMenu 클래스와 관련되는 함수를 살펴보겠습니다. Nakama에서 매치메이킹에 대한 세부적인 내용은 매치메이커 문서를 참조하십시오.
여기서는 새로운 Dictionary을(를) 생성하여 연결된 플레이어를 저장하고 다음의 이벤트를 구독합니다:
ReceivedMatchmakerMatched: Nakama가 대결을 찾은 경우 반응할 수 있음.
ReceivedMatchPresence: 플레이어가 대결에 참여하거나 떠난 경우 반응할 수 있음.
ReceivedMatchState: Nakama 서버에서 메시지를 수신할 경우 반응할 수 있음.
GameManager.cs
1
2
3
4
5
6
7
8
9
10
11
12
13
14
15
16
17
/// <summary>/// Called by Unity when the GameObject starts./// </summary>privateasyncvoidStart(){// Create an empty dictionary to hold references to the currently connected players.players=newDictionary<string,GameObject>();// ...// Setup network event handlers.NakamaConnection.Socket.ReceivedMatchmakerMatched+=OnReceivedMatchmakerMatched;NakamaConnection.Socket.ReceivedMatchPresence+=OnReceivedMatchPresence;NakamaConnection.Socket.ReceivedMatchState+=asyncm=>awaitOnReceivedMatchState(m);// ...}
MainMenu 클래스에서 FindMatch 함수를 통해 매치메이킹 요청 사항이 어떻게 트리거되는지 살펴볼 수 있습니다.
여기서는 NakamaConnection 클래스에서 GameManager의 참조를 통해 FindMatch 함수를 호출하고 대결을 성사시킬 플레이어 숫자(드롭다운으로 선택)를 전달합니다.
MainMenu.cs
1
2
3
4
5
6
7
8
9
/// <summary>/// Begins the matchmaking process./// </summary>publicasyncvoidFindMatch(){// ...awaitgameManager.NakamaConnection.FindMatch(int.Parse(PlayersDropdown.options[PlayersDropdown.value].text));}
NakamaConnection 클래스의 FindMatch 함수에서 Dictionary은(는) Unity 엔진을 사용하고 있음을 명시하는 한 개의 key,value 쌍과 이 필터와 다른 지정된 매개 변수를 통해 해당 요청 사항을 매치메이킹 풀에 추가할 수 있는 함수로 선언됩니다:
NakamaConnection.cs
1
2
3
4
5
6
7
8
9
10
11
12
13
14
15
16
17
/// <summary>/// Starts looking for a match with a given number of minimum players./// </summary>publicasyncTaskFindMatch(intminPlayers=2){// Set some matchmaking properties to ensure we only look for games that are using the Unity client.// This is not a required when using the Unity Nakama SDK,// however in this instance we are using it to differentiate different matchmaking requests across multiple platforms using the same Nakama server.varmatchmakingProperties=newDictionary<string,string>{{"engine","unity"}};// Add this client to the matchmaking pool and get a ticket.varmatchmakerTicket=awaitSocket.AddMatchmakerAsync("+properties.engine:unity",minPlayers,minPlayers,matchmakingProperties);currentMatchmakingTicket=matchmakerTicket.Ticket;}
Nakama는 MatchmakingTicket을(를) 제공하여 반응합니다. 이 티켓으로 Nakama가 발견한 대결에 참여하거나 기존의 매치메이킹 요청을 취소할 수 있습니다:
NakamaConnection.cs
1
2
3
4
5
6
7
/// <summary>/// Cancels the current matchmaking request./// </summary>publicasyncTaskCancelMatchmaking(){awaitSocket.RemoveMatchmakerAsync(currentMatchmakingTicket);}
매치메이킹 풀에 추가되면 Nakama가 대결을 검색하고, 대결이 검색된 경우 ReceivedMatchmakerMatched 이벤트 리스너를 통해 알림이 제공됩니다:
/// <summary>/// Called when a MatchmakerMatched event is received from the Nakama server./// </summary>/// <param name="matched">The MatchmakerMatched data.</param>privateasyncvoidOnReceivedMatchmakerMatched(IMatchmakerMatchedmatched){// Cache a reference to the local user.localUser=matched.Self.Presence;// Join the match.varmatch=awaitNakamaConnection.Socket.JoinMatchAsync(matched);// ...// Spawn a player instance for each connected user.foreach(varuserinmatch.Presences){SpawnPlayer(match.Id,user);}// Cache a reference to the current match.currentMatch=match;}
Self.Presence 값에 대해서 저장된 참조를 통해 로컬 플레이어의 Nakama 현재 상태에 빠르고 쉽게 액세스하여 세션 ID, 사용자 ID, 사용자 이름 등을 검색하는 데 유용합니다.
JoinMatchAsync() 반환 값에 대해서 저장된 참조를 통해 현재 대결 ID와 연결된 사용자에 액세스할 수 있습니다.
다음으로, match.Presences 속성과 플레이어 생성을 통해 모든 연결된 사용자를 반복합니다.
마지막으로, 매치메이킹 시 사용자가 연결되고 해제될 때 어떤 작업을 수행할지 고려해야 합니다. 이 작업은 OnReceivedMatchPresence 이벤트 핸들러를 통해 처리됩니다:
/// <summary>/// Called when a player/s joins or leaves the match./// </summary>/// <param name="matchPresenceEvent">The MatchPresenceEvent data.</param>privatevoidOnReceivedMatchPresence(IMatchPresenceEventmatchPresenceEvent){// For each new user that joins, spawn a player for them.foreach(varuserinmatchPresenceEvent.Joins){SpawnPlayer(matchPresenceEvent.MatchId,user);}// For each player that leaves, despawn their player.foreach(varuserinmatchPresenceEvent.Leaves){if(players.ContainsKey(user.SessionId)){Destroy(players[user.SessionId]);players.Remove(user.SessionId);}}}
여기서, IMatchPresenceEvent은(는) 대결에 참여한 사용자의 목록과 대결에서 떠난 사용자의 목록을 제공합니다.
대결에 참여한 사용자의 경우, OnReceivedMatchmakerMatched 이벤트 핸들러와 마찬가지로 해당 사용자에 대한 플레이어 개체를 생성합니다.
대결을 떠난 사용자의 경우, 사용자의 세션 ID를 기반으로 players 사전에서 해당 사용자에 대한 참조가 있는지 확인합니다. 해당 사용자에 대한 참조가 있는 경우, 해당 플레이어의 GameObject을(를) 파괴하고 플레이어의 Dictionary에서 삭제합니다.
여기서는, 매치메이킹 또는 사용자의 현재 상태 이벤트에 대응하여 GameManager에 의해 호출된 SpawnPlayer 함수를 검토합니다.
먼저, 사용자의 세션 ID를 기반으로 플레이어 사전에 해당 사용자에 대한 참조가 있는지 확인합니다. 사용자에 대한 참조가 있는 경우, 해당 플레이어를 이미 생성했기 때문에 결과를 일찍 반환합니다:
GameManager.cs
1
2
3
4
5
// If the player has already been spawned, return early.if(players.ContainsKey(user.SessionId)){return;}
다음으로, 해당 플레이어를 생성할 장소를 결정합니다. spawnIndex이(가) 전달되지 않은 경우(spawnIndex == -1), 해당 플레이어에 대한 생성 포인트를 임의로 선택합니다. 생성 인덱스가 전달된 경우, 이를 대신 사용합니다:
GameManager.cs
1
2
3
4
// If the spawnIndex is -1 then pick a spawn point at random, otherwise spawn the player at the specified spawn point.varspawnPoint=spawnIndex==-1?SpawnPoints.transform.GetChild(Random.Range(0,SpawnPoints.transform.childCount-1)):SpawnPoints.transform.GetChild(spawnIndex);
다음으로, 해당 플레이어가 로컬 플레이어 또는 원격 플레이어인지 확인합니다. 이것을 기반으로 어떤 플레이어 프리팹을 생성할지 결정하고, 관련되는 생성 포인트에서 게임 내의 프리팹 인스턴스를 인스턴스화합니다:
GameManager.cs
1
2
3
4
5
6
7
8
// Set a variable to check if the player is the local player or not based on session ID.varisLocal=user.SessionId==localUser.SessionId;// Choose the appropriate player prefab based on if it's the local player or not.varplayerPrefab=isLocal?NetworkLocalPlayerPrefab:NetworkRemotePlayerPrefab;// Spawn the new player.varplayer=Instantiate(playerPrefab,spawnPoint.transform.position,Quaternion.identity);
다음으로, 해당 플레이어가 원격으로 연결된 플레이어인지 확인합니다. 원격 플레이어에 해당하는 경우, PlayerNetworkRemoteSync 구성 요소에 대한 참조를 찾고 적절한 네트워크 데이터를 설정합니다. 현재 대결 ID와 참조를 해당 사용자의 IUserPresence 개체로 전달합니다:
GameManager.cs
1
2
3
4
5
6
7
8
9
// Setup the appropriate network data values if this is a remote player.if(!isLocal){player.GetComponent<PlayerNetworkRemoteSync>().NetworkData=newRemotePlayerNetworkData{MatchId=matchId,User=user};}
해당 데이터가 특정 플레이어를 위해서 사용된 것인지 확인하기 위해서 데이터를 수신할 때 사용됩니다.
플레이어의 세션 ID를 사용하여 플레이어를 players 사전에 키로 추가하고 플레이어 GameObject을(를) 값으로 전달합니다.
GameManager.cs
1
2
// Add the player to the players array.players.Add(user.SessionId,player);
다음으로, 해당 플레이어가 로컬 플레이어인지 확인합니다. 로컬 플레이어에 해당하는 경우, PlayerDied 이벤트에서 이벤트 리스너를 설정합니다:
GameManager.cs
1
2
3
4
5
6
// If this is our local player, add a listener for the PlayerDied event.if(isLocal){localPlayer=player;player.GetComponent<PlayerHealthController>().PlayerDied.AddListener(OnLocalPlayerDied);}
플레이어 프리팹에 대한 래퍼로, 루트에 한 개의 구성 요소만 포함됨: PlayerNetworkRemoteSync.
해당 구성 요소는 네트워크로부터 상태 업데이트를 수신하고, 현재 상태가 새롭게 수신된 정확한 상태로 원활하게 삽입되도록 처리합니다. 예를 들어, 해당 개체가 { 100, 100 } 위치에 있는 상태에서 네트워크 메시지가 정확한 위치는 { 120, 100 }이어야 한다고 알려줄 경우, 해당 구성 요소는 LerpTime 초의 시간 내에 이 개체의 위치가 원활하게 수정될 수 있도록 처리합니다.
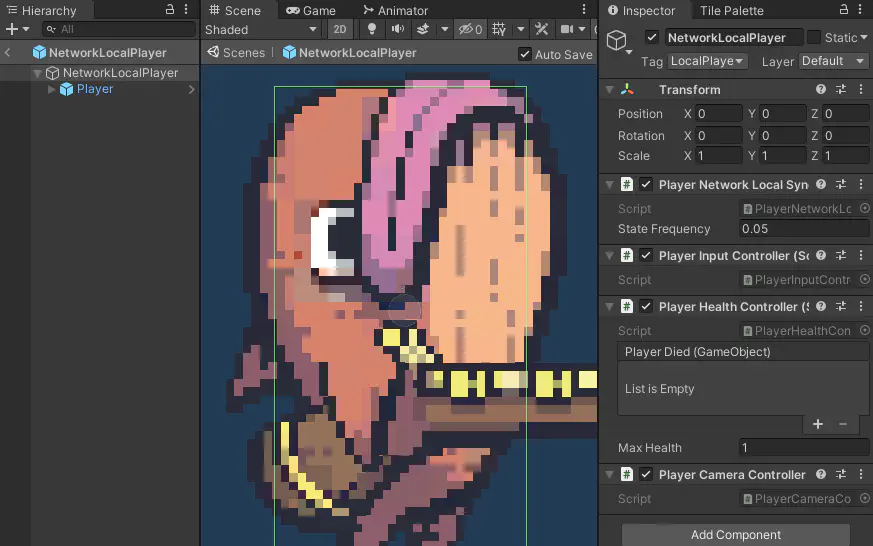
NetworkLocalPlayer에서 네트워크를 통해 위치 및 입력 업데이트를 보내는 방법을 검토하기 위해서 Entities > Player > PlayerNetworkLocalSync.cs을(를) 살펴봅니다.
먼저, 공용 변수를 통해 네트워크 상태 동기화 업데이트가 전송되는 주기를 결정합니다:
PlayerNetworkLocalSync.cs
1
2
3
4
/// <summary>/// How often to send the player's velocity and position across the network, in seconds./// </summary>publicfloatStateFrequency=0.1f;
해당 값을 변경하면 네트워크에서 상태 업데이트가 전송되는 주기가 증가하거나 감소합니다. 원활한 느낌의 멀티플레이어 게임을 생성하기 위해서는 균형점을 찾는 것이 중요합니다.
여기서 기본값은 0.1f이거나 1초당 10회의 틱이 발생합니다. Fish Game 예시의 경우, 이것을 0.05f(으)로 설정하면 1초당 20회의 틱이 발생합니다:
1
publicfloatStateFrequency=0.1f;
속도가 더 빨라지면 업데이트 전송 주기가 늘어나서 다른 플레이어가 원활한 느낌을 받게 됩니다. 업데이트 전송 주기가 줄어들면 플레이어의 위치가 다른 연결된 클라이언트와 동기화되지 않으며, 보간 및 수정 과정에서 지연이 발생합니다.
다음으로, 플레이어의 위치가 업데이트된 후에 업데이트를 전송하기 위해서 사용하는 LateUpdate 함수를 살펴보겠습니다. 먼저, 상태 동기화 타이머가 경과되었는지 확인합니다. 시간이 경과된 경우, 새로운 업데이트를 전송해야 합니다:
PlayerNetworkLocalSync.cs
1
2
3
4
// Send a network packet containing the player's velocity and position.gameManager.SendMatchState(OpCodes.VelocityAndPosition,MatchDataJson.VelocityAndPosition(playerRigidbody.velocity,playerTransform.position));
다음으로, 마지막에 함수를 실행한 후에 로컬 플레이어의 입력이 변경되었는지 확인합니다. 변경되지 않은 경우, 결과를 일찍 반환합니다:
PlayerNetworkLocalSync.cs
1
2
3
4
5
// If the players input hasn't changed, return early.if(!playerInputController.InputChanged){return;}
마지막으로, 플레이어의 현재 입력을 네트워크로 전송합니다:
PlayerNetworkLocalSync.cs
1
2
3
4
5
// Send network packet with the player's current input.gameManager.SendMatchState(OpCodes.Input,MatchDataJson.Input(playerInputController.HorizontalInput,playerInputController.Jump,playerInputController.JumpHeld,playerInputController.Attack));
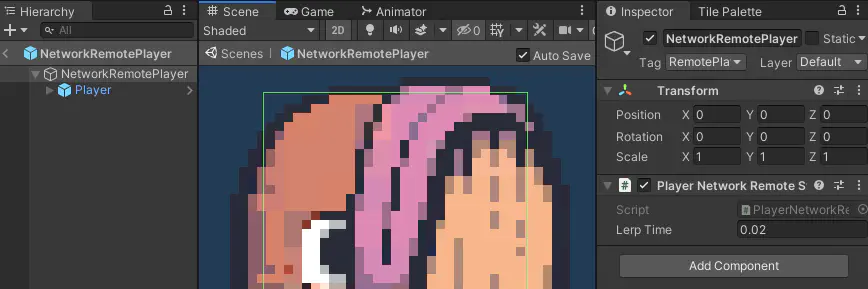
NetworkRemotePlayer에서 네트워크를 통해 위치와 입력 업데이트를 수신하는 방법을 검토하기 위해서 Entities > Player > PlayerNetworkRemoteSync.cs을(를) 살펴봅니다.
먼저, 두 개의 공용 변수가 있습니다. 한 개의 변수는 현재 대결 ID와 플레이어의 IUserPresence 개체에 참조를 저장하며, 다른 변수는 플레이어의 위치에서 보간 속도를 결정합니다.
PlayerNetworkRemoteSync.cs
1
2
3
4
5
6
publicRemotePlayerNetworkDataNetworkData;/// <summary>/// The speed (in seconds) in which to smoothly interpolate to the player's actual position when receiving corrected data./// </summary>publicfloatLerpTime=0.05f;
// Add an event listener to handle incoming match state data.gameManager.NakamaConnection.Socket.ReceivedMatchState+=OnReceivedMatchState;// .../// <summary>/// Called when receiving match data from the Nakama server./// </summary>/// <param name="matchState">The incoming match state data.</param>privatevoidOnReceivedMatchState(IMatchStatematchState){// If the incoming data is not related to this remote player, ignore it and return early.if(matchState.UserPresence.SessionId!=NetworkData.User.SessionId){return;}// Decide what to do based on the Operation Code of the incoming state data as defined in OpCodes.switch(matchState.OpCode){caseOpCodes.VelocityAndPosition:UpdateVelocityAndPositionFromState(matchState.State);break;caseOpCodes.Input:SetInputFromState(matchState.State);break;caseOpCodes.Died:playerMovementController.PlayDeathAnimation();break;default:break;}}
먼저, 해당 개체의 NetworkData.User.SessionId을(를) matchState.UserPresence.SessionId 값과 비교하여 메시지가 해당 개체에 대해서 수신된 것인지 여부를 확인합니다:
일치하지 않을 경우, 이 메시지를 처리하지 않아도 되고 해당 함수에서 결과가 일찍 반환됩니다.
일치할 경우, matchState.OpCode에서 전환을 실시합니다. OpCode에 따라 상태를 처리해야 하는 세 개의 함수 중 한 개의 함수로 전달합니다:
/// <summary>/// Updates the player's velocity and position based on incoming state data./// </summary>/// <param name="state">The incoming state byte array.</param>privatevoidUpdateVelocityAndPositionFromState(byte[]state){varstateDictionary=GetStateAsDictionary(state);playerRigidbody.velocity=newVector2(float.Parse(stateDictionary["velocity.x"]),float.Parse(stateDictionary["velocity.y"]));varposition=newVector3(float.Parse(stateDictionary["position.x"]),float.Parse(stateDictionary["position.y"]),0);// Begin lerping to the corrected position.lerpFromPosition=playerTransform.position;lerpToPosition=position;lerpTimer=0;lerpPosition=true;}
여기서, 도움말 함수 GetStateAsDictionary을(를) 사용하여 상태를 Dictionary<string, string>(으)로 수신하고, 입력되는 velocity.x와(과) velocity.y의 값을 통해 플레이어의 속도 속성을 업데이트합니다.
다음으로, 수신되는 position.x 및 position.y 값을 사용하여 새로운 Vector3을(를) 생성합니다. 그런 다음, 플레이어의 현재 위치를 lerpFromPosition(으)로 설정하고 새로운 위치를 lerpToPosition(으)로 설정하여 보간 과정을 시작합니다. 보간 타이머를 재설정하여 lerpPosition 값을 true(으)로 설정해서 LateUpdate에서 발생하는 보간 코드가 실행될 수 있도록 합니다.
/// <summary>/// Sets the appropriate input values on the PlayerMovementController and PlayerWeaponController based on incoming state data./// </summary>/// <param name="state">The incoming state Dictionary.</param>privatevoidSetInputFromState(byte[]state){varstateDictionary=GetStateAsDictionary(state);playerMovementController.SetHorizontalMovement(float.Parse(stateDictionary["horizontalInput"]));playerMovementController.SetJump(bool.Parse(stateDictionary["jump"]));playerMovementController.SetJumpHeld(bool.Parse(stateDictionary["jumpHeld"]));if(bool.Parse(stateDictionary["attack"])){playerWeaponController.Attack();}}
다시 상태를 Dictionary<string, string>(으)로 수신하고, 입력되는 상태 데이터에서 PlayerMovementController에 적절한 값을 설정합니다. stateDictionary["attack"] 값이 true인 경우, Attack 함수를 호출하여 PlayerWeaponController을(를) 업데이트합니다.
마지막으로 OnDestroy 함수를 고려합니다. 해당 개체가 파괴된 경우 OnReceivedMatchState 핸들러와 같이 더 이상 필요하지 않은 이벤트 리스너를 제거하는 것이 좋습니다:
PlayerNetworkRemoteSync.cs
1
2
3
4
5
6
7
8
9
10
/// <summary>/// Called when this GameObject is being destroyed./// </summary>privatevoidOnDestroy(){if(gameManager!=null){gameManager.NakamaConnection.Socket.ReceivedMatchState-=OnReceivedMatchState;}}
플레이어의 사망을 처리하는 방법을 검토하기 위해서 Entities > Player > PlayerHealthController을(를) 살펴보겠습니다. 플레이어의 체력이 1 미만인 경우 PlayerDied 이벤트가 선언되고 TakeDamage 함수로 호출됩니다:
PlayerHealthController.cs
 1
 2
 3
 4
 5
 6
 7
 8
 9
10
11
12
13
14
15
16
17
18
19
publicPlayerDiedEventPlayerDied;// .../// <summary>/// Reduces the players health by damage, triggers the PlayerDied event if health is 0 or below./// </summary>/// <param name="damage">The amount of damage the player should receive.</param>publicvoidTakeDamage(intdamage=1){// ...// If health falls to 0 or below, disable player input controls, play the death animation and fire the PlayerDied event.if(health<=0){// ...PlayerDied.Invoke(gameObject);}}
로컬 플레이어의 사망은 GameManager 클래스에서 OnLocalPlayerDied 함수를 통해 처리됩니다:
GameManager.cs
1
2
3
4
5
6
7
8
9
10
11
12
13
/// <summary>/// Called when the local player dies./// </summary>/// <param name="player">The local player.</param>privateasyncvoidOnLocalPlayerDied(GameObjectplayer){// Send a network message telling everyone that we died.awaitSendMatchStateAsync(OpCodes.Died,MatchDataJson.Died(player.transform.position));// Remove ourself from the players array and destroy our GameObject after 0.5 seconds.players.Remove(localUser.SessionId);Destroy(player,0.5f);}
여기서, 네트워크를 통해 메시지를 전송하여 다른 플레이어에게 사망했다는 소식과 위치를 알려줍니다. 그런 다음, players 사전에서 제거되고 파괴됩니다.
남아 있는 모든 플레이어는 OpCodes.Died 네트워크 동작을 수신하고 응답은 OnReceivedMatchState 함수를 통해 처리됩니다:
/// <summary>/// Called when new match state is received./// </summary>/// <param name="matchState">The MatchState data.</param>privateasyncTaskOnReceivedMatchState(IMatchStatematchState){// Get the local user's session ID.varuserSessionId=matchState.UserPresence.SessionId;// If the matchState object has any state length, decode it as a Dictionary.varstate=matchState.State.Length>0?System.Text.Encoding.UTF8.GetString(matchState.State).FromJson<Dictionary<string,string>>():null;// Decide what to do based on the Operation Code as defined in OpCodes.switch(matchState.OpCode){caseOpCodes.Died:// Get a reference to the player who died and destroy their GameObject after 0.5 seconds and remove them from our players array.varplayerToDestroy=players[userSessionId];Destroy(playerToDestroy,0.5f);players.Remove(userSessionId);// If there is only one player left and that us, announce the winner and start a new round.if(players.Count==1&&players.First().Key==localUser.SessionId){AnnounceWinnerAndStartNewRound();}break;caseOpCodes.Respawned:// Spawn the player at the chosen spawn index.SpawnPlayer(currentMatch.Id,matchState.UserPresence,int.Parse(state["spawnIndex"]));break;caseOpCodes.NewRound:// Display the winning player's name and begin a new round.awaitAnnounceWinnerAndRespawn(state["winningPlayerName"]);break;default:break;}}
여기서, 메시지를 전송한 연결된 사용자의 세션 ID를 참조하여 userSessionId(으)로 저장하고, matchState.State.Length 속성을 확인하여 네트워크 메시지 내에 상태 데이터가 있는지 확인합니다.
마지막으로, matchState.OpCode(으)로 전환하고 필요 시 각각의 항목을 처리합니다.
플레이어가 사망할 때마다 GameObject을(를) 파괴하고 세션 ID를 기반으로 players 사전에서 제거합니다.
다음으로, 다른 플레이어가 남아 있는지 확인합니다. 다른 플레이어가 남아 있는 경우, AnnounceWinnerAndStartNewRound 함수가 호출됩니다:
GameManager.cs
1
2
3
4
5
6
7
8
9
10
11
12
13
14
15
/// <summary>/// Sends a network message that indicates a player has won and a new round is being started./// </summary>/// <returns></returns>publicasyncvoidAnnounceWinnerAndStartNewRound(){// ...varwinningPlayerName=localDisplayName;// Send a network message telling everyone else that we won.awaitSendMatchStateAsync(OpCodes.NewRound,MatchDataJson.StartNewRound(winningPlayerName));// Display the winning player message and respawn our player.awaitAnnounceWinnerAndRespawn(winningPlayerName);}
승자가 된 플레이어의 이름을 받아 OpCodes.NewRound 동작으로 네트워크 메시지를 전송하여 다른 플레이어에게 대결에서 승리하고 승자가 정해졌다는 사실을 알려줍니다. 그런 다음, AnnounceWinnerAndRespawn 함수를 호출합니다:
/// <summary>/// Displays the winning player message and respawns the player./// </summary>/// <param name="winningPlayerName">The name of the winning player.</param>privateasyncTaskAnnounceWinnerAndRespawn(stringwinningPlayerName){// Set the winning player text label.WinningPlayerText.text=string.Format("{0} won this round!",winningPlayerName);// Wait for 2 seconds.awaitTask.Delay(2000);// Reset the winner player text label.WinningPlayerText.text="";// Remove ourself from the players array and destroy our player.players.Remove(localUser.SessionId);Destroy(localPlayer);// Choose a new spawn position and spawn our local player.varspawnIndex=Random.Range(0,SpawnPoints.transform.childCount-1);SpawnPlayer(currentMatch.Id,localUser,spawnIndex);// Tell everyone where we respawned.SendMatchState(OpCodes.Respawned,MatchDataJson.Respawned(spawnIndex));}
이렇게 하면 승자 플레이어 메시지가 표시되고, 약간의 지연(2초) 후에 메시지를 제거합니다. 그런 다음, 로컬 플레이어 GameObject을(를) 파괴하고 임의의 장소에서 다시 생성하기 전에 players 사전을 기반으로 제거합니다.