Java/Android 클라이언트 가이드 #

이 클라이언트 라이브리러 가이드에서는 Among Us(외부)에서 영감을 받은 Sagi-shi(“사기꾼"을 뜻하는 일본어)라는 게임에서 Nakama 고유의 부품을 개발하는 방법(전체 게임 로직이나 UI를 사용하지 않음)을 통해 Java에서 Nakama의 핵심 기능을 사용하는 방법에 대해서 설명합니다.

Sagi-shi gameplay screen
Sagi-shi gameplay

필수 조건 #

진행하기 전에 다음 사항을 확인합니다:

Java 클라이언트로 작업하려면 Gradle과 같은 빌드 도구와 IntelliJ, Eclipse 또는 Visual Studio Code와 같은 편집기/IDE가 필요합니다.

전체 API 문서 #

전체 API 문서에 대한 자세한 내용은 API 문서를 확인하시기 바랍니다.

설정 #

Gradle이나 Maven을 사용하는지 아니면 JAR 패키지에 직접 의존하는지에 따라 프로젝트에 Nakama Java SDK를 설치하는 몇 가지 옵션이 있습니다.

Gradle로 설치하기 #

 1
 2
 3
 4
 5
 6
 7
 8
 9
10
11
12
repositories {
    maven {
        url 'https://jitpack.io'
    }
}

dependencies {
    implementation 'com.github.heroiclabs.nakama-java:nakama-java:<commit>'

 // or, depend on the fat Jar which bundles all of the Nakama Java dependencies into a single Jar.
 // implementation 'com.github.heroiclabs.nakama-java:nakama-java-all:<commit>'
}

Maven으로 설치하기 #

 1
 2
 3
 4
 5
 6
 7
 8
 9
10
11
12
13
14
15
16
  <repositories>
    <repository>
      <id>jitpack.io</id>
      <url>https://jitpack.io</url>
    </repository>
  </repositories>

  ...
  <dependencies>
    <dependency>
      <groupId>com.github.heroiclabs.nakama-java</groupId>
      <artifactId>nakama-java</artifactId>
      <version>_commit_</version>
      <type>jar</type>
    </dependency>
  </dependencies>

JAR로 설치하기 #

1
2
3
4
5
6
7
8
  <dependencies>
    <dependency>
      <groupId>com.github.heroiclabs.nakama-java</groupId>
      <artifactId>nakama-java-all</artifactId>
      <version>_commit_</version>
      <type>jar</type>
    </dependency>
  </dependencies>

Nakama Java SDK를 최신 버전으로 업데이트하려면 Gradle/Maven 구성 파일에서 버전/커밋 참조를 바꾸십시오.

로깅 #

Nakama Java SDK는 SLF4J 로깅 API를 사용합니다. 이 API를 사용하는 방법과 다양한 로깅 바인딩을 사용하는 방법에 대한 자세한 내용은 SLF4J 사용자 매뉴얼을 참조하세요.

이 가이드의 모든 예제는 다음과 같이 생성할 수 있는 SLF4J Logger를 사용합니다:

1
2
// Where App is the name of your class
Logger logger = LoggerFactory.getLogger(App.class);

Android의 경우 #

Android에서는 애플리케이션이 사용을 요청하고 사용자에게 권한을 요청할 플랫폼 서비스를 결정하는 권한 시스템을 사용합니다. 클라이언트는 네트워크를 사용하여 서버와 통신하므로 “인터넷” 권한을 추가해야 합니다.

1
<uses-permission android:name="android.permission.INTERNET"/>

비동기 프로그래밍 #

많은 Nakama API가 비동기식이rh 비차단적이며, Google Guava 라이브러리의 일부인 ListenableFuture 객체를 사용하여 Java SDK에 사용할 수 있습니다

Sagi-shi는 호출 스레드를 차단하지 않도록 콜백을 사용해 이러한 비동기 메서드를 호출하여 게임의 응답성과 효율성을 유지합니다.

 1
 2
 3
 4
 5
 6
 7
 8
 9
10
11
12
13
14
15
16
17
18
19
20
21
22
23
24
25
26
27
28
// Create a single thread executor
ExecutorService executor = Executors.newSingleThreadExecutor();

// Get a ListenableFuture with a Session result
ListenableFuture<Session> authFuture = client.authenticateDevice(deviceId);

// Setup the success and failure callbacks, specifying which executor to use
Futures.addCallback(authFuture, new FutureCallback<Session>() {
    @Override
    public void onSuccess(@NullableDecl Session session) {
        logger.debug("Authenticated user id: " + session.getUserId());
        executor.shutdown();
    }

    @Override
    public void onFailure(Throwable throwable) {
        logger.error(throwable.getMessage());
        executor.shutdown();
    }
}, executor);

// Wait for the executor to finish all tasks
try {
    executor.awaitTermination(5, TimeUnit.SECONDS);
}
catch (InterruptedException e) {
    logger.error(e.getMessage());
}

비동기식 호출을 함께 연결하려면 AsyncFunction<> 객체와 Futures.transformAsync 함수를 사용하면 됩니다.

 1
 2
 3
 4
 5
 6
 7
 8
 9
10
11
12
13
14
15
16
17
18
19
20
21
22
23
// Get a ListenableFuture with a Session result
ListenableFuture<Session> authFuture = client.authenticateDevice(deviceId);

// Create an AsyncFunction to get the Account of a user using a Session object
AsyncFunction<Session, Account> accountFunction = session -> client.getAccount(session);

// Get a ListenableFuture from Futures.transformAsync by first passing the original Future, followed by the extended Future and finally an exector
ListenableFuture<Account> accountFuture = Futures.transformAsync(authFuture, accountFunction, executor);

// Setup the success and failture callbacks as usual
Futures.addCallback(accountFuture, new FutureCallback<>() {
    @Override
    public void onSuccess(@NullableDecl Account account) {
        logger.debug("Got account for user id: " + account.getUser().getId());
        executor.shutdown();
    }

    @Override
    public void onFailure(Throwable throwable) {
        logger.error(throwable.getMessage());
        executor.shutdown();
    }
}, executor);

간결함을 위해 이 가이드의 코드 샘플에서는 더 간단하지만 스레드 차단 .get() 함수를 대신 사용합니다.

1
Account account = client.getAccount(session).get();

예외 처리 #

네트워크 프로그래밍은 연결과 페이로드 문제에 대해서 추가적인 안전 장치가 필요합니다.

위와 같이 Sagi-Shi의 API 호출은 성공 콜백과 실패 콜백이 모두 제공되는 콜백 패턴을 사용합니다. API 호출에서 예외가 발생하면 onFailure 콜백에서 처리되고 throwable 객체에서 예외 세부 정보에 액세스할 수 있습니다.

데이터 직렬화 및 역직렬화 #

네트워크에서 데이터를 전송하거나 수신하려면 직렬화 및 역직렬화가 적용되어야 합니다. 가장 일반적으로 할 수 있는 두 가지 방법은 JSON이나 바이너리 데이터를 사용하는 것입니다.

두 예시 모두 아래 Map 객체를 직렬화 및 역직렬화하는 방법을 보여주지만 직렬화 가능한 모든 객체와 함께 사용할 수 있습니다.

1
2
3
Map<String, String> data = new HashMap<>();
data.put("Key", "Value");
data.put("AnotherKey", "AnotherValue");

JSON #

com.google.gson.Gson 패키지 사용.

1
2
3
4
5
// Serialize
String serialized = new Gson().toJson(data, data.getClass());

// Deserialize
Map<String, String> deserialized = new Gson().fromJson(serialized, new TypeToken<Map<String, String>>(){}.getType());

바이너리 #

java.io.* 패키지 사용. Base64로(으로부터)의 변환은 직렬화된 데이터를 String(으)로 보내고 받는 경우에만 필요하며 그렇지 않은 경우 byte[] 배열을 사용하여 직렬화 및 역직렬화할 수 있습니다.

 1
 2
 3
 4
 5
 6
 7
 8
 9
10
11
12
13
14
15
16
17
18
19
20
21
22
23
24
25
26
// Serialize
String serialized = null;
ByteArrayOutputStream byteArrayOutputStream = new ByteArrayOutputStream();

try {
    ObjectOutputStream objectOutputStream = new ObjectOutputStream(byteArrayOutputStream);
    objectOutputStream.writeObject(data);
    byte[] bytes = byteArrayOutputStream.toByteArray();
    serialized = Base64.getEncoder().encodeToString(bytes);
} catch (IOException e) {
    e.printStackTrace();
}


// Deserialize
byte[] bytes = Base64.getDecoder().decode(serialized);
ByteArrayInputStream byteArrayInputStream = new ByteArrayInputStream(bytes);

try {
    ObjectInputStream objectInputStream = new ObjectInputStream(byteArrayInputStream);
    Map<String, String> deserialized = (Map<String, String>) objectInputStream.readObject();
} catch (IOException e) {
    e.printStackTrace();
} catch (ClassNotFoundException e) {
    e.printStackTrace();
}

시작하기 #

Nakama 클라이언트와 소켓 개체를 통해 Sagi-shi와 게임을 시작하는 방법에 대해서 알아봅니다.

Nakama 클라이언트 #

Nakama 클라이언트를 통해 Nakama 서버로 연결하며 Nakama 기능에 접근할 수 있습니다. 게임별 서버에 한 개의 클라이언트가 있는 것이 좋습니다.

서버 연결 세부내역에서 Sagi-shi 패스에 대한 클라이언트를 생성하려면 다음 사항이 필요합니다:

1
2
3
4
// explictly passing the defaults
Client client = new DefaultClient("defaultkey", "127.0.0.1", 7349, false)
// or same as above
Client client = new DefaultClient("defaultkey");

Nakama Java SDK는 gRPC를 통해 Nakama 서버와 직접 통신하므로 Nakama 서버에 대해 구성한 gRPC 포트 번호를 사용하는 것이 좋습니다. 기본적으로 이것은 7349입니다.

요청 제한 시간 구성하기 #

클라이언트에서 Nakama에 대한 요청은 시간 초과로 간주되기 전에 일정한 시간 내에 완료되어야 합니다. 클라이언트에서 Timeout 값을 설정하여 해당 시간(초)을 구성할 수 있습니다:

1
client.Timeout = 10;

Nakama 소켓 #

Nakama 소켓은 채팅, 파티, 대결 및 RPC와 같은 게임 플레이 및 실시간 대기 시간에 민감한 기능에 사용됩니다.

이 소켓은 서버의 다른 포트에서 클라이언트에 노출됩니다. 연결이 성공적으로 설정되었는지 확인하려면 여기에 다른 포트를 지정해야 합니다.

클라이언트는 이 서버에 하나 이상의 소켓을 만들 수 있습니다. 각 소켓은 서버에서 받은 응답에 대해 자체 이벤트 리스너를 등록할 수 있습니다.

클라이언트에서 소켓을 생성합니다:

 1
 2
 3
 4
 5
 6
 7
 8
 9
10
11
SocketClient socket = client.createWebSocket();

SocketListener listener = new AbstractSocketListener() {
    @Override
    public void onDisconnect(final Throwable t) {
        logger.info("Socket disconnected.");
    }
};

socket.connect(session, listener).get();
logger.info("Socket connected.");

인증 #

Nakama에는 많은 인증 방법이 있으며 서버에서 사용자 지정 인증 생성을 지원합니다.

Sagi-shi는 같은 사용자 계정과 연동된 장치 인증과 Facebook 인증을 통해서 사용자가 여러 장치에서 게임을 실행할 수 있도록 합니다.

Sagi-shi login screen
Login screen and Authentication options

장치 인증 #

Nakama 장치 인증은 물리적인 장치의 고유한 식별자를 사용하여 사용자 인증을 용이하게 하고 계정이 없는 경우 계정을 생성할 수 있습니다.

장치 인증만 사용할 경우, 게임이 실행되면 자동으로 인증이 진행되기 때문에 사용자는 로그인 UI가 필요하지 않습니다.

인증은 Nakama 클라이언트에서 액세스할 수 있는 Nakama 기능의 예시입니다.

1
2
3
String deviceId = UUID.randomUUID().toString();
Session session = client.authenticateDevice(deviceId).get();
logger.info("Session authToken: {}", session.getAuthToken());

Facebook 인증 #

Nakama Facebook 인증은 사용자의 Facebook 친구를 선택하여 Nakama 친구 목록에 추가할 수 있는 인증 방법입니다.

1
2
3
String oauthToken = "...";
Session session = client.authenticateFacebook(oauthToken).get();
logger.info("Session authToken: {}", session.getAuthToken());

사용자 지정 인증 #

Nakama는 사용자 지정 인증 방법을 지원하여 추가적인 신원 확인 서비스와 통합할 수 있습니다.

예시는 Itch.io 사용자 지정 인증 레시피를 참조하십시오.

연결 인증 #

사용자 인증을 완료한 경우, 사용자는 계정에서 Nakama 연결 인증 방법을 사용할 수 있습니다.

장치 ID 인증 연결

1
2
3
String deviceId = UUID.randomUUID().toString();
client.linkDevice(session, deviceId);
logger.info("Linked device id {} for user {}", deviceId, session.getUserId());

Facebook 인증 연결

1
2
3
4
String facebookAccessToken = "...";
boolean importFriends = true;
client.linkFacebook(session, facebookAccessToken, importFriends);
logger.info("Linked facebook authentication for user {}", deviceId, session.getUserId());

세션 변수 #

Nakama 세션 변수는 인증 시 저장될 수 있으며 세션이 활성화되어 있는 경우 클라이언트와 서버에서 사용할 수 있습니다.

Sagi-shi는 세션 변수를 통해 분석, 추천, 보상 프로그램 등을 실행합니다.

인증을 진행하는 과정에서 인수로 전달하여 세션 변수를 저장합니다:

1
2
3
4
5
6
Map<String, String> vars = new HashMap<>();
vars.put("DeviceOS", System.getProperty("os.name"));
vars.put("GameVersion", "VersionNumber");
vars.put("InviterUserId", "<SomeUserId>");

Session session = client.authenticateDevice(deviceId, vars).get();

클라이언트에서 세션 변수에 액세스하려면 Session 개체의 Vars 속성을 사용합니다:

1
Map<String, String> vars = session.getVars()

세션 수명 주기 #

Nakama 세션은 서버 구성에서 설정한 시간이 지나면 만료됩니다. 비활성 세션을 만료시키는 것은 보안 측면에서 모범적인 사례입니다.

세션의 인증 토큰을 저장하고 시작 시 만료되었는지 확인하는 것이 좋습니다. 토큰이 만료된 경우 재인증해야 합니다. 토큰의 만료 시간은 서버의 설정으로 변경할 수 있습니다.

1
2
3
4
5
6
7
logger.info("Session connected: {}", session.getAuthToken());

// Android
SharedPreferences pref = getActivity().getPreferences(Context.MODE_PRIVATE);
SharedPreferences.Editor editor = pref.edit();
editor.putString("nk.session", session.getAuthToken());
editor.commit();

Nakama의 경우 예를 들어 Sagi-shi 플레이어가 게임을 다시 시작할 때 재인증 없이 세션을 복원하는 방법을 사용할 수 있습니다.]

1
session = DefaultSession.restore(authToken);

사용자 계정 #

Nakama 사용자 계정은 Nakama와 사용자 지정 개발자 메타데이터에 의해 정의된 사용자 정보를 저장합니다.

Sagi-shi에서는 게임 진행률과 게임 아이템과 같은 메타데이터를 저장하고 계정을 편집할 수 있습니다.

Sagi-shi player profile screen
Player profile

사용자 계정 만들기 #

많은 Nakama 기능은 사용자 계정 가져오기와 같은 인증 세션을 통해서 액세스할 수 있습니다.

기본 사용자 정보 및 사용자 ID를 통해 Sagi-shi 플레이어의 전체 사용자 계정을 가져옵니다:

1
2
3
4
5
Account account = client.getAccount(session).get();
User user = account.getUser();
String username = user.getUsername();
String avatarUrl = user.getAvatarUrl();
String userId = user.getId();

사용자 계정 업데이트 #

Nakama에서는 사용자 계정과 같이 서버에 저장된 리소스를 쉽게 업데이트할 수 있습니다.

Sagi-shi 플레이어는 공용 프로필을 업데이트할 수 있어야 합니다:

1
2
3
4
5
6
7
String newUsername = "NotTheImp0ster";
String newDisplayName = "Innocent Dave";
String newAvatarUrl = "https://example.com/imposter.png";
String newLangTag = "en";
String newLocation = "Edinburgh";
String newTimezone = "BST";
client.updateAccount(session, newUsername, newDisplayName, newAvatarUrl, newLangTag, newLocation, newTimezone).get();

사용자 가져오기 #

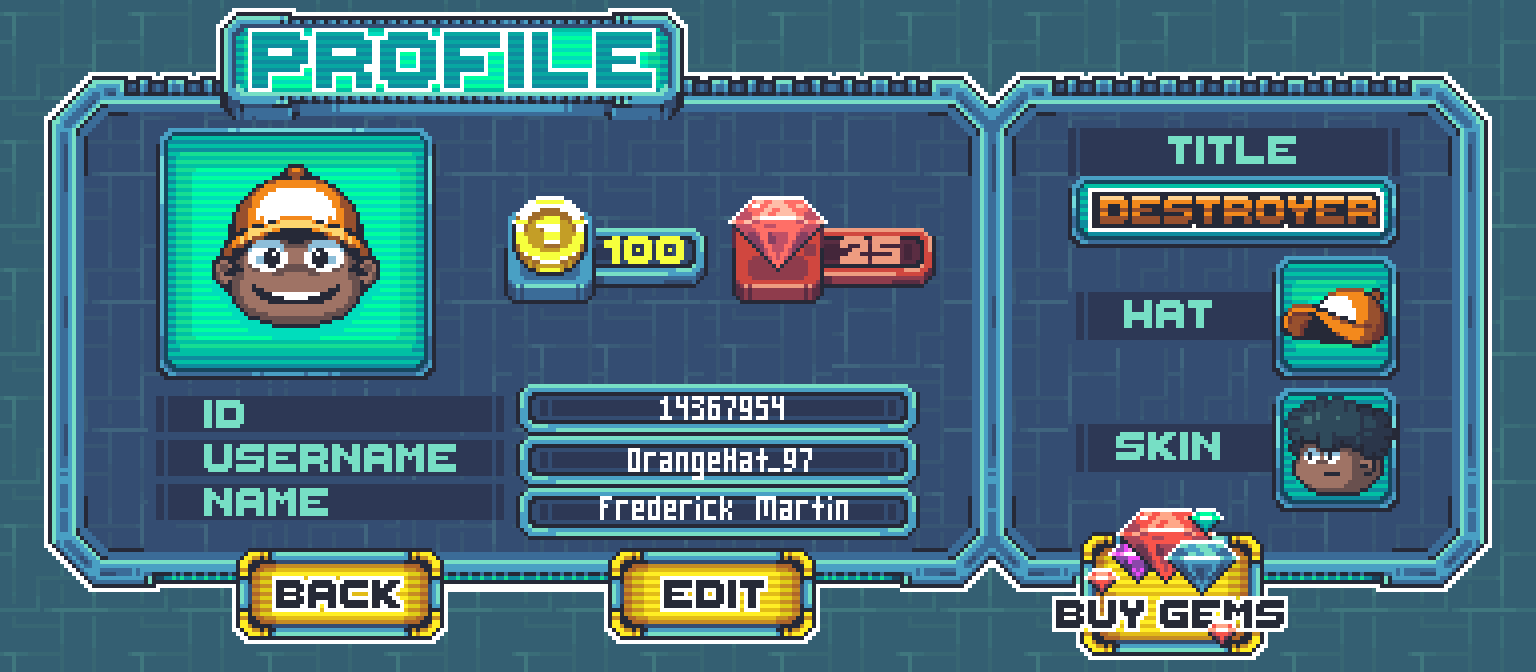
현재 인증된 플레이어의 사용자 계정을 가져오는 방법 외에 Nakama에서 ID나 사용자 이름, Facebook ID와 같은 기존 방식을 통해 다른 플레이어의 공용 프로필을 가져올 수 있습니다.

Sagi-shi는 다른 Nakama 기능을 사용할 때 이 메서드로 플레이어의 프로필을 표시합니다:

1
2
3
4
5
6
7
8
9
List<String> ids = Arrays.asList("userid1", "userid2");
List<String> usernames = Arrays.asList("username1", "username1");
String[] facebookIds = new String[] {"facebookid1"};

Users users = client.getUsers(session, ids, usernames, facebookIds).get();

for (User user : users.getUsersList()) {
  logger.info("User id {} username {}", user.getId(), user.getUsername());
}

메타데이터 저장 #

개발자는 Nakama 사용자 메타데이터를 사용하여 사용자 계정을 공용 사용자 필드로 확장할 수 있습니다.

사용자 메타데이터는 서버에서만 업데이트할 수 있습니다. 예시는 사용자 메타데이터 업데이트 레시피를 참조하십시오.

Sagi-shi는 메타데이터를 통해 플레이어가 게임에서 구비한 아이템을 저장합니다:

메타데이터 읽기 #

메타데이터를 설명하고 JSON 메타데이터를 분석하는 클래스를 정의합니다:

1
2
3
4
5
6
public class Metadata
{
    public String Title;
    public String Hat;
    public String Skin;
}
1
2
3
4
5
6
7
// Get the updated account object.
Account account = client.getAccount(session).get();

// Parse the account user metadata and log the result.
Gson gson = new Gson();
Metadata metadata = gson.fromJson(account.getUser().getMetadata(), Metadata.class);
logger.info("Title: {}, Hat: {}, Skin: {}", metadata.Title, metadata.Hat, metadata.Skin);

위의 코드에서는 com.google.gson 직렬화/역직렬화 라이브러리가 사용됩니다.

지갑 #

Nakama 사용자 지갑은 여러 디지털 화폐를 문자열/정수의 키/값의 쌍으로 저장할 수 있습니다.

Sagi-shi 플레이어는 게임 내의 가상 화폐를 통해 잠금 해제하거나 제목, 스킨, 모자를 구매할 수 있습니다.

지갑에 액세스하기 #

사용자 계정에서 JSON 지갑 데이터를 분석합니다:

1
2
3
4
5
6
Gson gson = new Gson();
Map<String, Double> wallet = new HashMap<>();
wallet = gson.fromJson(account.getWallet(), wallet.getClass());

logger.info("Wallet:");
wallet.forEach((k, v) -> logger.info("{}: {}", k, v));

지갑 업데이트하기 #

지갑은 서버에서만 업데이트할 수 있습니다. 예시는 사용자 계정 가상 지갑 문서를 참조하십시오.

인앱 구매 확인 #

Sagi-shi 플레이어는 서버에서 합법적으로 승인되고 검증된 인앱 구매를 통해 게임 내의 가상 화폐를 구매할 수 있습니다.

예시는 인앱 구매 확인 문서를 참조하십시오.

저장소 엔진 #

Nakama 저장소 엔진은 게임을 위한 분산 및 확장 가능한 문서 기반 저장소 솔루션입니다.

저장소 엔진을 통해 데이터에 쉽게 액세스하고 컬렉션으로 구성할 수 있습니다.

컬렉션은 이름이 지정되며 고유 키와 사용자 ID에 JSON 데이터를 저장합니다.

기본적으로, 플레이어는 자체적인 저장소 객체를 생성, 읽기, 업데이트, 삭제할 수 있는 권한이 있습니다.

Sagi-shi 플레이어는 저장소 엔진에 저장된 항목을 잠금 해제하거나 구매할 수 있습니다.

Sagi-shi player items screen
Player items

저장소 개체 읽기 #

저장소 개체(또는 HashMap<String, Object>도 사용 가능)를 설명하는 클래스를 정의하고 컬렉션 이름, 키, 사용자 ID를 사용하여 새로운 저장소 개체를 생성합니다. 마지막으로, 저장소 개체를 읽고 JSON 데이터를 분석합니다:

 1
 2
 3
 4
 5
 6
 7
 8
 9
10
11
StorageObjectId objectId = new StorageObjectId("favorites");
objectId.setKey("Hats");
objectId.setUserId(session.getUserId());

StorageObjects objects = client.readStorageObjects(session, objectId).get();

objects.getObjectsList().forEach((object) -> {
    Map<String, Object> parsedObj = new Gson().fromJson(object.getValue(), new TypeToken<Map<String, Object>>(){}.getType());
    logger.info("{}:", object.getKey());
    parsedObj.forEach((k, v) -> logger.info("{}: {}", k, v));
});

다른 플레이어의 공용 저장소 개체를 읽기 위해서 UserId을(를) 사용합니다. 플레이어는 본인이 소유하거나 공용인 저장소 개체만 읽을 수 있습니다(2PermissionRead 값).

저장소 개체 작성하기 #

개발자는 Nakama를 통해 클라이언트와 서버에서 저장소 엔진을 작성할 수 있습니다.

쓰기 로직을 어디에 둘 것인지 결정할 때 악의적인 사용자가 게임과 재무 상태에 어떤 역효과를 줄 수 있는지 생각하십시오. 예를 들어 정식으로만 작성해야 하는 데이터(예: 게임 잠금 해제 또는 진행 상황).

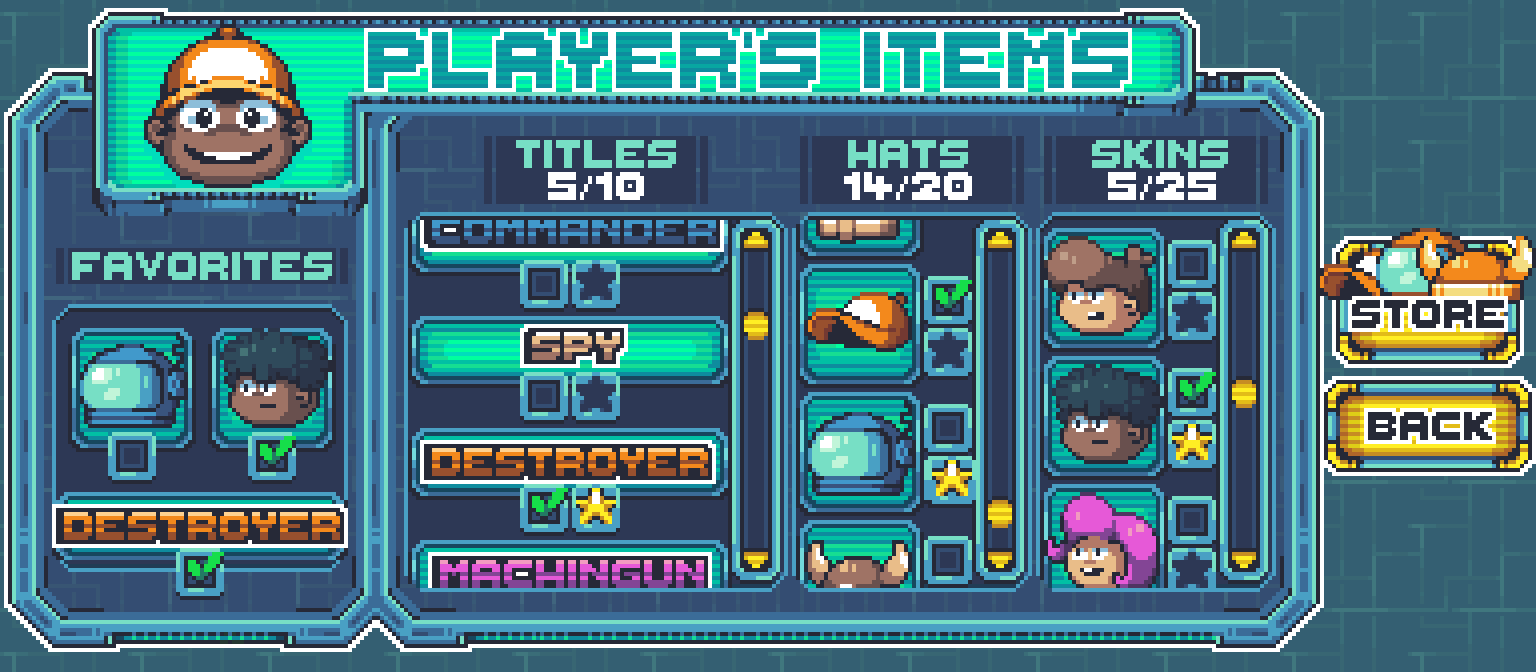
Sagi-shi에서 플레이어는 UI를 통해 더 쉽게 액세스할 수 있도록 즐겨찾기 항목을 사용할 수 있으며 클라이언트로부터 이 데이터를 쓰는 것이 안전합니다.

컬렉션 이름, 키, JSON 인코딩 데이터를 사용하여 저장소 개체 작성하기를 생성합니다. 마지막으로, 저장소 엔진에 저장소 객체를 작성합니다.

1
2
3
4
5
6
7
8
// Serialize your object as JSON
Map<String, List<String>> favoriteHats = new HashMap<>();
favoriteHats.put("hats", Arrays.asList("cowboy", "alien"));
String favoriteHatsJson = new Gson().toJson(favoriteHats);

StorageObjectWrite writeObject = new StorageObjectWrite("favorites", "Hats", favoriteHatsJson, PermissionRead.OWNER_READ, PermissionWrite.OWNER_WRITE);
StorageObjectAcks acks = client.writeStorageObjects(session, writeObject).get();
logger.info("Stored objects {}", acks.getAcksList());

client.writeStorageObjects 메서드에 여러 개의 객체를 전달할 수 있습니다.

1
2
3
4
5
6
7
8
String favoriteHatsJson = "...";
String myStatsJson = "...";

StorageObjectWrite writeObject = new StorageObjectWrite("favorites", "Hats", favoriteHats, PermissionRead.OWNER_READ, PermissionWrite.OWNER_WRITE);
StorageObjectWrite statsObject = new StorageObjectWrite("stats", "player", myStats, PermissionRead.OWNER_READ, PermissionWrite.OWNER_WRITE);

StorageObjectAcks acks = client.writeStorageObjects(session, saveGameObject, statsObject).get();
System.out.format("Stored objects %s", acks.getAcksList());

조건부 작성 #

저장소 엔진 조건부 작성은 저장소 엔진에 액세스한 후에 개체가 변경되지 않은 경우에만 발생합니다.

이렇게 하면 데이터 덮어쓰기를 방지할 수 있습니다. 예를 들어, 플레이어가 마지막으로 액세스한 이후에 Sagi-shi 서버가 개체를 업데이트 했을 수도 있습니다.

조건부 작성을 실행하려면 버전을 추가하여 가장 최신의 객체 버전에서 저장소 객체를 작성합니다:

1
2
3
4
5
6
// Assuming we already got an object (`obj`)
// Create a new object with the same Collection and Key and use the previous object's Version
StorageObjectWrite writeObject = new StorageObjectWrite(obj.getCollection(), obj.getKey(), newJsonValue, PermissionRead.OWNER_READ, PermissionWrite.OWNER_WRITE);
writeObject.setVersion(obj.getVersion())

// ... then write it to the Storage Engine as shown above

저장소 객체 목록 만들기 #

개별 키로 다양한 읽기 요청을 수행하지 않고, 컬렉션에서 플레이어가 액세스할 수 있는 모든 저장소 객체의 목록을 만들 수 있습니다.

Sagi-shi는 플레이어가 잠금 해제하거나 구매한 모든 제목, 모자, 스킨을 나열합니다:

1
2
3
4
5
6
int limit = 3;
String cursor = null;

StorageObjectList objects = client.listUsersStorageObjects(session, "Unlocks", limit, cursor);
logger.info("Object count: {}", objects.getObjectsCount());
objects.getObjectsList().forEach(object -> logger.info("Key: {}", object.getKey()));

페이지 지정 결과 #

결과를 나열하는 Nakama 메서드는 컬렉션에서 개체 검색을 시작할 위치를 나타내기 위해 Nakama에 대한 후속 호출에 전달할 수 있는 커서를 반환합니다.

예:

  • 커서의 값이 5인 경우, 다섯 번째 객체에서 결과를 얻습니다.
  • 커서가 null인 경우, 첫 번째 객체에서 결과를 얻습니다.
1
StorageObjectList objectsPage2 = lient.listUsersStorageObjects(session, "Unlocks", limit, objectsPage1.cursor);

서버에서 저장소 작업 보호하기 #

Nakama 저장소 엔진 작업은 서버에서 플레이어가 데이터(예: 게임 잠금 해제 또는 진행률)를 수정할 수 없도록 보호할 수 있습니다. 저장소 엔진에 작성하기 레시피를 참조하십시오.

원격 프로시저 호출 #

개발자는 Nakama 서버에서 사용자 지정 로직을 작성하여 클라이언트에게 RPC로 노출시킬 수 있습니다.

Sagi-shi에는 플레이어가 장비를 장착하기 전에 장비를 소유하고 있는지 확인하는 등 서버 내에서 보호해야 하는 다양한 로직이 포함되어 있습니다.

서버 로직 생성하기 #

플레이어가 장비를 장착하기 전에 장비를 소유하고 있는지 확인하는 원격 절차를 만드는 예시에 대해서는 플레이어 장비 정식 취급 레시피를 참조하십시오.

클라이언트 RPC #

클라이언트에서 Nakama 원격 프로시저를 호출하여 JSON 페이로드를 선택할 수 있습니다.

Sagi-shi 클라이언트는 모자를 안전하게 구비하기 위해서 RPC를 만듭니다.

1
2
3
4
String payload = "{ \"item\", \"cowboy\" }";

Rpc result = client.rpc(session, "EquipHat", payload).get();
logger.info("New hat equipped successfully {}", result.getPayload());

소켓 RPC #

Nakama의 실시간 기능에 인터페이스를 설정해야 할 경우 소켓에서 Nakama 원격 프로시저도 호출할 수 있습니다.

1
2
Rpc result = socket.rpc("EquipHat", payload).get();
logger.info("New hat equipped successfully {}", result.getPayload());

친구 #

Nakama 친구는 플레이어 간의 우정을 관리하는 완벽한 소셜 그래프 시스템을 제공합니다.

Sagi-shi에서 플레이어는 친구를 추가하고, 관계를 관리하고, 함께 플레이할 수 있습니다.

Sagi-shi Friends screen
Friends screen

친구 추가하기 #

Nakama에서 친구를 추가해도 상호적인 친구 관계가 즉각적으로 추가되지 않습니다. 사용자별 진행중인 친구 요청은 사용자가 승인해야 합니다.

Sagi-shi에서 플레이어는 사용자 이름이나 사용자 ID를 통해 친구를 추가할 수 있습니다:

1
2
3
4
5
6
7
// Add friends by User ID.
List<String> ids = Arrays.asList("AlwaysTheImposter21", "SneakyBoi");

// Add friends by Username.
String[] usernames = new String[] { "<SomeUserId>", "<AnotherUserId>" };

client.addFriends(session, ids, usernames).get();

친구 관계 상태 #

Nakama 친구 관계는 다음의 상태로 구분됩니다.

상태
0서로 아는 친구
1수락 대기 중인 친구 요청 발신
2수락 대기 중인 친구 요청 수신
4금지됨

친구 목록 만들기 #

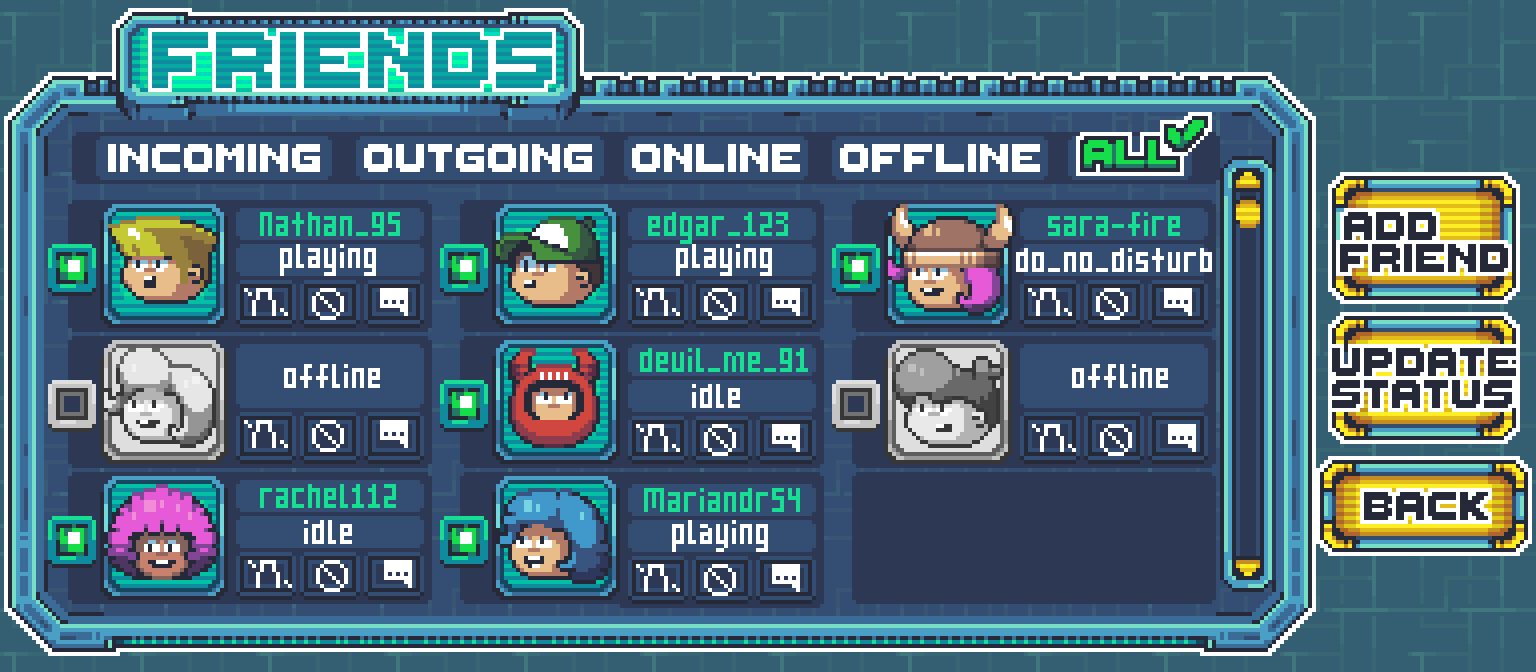
개발자는 Nakama에서 친구 관계 상태를 기반으로 플레이어의 친구 목록을 만들 수 있습니다.

Sagi-shi에서는 20명의 가장 최근 친구가 목록으로 표시됩니다:

1
2
3
4
5
6
int friendshipState = 0;
int limit = 20; // Limit is capped at 1000
String cursor = null;

FriendList friends = client.listFriends(session, friendshipState, limit, cursor).get();
friends.getFriendsList().forEach(friend -> logger.info("Friend Id: {}", friend.getUser().getId()));

친구 요청 수락하기 #

Nakama에서 친구 요청을 수락하면 플레이어는 양방향 친구 관계를 추가합니다.

Nakama는 둘의 상태를 보류에서 상호로 변경하는 작업을 처리합니다.

완전한 게임에서는 플레이어가 개별 요청을 수락할 수 있도록 허용합니다.

Sagi-shi는 들어오는 모든 친구 요청을 가져와 수락합니다:

1
2
3
4
5
6
7
int friendshipState = 2;
FriendList friends = client.listFriends(session, friendshipState).get();

for (Friend friend : friends.getFriendsList()) {
    List<String> ids = Arrays.asList(friend.getUser().getId());
    client.addFriends(session, ids, null).get();
}

친구 삭제하기 #

Sagi-shi 플레이어는 사용자 이름이나 사용자 ID를 통해 친구를 삭제할 수 있습니다:

1
2
3
4
5
6
7
// Delete friends by User ID.
List<String> ids = Arrays.asList("<SomeUserId>", "<AnotherUserId>");

// Delete friends by Username.
String[] usernames = new String[] { "<SomeUsername>", "<AnotherUsername>" };

client.deleteFriends(session, ids, usernames).get();

사용자 차단하기 #

Sagi-shi 플레이어는 사용자 이름이나 사용자 ID를 통해 다른 사용자를 차단할 수 있습니다:

1
2
3
4
5
6
7
// Block friends by User ID.
List<String> ids = Arrays.asList("<SomeUserId>", "<AnotherUserId>");

// Block friends by Username.
String[] usernames = new String[] { "<SomeUsername>", "<AnotherUsername>" };

client.blockFriends(session, ids, usernames).get();

차단된 친구는 3 친구 관계 상태로 표시됩니다.

상태 및 현재 상태 #

Nakama 상태 및 현재 상태는 온라인 상태를 설정하고 상태 메시지를 업데이트하며 다른 사용자의 업데이트를 따를 수 있는 실시간 상태 및 현재 상태 서비스입니다.

플레이어는 팔로우하려고 하는 다른 사용자와 친구가 아니어도 됩니다.

Sagi-shi는 상태 메시지와 온라인 현재 상태를 사용하여 친구가 온라인 상태일 때 플레이어에게 알리고 대결을 공유합니다.

Sagi-shi status update screen
Updating player status

사용자 팔로우하기 #

개발자는 Nakama 실시간 API를 사용하여 상태 변경과 같은 소켓의 이벤트를 구독하고 실시간으로 수신할 수 있습니다.

사용자 팔로우 방법은 현재 상태라고 하는 현재 온라인 사용자와 해당 상태도 반환합니다.

Sagi-shi는 플레이어의 친구를 팔로우하며 친구가 온라인 상태가 되면 알림을 제공합니다:

 1
 2
 3
 4
 5
 6
 7
 8
 9
10
11
12
13
14
15
16
17
18
19
20
21
22
23
24
25
26
27
28
29
30
31
32
33
34
// If one doesn't already exist, create a socket listener and handle status presence events
SocketListener socketListener = new SocketListener() {
    @Override
    public void onStatusPresence(StatusPresenceEvent e) {
        if (e.getJoins() != null) {
            e.getJoins().forEach(presence -> logger.info("{} is online with status {}", presence.getUsername(), presence.getStatus()));
        }

        if (e.getLeaves() != null) {
            e.getLeaves().forEach(presence -> logger.info("{} went offline", presence.getUsername()));
        }
    }

    // ... other required overrides (e.g. onChannelMessage etc)
}

// Then create and connect a socket connection
SocketClient socket = client.createSocket();
socket.connect(session, socketListener);

// Follow mutual friends and get the initial Status of any that are currently online
int friendshipState = 0; // Mutual friends
int limit = 20; // Limit is capped at 1000

FriendList friends = client.listFriends(session, friendshipState, limit, null).get();
List<String> friendIds = new ArrayList<>();
for (Friend friend : friends.getFriendsList()) {
    friendIds.add(friend.getUser().getId());
}

Status status = socket.followUsers(friendIds).get();
if (status.getPresences() != null) {
    status.getPresences().forEach(presence -> logger.info("{} is online with status {}", presence.getUsername(), presence.getStatus()));
}

사용자 팔로우 취소하기 #

Sagi-shi 플레이어는 팔로우를 취소할 수 있습니다:

1
socket.unfollowUsers("<UserId>", "<AnotherUserId>").get();

플레이어 상태 업데이트하기 #

Sagi-shi 플레이어는 상태를 변경하고 팔로워에게 공개할 수 있습니다:

1
socket.updateStatus("Viewing the Main Menu").get();

그룹 #

Nakama 그룹은 공용/개인 표시, 사용자 구성원 및 권한, 메타데이터 및 그룹 채팅을 제공하는 그룹 또는 클랜 시스템입니다.

Sagi-shi에서 플레이어는 그룹을 만들고 가입하여 협력하고 경쟁할 수 있습니다.

Sagi-shi groups screen
Groups list screen

그룹 생성하기 #

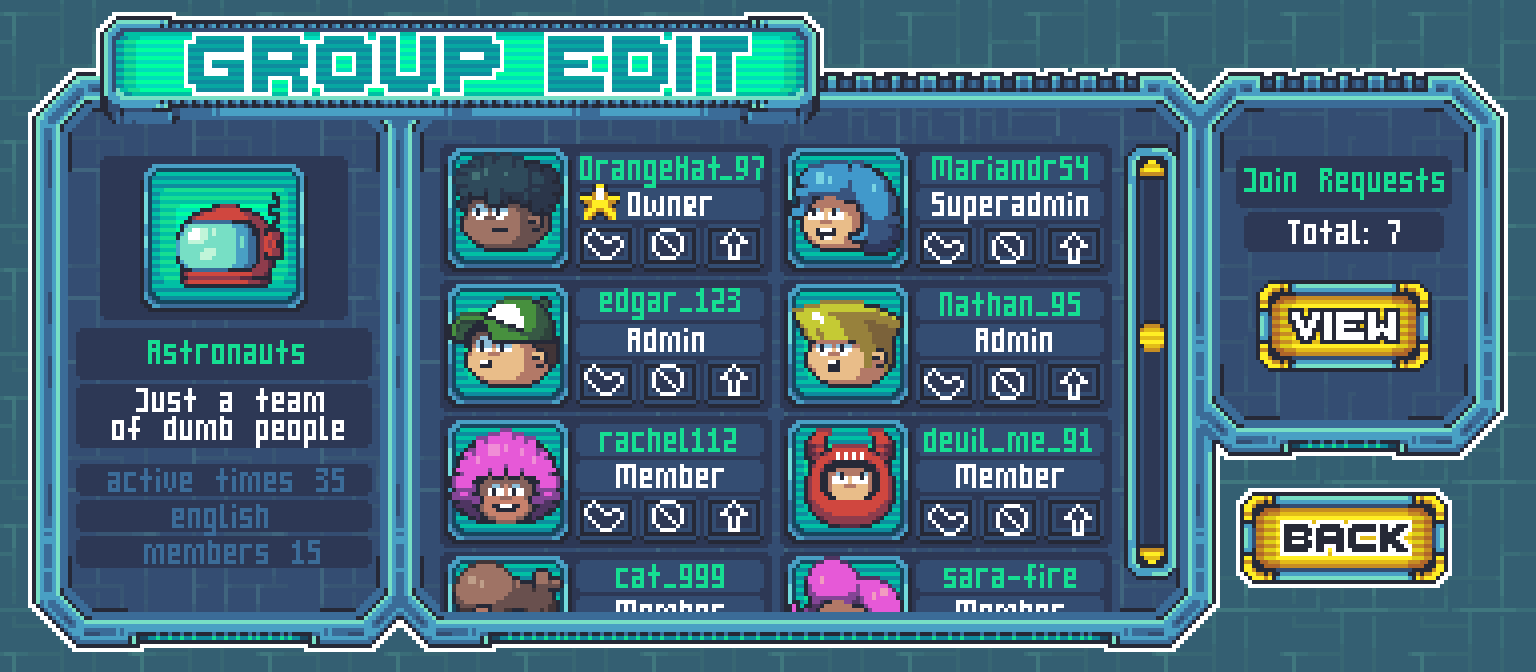
그룹에는 공용 또는 개인 “공개” 표시가 있습니다. 누구나 공용 그룹에 가입할 수 있지만 가입을 요청하고 비공개 그룹의 최고 관리자/관리자가 수락해야 합니다.

Sagi-shi 플레이어는 공통의 관심사를 기반으로 그룹을 생성할 수 있습니다:

1
2
3
4
5
6
7
String name = "Imposters R Us";
String description = "A group for people who love playing the imposter.";
String avatarUrl = "";
String langTag = "";
Boolean open = true; // Public group
int maxSize = 100;
Group group = client.createGroup(session, name, description, avatarUrl, langTag, open, maxSize).get();

그룹 표시 유형 업데이트 #

Nakama를 사용하면 그룹 총괄 관리자 또는 관리자 구성원이 공개 표시와 같은 클라이언트의 일부 속성을 업데이트할 수 있습니다:

1
2
3
String groupId = "<GroupId>";
boolean open = false;
client.updateGroup(session, groupId, name, description, avatarUrl, langTag, open);

그룹 크기 업데이트 #

그룹의 최대 구성원 숫자와 같은 다른 속성은 서버에서만 변경할 수 있습니다.

예시를 보려면 그룹 크기 업데이트 레시피를 참조하고 서버에서 그룹을 업데이트하는 방법을 자세히 알아보려면 그룹 서버 함수 참조를 참조하십시오.

Sagi-shi group edit screen
Sagi-shi group edit

그룹 목록 및 필터링 #

그룹은 다른 Nakama 리소스와 같이 목록을 만들고 와일드카드 그룹 이름으로 필터링할 수 있습니다.

Sagi-shi 플레이어는 그룹 목록과 필터링을 통해 기존 그룹을 검색할 수 있습니다:

1
2
3
4
5
6
int limit = 20;
GroupList groupList = client.listGroups(session, "imposter%", limit).get();
groupList.getGroupsList().forEach(group -> logger.info("{} [{}]", group.getName(), group.hasOpen() && group.getOpen().getValue() ? "Public" : "Private"));

// Get the next page of results.
GroupList nextGroupListResults = client.listGroups(session, "imposter%", limit, groupList.getCursor()).get();

그룹 삭제 #

총괄 관리자는 Nakama를 통해 그룹을 삭제할 수 있습니다.

개발자는 해당 기능 전체를 사용하지 않을 수 있습니다. Nakama API를 보호하는 다양한 방법에 대한 예시는 API 보호 가이드를 참조하십시오.

Sagi-shi 플레이어는 관리자로 되어 있는 그룹을 삭제할 수 있습니다:

1
client.deleteGroup(session, "<GroupId>").get();

그룹 메타데이터 #

사용자 계정과 마찬가지로, 그룹에는 공용 메타데이터가 있을 수 있습니다.

Sagi-shi는 그룹 메타데이터를 사용하여 그룹의 관심사, 활성 플레이어 시간, 언어를 저장합니다.

그룹 메타데이터는 서버에서만 업데이트할 수 있습니다. 예시는 그룹 메타데이터 업데이트 레시피를 참조하십시오.

Sagi-shi 클라이언트는 그룹 메타데이터 페이로드를 통해 RPC를 생성합니다:

 1
 2
 3
 4
 5
 6
 7
 8
 9
10
11
12
13
Map<String, Object> payload = new HashMap<>();
payload.put("GroupId", "<GroupId>");
payload.put("Interests", Arrays.asList("Deception", "Sabotage", "Cute Furry Bunnies"));
payload.put("ActiveTimes", Arrays.asList("9am-2pm Weekdays", "9am-10am Weekends"));
payload.put("Languages", Arrays.asList("English", "German"));

try {
    Rpc rpcResult = client.rpc(session, "UpdateGroupMetadata", new Gson().toJson(payload, payload.getClass())).get();
    logger.info("Successfully updated group metadata");
}
catch (ExecutionException ex) {
    logger.error(ex.getMessage());
}

그룹 구성원 상태 #

Nakama 그룹 구성원은 다음의 상태로 구분합니다:

코드목적
0총괄 관리자모든 그룹에는 최소 1명의 총괄 관리자가 있어야 합니다. 총괄 관리자는 모든 관리자 권한이 부여되며, 그룹을 삭제하고 관리자 구성원을 승격시킬 수 있습니다.
1관리자관리자는 2명 이상일 수 있습니다. 관리자는 그룹을 업데이트하거나 구성원을 수락, 추방, 승격, 강등, 금지, 추가할 수 있습니다.
2구성원일반 그룹 구성원 새로운 사용자의 가입 요청을 수락할 수 없습니다.
3가입 요청새로운 사용자로부터 가입 요청이 있습니다. 이것은 그룹의 최대 구성원 숫자에 포함되지 않습니다.

그룹에 가입하기 #

플레이어가 공개 그룹에 가입하는 경우, 즉각적으로 구성원으로 되지만, 개인 그룹에 가입하려고 하는 경우에는 그룹 관리자가 수락해야 합니다.

Sagi-shi 플레이어는 그룹에 가입할 수 있습니다:

1
client.joinGroup(session, "<GroupId>").get();

사용자 그룹 목록 만들기 #

Sagi-shi 플레이어는 구성원인 그룹의 목록을 만들 수 있습니다:

1
2
3
4
5
6
String userid = "<user id>";
UserGroupList userGroups = client.listUserGroups(session, userid).get();

for (UserGroupList.UserGroup userGroup : userGroups.getUserGroupsList()) {
    System.out.format("Group name %s role %d", userGroup.getGroup().getName(), userGroup.getState());
}

구성원 목록 만들기 #

Sagi-shi 플레이어는 그룹의 구성원 목록을 만들 수 있습니다:

1
2
GroupUserList groupUserList = client.listGroupUsers(session, "<GroupId>").get();
groupUserList.getGroupUsersList().forEach(groupUser -> logger.info("{}: {}", groupUser.getUser().getId(), groupUser.getState().getValue()));

가입 요청 수락하기 #

개인 그룹 관리자 또는 총괄 관리자는 사용자를 그룹에 추가하여 가입 요청을 수락할 수 있습니다.

Sagi-shi는 먼저 가입 요청 상태의 모든 사용자를 나열한 다음 루프를 통해 그룹에 추가합니다:

1
2
3
4
5
6
7
int state = 3;
int limit = 100;
String cursor = "";
GroupUserList groupUserList = client.listGroupUsers(session, groupId, state, limit, cursor).get();
groupUserList.getGroupUsersList().forEach(groupUser -> {
    client.addGroupUsers(session, groupId, groupUser.getUser().getId());
});

구성원 승격하기 #

Nakama 그룹 구성원은 관리자 또는 총괄 관리자 역할로 승격되어 성장하는 그룹을 관리하거나 구성원이 탈퇴할 경우 인수할 수 있습니다.

관리자는 다른 구성원을 관리자로 승격시킬 수 있고, 총괄 관리자는 다른 구성원을 총괄 관리자로 승격시킬 수 있습니다.

구성원은 한 단계 승격됩니다. 예:

  • 구성원이 승격되면 관리자가 됩니다.
  • 관리자가 승격되면 총괄 관리자가 됩니다.
1
client.promoteGroupUsers(session, "<GroupId>", "UserId", "AnotherUserId").get();

구성원 강등하기 #

Sagi-shi 그룹 관리자와 총괄 관리자는 구성원을 강등시킬 수 있습니다:

1
2
3
String groupid = "<group id>";
String[] userIds = new String[] {"<user id>"};
client.demoteGroupUsers(session, groupid, userIds).get();

구성원 추방하기 #

Sagi-shi 그룹 관리자와 총괄 관리자는 그룹의 구성원을 삭제할 수 있습니다:

1
client.demoteGroupUsers(session, "<GroupId>", "UserId", "AnotherUserId").get();

구성원 차단하기 #

Sagi-shi 그룹 관리자와 총괄 관리자는 강등이나 탈퇴 외에 사용자를 차단할 수도 있습니다:

1
client.banGroupUsers(session, "<GroupId>", "UserId", "AnotherUserId").get();

그룹 탈퇴하기 #

Sagi-shi 플레이어는 그룹에서 탈퇴할 수 있습니다:

1
client.leaveGroup(session, "<GroupId>").get();

채팅 #

Nakama 채팅은 그룹, 개인/직접 메시지 및 동적 채팅방을 위한 실시간 채팅 시스템입니다.

Sagi-shi는 그룹 채팅 및 개인/다이렉트 메시지를 사용하며 대결 중 동적 채팅을 사용하여 플레이어는 서로를 오도하고 사기꾼이 누구인지 이야기할 수 있습니다.

Sagi-shi chat screen
Sagi-shi Chat

동적 채팅 참여하기 #

Sagi-shi 대결에는 플레이어가 이야기할 수 있는 임시 대화방이 있습니다:

1
2
3
4
5
String roomName = "<MatchId>";
boolean persistence = false;
boolean hidden = false;
Channel channel = socket.joinChat(roomName, ChannelType.ROOM, persistence, hidden).get();
logger.info("Connected to dynamic room channel: {}", channel.getId());

그룹 채팅 참여하기 #

Sagi-shi 그룹 구성원은 지속적인 그룹 채팅 채널에서 플레이 세션 동안 대화할 수 있습니다:

1
2
3
4
5
String groupId = "<GroupId>";
boolean persistence = true;
boolean hidden = false;
Channel channel = socket.joinChat(groupId, ChannelType.GROUP, persistence, hidden).get();
logger.info("Connected to group channel: {}", channel.getId());

직접 채팅 참여하기 #

Sagi-shi 플레이어는 대결 중 또는 대결 후에 개인적으로 1:1 채팅을 하고 이전 메시지를 볼 수도 있습니다:

1
2
3
4
5
String userId = "<UserId>";
boolean persistence = true;
boolean hidden = false;
Channel channel = socket.joinChat(userId, ChannelType.DIRECT_MESSAGE, persistence, hidden).get();
logger.info("Connected to direct message channel: {}", channel.getId());

메시지 보내기 #

모든 유형의 채팅 채널에서 메시지를 보내는 방법은 동일합니다. 메시지에는 채팅 문자와 이모티콘이 포함되며 JSON 직렬 데이터로 전송됩니다:

 1
 2
 3
 4
 5
 6
 7
 8
 9
10
String channelId = "<ChannelId>";

Map<String, String> messageContent = new HashMap<>();
messageContent.put("message", "I think Red is the imposter!");
ChannelMessageAck messageSendAck = socket.writeChatMessage(channelId, new Gson().toJson(messageContent, messageContent.getClass())).get();

Map<String, String> emoteContent = new HashMap<>();
emoteContent.put("emote", "point");
emoteContent.put("emoteTarget", "<RedPlayerUserId>");
ChannelMessageAck emoteSendAck = socket.writeChatMessage(channelId, new Gson().toJson(emoteContent, emoteContent.getClass())).get();

메시지 기록 나열하기 #

메시지 목록에는 메시지를 최신 순 또는 역순으로 표시할 수 있는 매개변수가 있습니다.

Sagi-shi 플레이어는 그룹의 메시지 기록을 나열할 수 있습니다:

1
2
3
4
5
int limit = 100;
boolean forward = true;
String groupId = "<GroupId>";
ChannelMessageList channelMessageList = client.listChannelMessages(session, channelId, limit, null, forward).get();
channelMessageList.getMessagesList().forEach(message -> logger.info("{}:{}", message.getUsername(), message.getContent()));

채팅에는 캐시 가능한 커서가 있어 가장 최근 메시지를 가져올 수 있으며 이런 메시지는 원하는 위치에 저장할 수 있습니다.

1
2
3
4
5
// Store this in whichever way suits your application
String cacheableCursor = channelMessageList.getCacheableCursor();

// ...then use the cacheable cursor later to retrieve the next results
ChannelMessageList nextResults = client.listChannelMessages(session, groupId, limit, cacheableCursor, forward);

메시지 업데이트 #

Nakama는 메시지 업데이트 기능도 지원합니다. 이 기능은 원하는 경우 사용할 수 있지만 Sagi-shi와 같은 속임수 게임에서는 속임수가 추가될 수 있습니다.

예를 들어, 플레이어는 다음의 메시지를 전송합니다:

1
2
3
4
5
6
7
Map<String, String> messageContent = new HashMap<>();
messageContent.put("message", "I think Red is the imposter!");
ChannelMessageAck ack = socket.writeChatMessage(channelId, new Gson().toJson(messageContent, messageContent.getClass())).get();

Map<String, String> updatedMessageContent = new HashMap<>();
updatedMessageContent.put("message", "I think BLUE is the imposter!");
ChannelMessageAck updateAck = socket.updateChatMessage(channelId, ack.getMessageId(), new Gson().toJson(updatedMessageContent, updatedMessageContent.getClass())).get();

대결 #

Nakama는 Server AuthoritativeServer Relayed 멀티플레이어 대결을 지원합니다.

서버 정식 대결에서 서버는 게임 플레이 루프를 제어하고 모든 클라이언트를 게임의 현재 상태인 최신 상태로 유지해야 합니다.

서버 중계 대결의 경우 클라이언트가 제어하고 서버는 연결된 다른 클라이언트에게 정보만 릴전달합니다.

Sagi-shi와 같은 경쟁 게임에서는 클라이언트가 승인되지 않은 방식으로 게임과 상호 작용하는 것을 방지하기 위해 서버 정식 대결이 사용될 수 있습니다.

이 가이드에서는 쉽게 설명하기 위해 서버 중계 모델을 사용합니다.

대결 생성하기 #

Sagi-shi 플레이어는 대결을 생성하여 온라인 친구들이 참여하도록 초대할 수 있습니다:

 1
 2
 3
 4
 5
 6
 7
 8
 9
10
11
12
Match match = socket.createMatch().get();
FriendList friendList = client.listFriends(session, 0, 100, "").get();
for (Friend friend : friendList.getFriendsList()) {
    if (friend.getUser().getOnline()) {
        Map<String, String> messageContent = new HashMap<>();
        messageContent.put("message", String.format("Hey %s, join me for a match!", friend.getUser().getUsername()));
        messageContent.put("matchId", match.getMatchId());

        Channel channel = socket.joinChat(friend.getUser().getId(), ChannelType.DIRECT_MESSAGE).get();
        ChannelMessageAck ack = socket.writeChatMessage(channel.getId(), new Gson().toJson(messageContent, messageContent.getClass())).get();
    }
}

대결 참여하기 #

Sagi-shi 플레이어는 ID를 알고 있는 경우 기존 대결에 참여할 수 있습니다:

1
2
String matchId = "<MatchId>";
Match match = socket.joinMatch(matchId).get();

또는 실시간 매치 메이커 리스너를 설정하고 매치 메이커에 자신을 추가합니다:

 1
 2
 3
 4
 5
 6
 7
 8
 9
10
11
// In the SocketListener, override the onMatchmakerMatched function
@Override
public void onMatchmakerMatched(MatchmakerMatched matchmakerMatched) {
    Match match = socket.joinMatch(matchmakerMatched.getMatchId()).get();
}

// ...then, elsewhere
int minPlayers = 2;
int maxPlayers = 10;
String query = "";
MatchmakerTicket matchmakingTicket = socket.addMatchmaker(minPlayers, maxPlayers, query).get();

플레이어 상태로 대결 참여하기

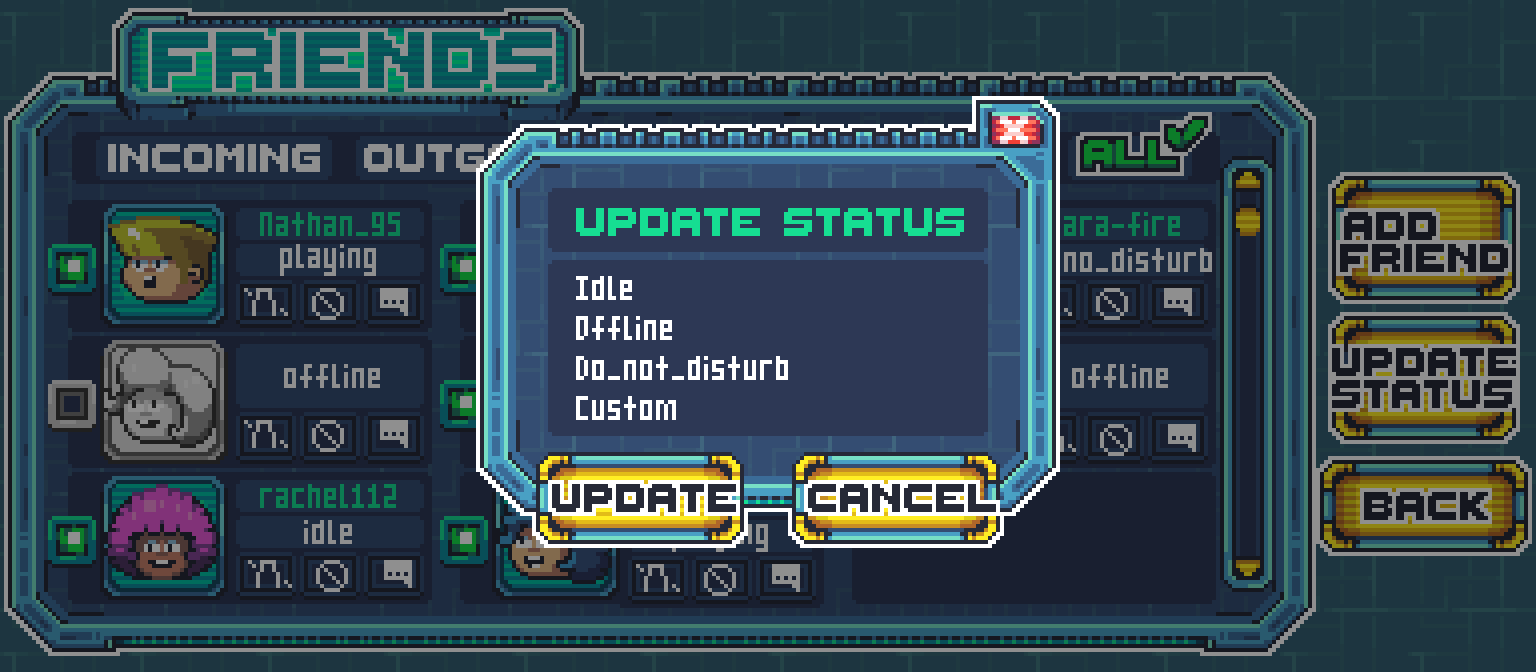
Sagi-shi 플레이어는 새로운 대결에 참여할 경우 상태를 업데이트할 수 있습니다:

1
2
3
4
5
Map<String, String> status = new HashMap<>();
status.put("Status", "Playing a match");
status.put("MatchId", "<MatchId>");

socket.updateStatus(new Gson().toJson(status, status.getClass())).get();

팔로워가 실시간 상태 이벤트를 수신한 경우, 대결에 참여할 수 있습니다:

 1
 2
 3
 4
 5
 6
 7
 8
 9
10
11
@Override
public void onStatusPresence(StatusPresenceEvent e) {
    if (e.getJoins() != null) {
        e.getJoins().forEach(presence -> {
            Map<String, String> status = new Gson().fromJson(presence.getStatus(), new TypeToken<Map<String, String>>(){}.getType());
            if (status.containsKey("MatchId")) {
                socket.joinMatch(status.get("MatchId")).get();
            }
        });
    }
}

대결 나열하기 #

대결 목록은 플레이어 수, 대결 레이블 및 더 복잡한 검색 쿼리를 제공하는 옵션을 포함하여 대결을 필터링하기 위해 여러 기준을 사용합니다.

Sagi-shi 대결은 로비 상태에서 시작합니다. 대결은 서버상에 존재하지만, 플레이어의 숫자가 충분하지 않을 경우 실제 게임이 시작되지 않습니다.

Sagi-shi에서는 더 많은 플레이어를 기다리고 있는 대결 목록이 표시됩니다:

1
2
3
4
5
6
7
int minPlayers = 2;
int maxPlayers = 10;
int limit = 10;
boolean authoritative = true;
String label = "";
MatchList matchList = client.listMatches(session, minPlayers, maxPlayers, limit, label, authoritative).get();
matchList.getMatchesList().forEach(match -> logger.info("{}: {}/{}", match.getMatchId(), match.getSize(), limit));

"AnExactMatchLabel"과(와) 같은 레이블이 있는 대결 항목을 찾으려면:

1
String label = "AnExactMatchLabel";

플레이어 생성 #

대결 개체에는 현재 온라인 사용자의 현재 상태가 목록으로 나열됩니다.

Sagi-shi는 대결 현재 상태를 사용하여 클라이언트(플레이어가 Player 객체로 표시되는)에서 플레이어를 생성합니다:

1
2
3
4
5
6
7
8
Match match = socket.joinMatch(matchId).get();
Map<String, Player> players = new HashMap<>();

match.getPresences().forEach(presence -> {
    Player player = new Player();
    player.Spawn();
    players.put(presence.getSessionId(), player);
});

Sagi-shi는 소켓 리스너 재정의로 대결 현재 상태 수신 이벤트를 사용하여 생성된 플레이어가 대결 탈퇴 및 가입 시 최신 상태로 유지합니다:

 1
 2
 3
 4
 5
 6
 7
 8
 9
10
11
12
13
14
15
16
17
18
19
20
@Override
public void onMatchPresence(MatchPresenceEvent e) {
    if (e.getJoins() != null) {
        e.getJoins().forEach(presence -> {
            Player player = new Player();
            player.Spawn();
            players.put(presence.getSessionId(), player);
        });
    }

    if (e.getLeaves() != null) {
        e.getLeaves().forEach(presence -> {
            if (players.containsKey(presence.getSessionId())) {
                Player player = players.get(presence.getSessionId());
                player.Despawn();
                players.remove(presence.getSessionId());
            }
        });
    }
}

대결 상태 전송하기 #

Nakama는 실시간 네트워킹을 통해 플레이어가 게임 세계에서 이동하고 상호 작용할 때 대결 상태를 보내고 받습니다.

대결이 진행되는 동안 Sagi-shi 클라이언트는 다른 클라이언트와 연결되는 서버로 대결 상태를 전송합니다.

대결 상태에는 수신 중인 데이터를 수신인에게 알려주는 연산 코드가 포함되어 있어 수신 중인 데이터를 역직렬화하고 게임 보기를 업데이트할 수 있습니다.

Sagi-shi에서 사용되는 연산 코드 예시:

  • 1: 플레이어 위치
  • 2: 플레이어 호출 투표

플레이어 위치 전송

Sagi-shi 플레이어 위치 상태를 표시하는 클래스를 정의합니다:

1
2
3
4
5
public class PositionState {
    public float X;
    public float Y;
    public float Z;
}

플레이어의 변환에서 인스턴스를 만들고 연산 코드를 설정하고 JSON 인코딩 상태를 보냅니다:

1
2
3
4
5
6
7
8
PositionState state = new PositionState();
state.X = 10;
state.Y = 5;
state.Z = 1;

int opCode = 1;
String json = new Gson().toJson(state, state.getClass());
socket.sendMatchData(matchId, opCode, json.getBytes());

정적 속성으로서의 작업 코드

Sagi-shi에는 네트워크 게임 액션이 많습니다. 연산 코드에 대해 정적 상수 클래스를 사용하면 코드를 더 쉽게 준수하고 유지 관리할 수 있습니다:

1
2
3
4
public class OpCodes {
    public static final long Position = 1;
    public static final long Vote = 2;
}

대결 상태 수신하기 #

Sagi-shi 플레이어는 대결 상태 수신 이벤트를 구독하여 다른 연결된 클라이언트로부터 대결 데이터를 수신할 수 있습니다:

 1
 2
 3
 4
 5
 6
 7
 8
 9
10
11
12
13
14
15
16
@Override
public void onMatchData(MatchData matchData) {
    if (matchData.getOpCode() == OpCodes.Position) {
        // Get the updated position data
        String json = new String(matchData.getData());
        PositionState position = new Gson().fromJson(json, new TypeToken<PositionState>(){}.getType());

        // Update the GameObject associated with that player
        if (players.containsKey(matchData.getPresence().getSessionId())) {
            Player player = players.get(matchData.getPresence().getSessionId());

            // Here we would normally do something like smoothly interpolate to the new position, but for this example let's just set the position directly.
            player.position = position;
        }
    }
}

매치 메이커 #

개발자는 대결 목록 또는 Nakama 매치 메이커를 사용하여 플레이어의 대결을 찾을 수 있습니다. 이를 통해 플레이어는 실시간 매치메이킹 풀에 참여하고 지정된 기준과 일치하는 다른 플레이어와 대결이 성사될 때 알림을 받을 수 있습니다.

매치메이킹을 통해 플레이어는 서로를 찾을 수 있지만 대결을 생성하지는 않습니다. 이러한 분리는 의도된 것이므로 게임 대결을 찾는 것 이상으로 매치메이킹을 사용할 수 있습니다. 예를 들어, 소셜 경험을 만들고 있는 경우 매치메이킹을 사용하여 채팅할 다른 사람을 찾을 수 있습니다.

매치 메이커 추가 #

매치메이킹 기준은 그냥 2명의 플레이어만 찾거나 아니면 더 복잡하게 특정 게임 모드에 관심이 있는 최소 기술 수준을 가진 2-10명의 플레이어를 찾을 수 있습니다.

Sagi-shi에서는 플레이어가 매치메이킹 풀에 참여하고 서버를 통해 다른 플레이어와의 대결을 만들 수 있습니다:

1
2
3
4
5
6
7
8
int minPlayers = 2;
int maxPlayers = 10;
String query = "";
Map<String, String> stringProperties = new HashMap<>();
stringProperties.put("mode", "sabotage");
Map<String, Double> numericProperties = new HashMap<>();
numericProperties.put("skill", 125d);
MatchmakerTicket matchmakerTicket = socket.addMatchmaker(minPlayers, maxPlayers, query, stringProperties, numericProperties).get();

대결을 찾으면 onMatchmakerMatched 소켓 처리기에서 직접 가입할 수 있습니다.

1
2
3
4
@Override
public void onMatchmakerMatched(MatchmakerMatched matchmakerMatched) {
    Match match = socket.joinMatch(matchmakerMatched.getMatchId()).get();
}

순위표 #

Nakama 순위표는 게임에 경쟁적인 측면을 만들고 플레이어 참여도와 유지율을 높입니다.

Sagi-shi에는 주간 사기꾼 승리 순위표가 있습니다. 여기서 플레이어는 승리할 때마다 점수가 높아지며 마찬가지로 주간 직원 승리에 대한 순위표가 있습니다.

Sagi-shi leaderboard screen
Sagi-shi Leaderboard

순위표 생성하기 #

순위표는 서버에서 생성해야 합니다. 순위표 생성에 대한 자세한 내용은 순위표 문서를 참조하십시오.

점수 제출하기 #

플레이어가 점수를 제출하면, Nakama는 플레이어의 기존 점수에 제출된 점수값을 더합니다.

Nakama에는 점수값 외에 점수가 동일할 때 순위를 매길 수 있는 항목별 점수도 있습니다.

Sagi-shi 플레이어는 점수를 달성한 맵과 같은 상황별 메타데이터를 포함하여 순위표에 점수를 제출할 수 있습니다:

1
2
3
4
5
6
int score = 1;
int subscore = 0;
Map<String, String> metadata = new HashMap<>();
metadata.put("map", "space_station");

LeaderboardRecord record = client.writeLeaderboardRecord(session, "weekly_imposter_wins", score, subscore, new Gson().toJson(metadata, metadata.getClass())).get();

상위 레코드 나열하기 #

Sagi-shi 플레이어는 순위표에서 상위 레코드를 나열할 수 있습니다:

1
2
3
4
5
6
7
8
int limit = 20;
Iterable<String> ownerIds = null;
int expiry = 0;
String cursor = null;
String leaderboardName = "weekly_imposter_wins";

LeaderboardRecordList list = client.listLeaderboardRecords(session, leaderboardName, ownerIds, expiry, limit, cursor).get();
list.getRecordsList().forEach(record -> logger.info("{}:{}", record.getOwnerId(), record.getScore()));

사용자에 대한 레코드 나열하기

개발자는 Nakama에서 플레이어에 대한 순위표 레코드를 나열할 수 있습니다.

Sagi-shi는 플레이어에게 주변 플레이어에 대해 본인이 어떻게 하고 있는지에 대한 스냅샷을 제공합니다:

1
2
3
4
5
6
7
int limit = 20;
int expiry = 0;
String cursor = null;
String leaderboardName = "weekly_imposter_wins";

LeaderboardRecordList list = client.listLeaderboardRecordsAroundOwner(session, leaderboardName, session.getUserId(), expiry, limit).get();
list.getRecordsList().forEach(record -> logger.info("{}:{}", record.getOwnerId(), record.getScore()));

사용자 목록에 대한 레코드 나열하기

Sagi-shi 플레이어는 소유자 ID 매개변수로 사용자 ID를 제출하여 친구의 점수를 얻을 수 있습니다:

1
2
3
4
5
6
7
int limit = 20;
int expiry = 0;
String cursor = null;
String leaderboardName = "weekly_imposter_wins";

LeaderboardRecordList list = client.listLeaderboardRecords(session, leaderboardName, friendUserIds, expiry, limit, cursor).get();
list.getRecordsList().forEach(record -> logger.info("{}:{}", record.getOwnerId(), record.getScore()));

소유자 ID 매개변수로 사용자 ID를 제출하여 그룹 구성원의 점수도 얻을 수 있습니다:

 1
 2
 3
 4
 5
 6
 7
 8
 9
10
11
GroupUserList groupUserList = client.listGroupUsers(session, "<GroupId>", -1, 100, null).get();
List<String> groupUserIds = new ArrayList<>();
groupUserList.getGroupUsersList().forEach(user -> groupUserIds.add(user.getUser().getId()));

int limit = 20;
int expiry = 0;
String cursor = null;
String leaderboardName = "weekly_imposter_wins";

LeaderboardRecordList list = client.listLeaderboardRecords(session, leaderboardName, groupUserIds, expiry, limit, cursor).get();
list.getRecordsList().forEach(record -> logger.info("{}:{}", record.getOwnerId(), record.getScore()));

레코드 삭제하기 #

Sagi-shi 플레이어는 본인의 순위표 레코드를 삭제할 수 있습니다:

1
client.deleteLeaderboardRecord(session, "<LeaderboardId>").get();

토너먼트 #

Nakama 토너먼트는 플레이어가 상을 받기 위해서 경쟁하는 단기간의 경기입니다.

Sagi-shi 플레이어는 진행 중인 토너먼트를 보고 필터링하고 참가할 수 있습니다.

Sagi-shi tournaments screen
Sagi-shi Tournaments

토너먼트 생성하기 #

토너먼트는 서버에서 생성해야 합니다. 토너먼트 생성에 대한 자세한 내용은 토너먼트 문서를 참조하십시오.

Sagi-shi에는 가장 정확한 사기꾼 투표를 얻기 위해 플레이어들이 도전할 수 있는 주간 토너먼트가 있습니다. 한 주가 끝난 뒤에 상위 플레이어는 게임 화폐를 상금으로 받습니다.

토너먼트 참여하기 #

기본적으로, Nakama 플레이어는 점수를 제출하기 전에 토너먼트에 참여하지 않아도 되지만 Sagi-shi에서는 점수를 의무적으로 제출해야 합니다:

1
client.joinTournament(session, "<TournamentId>").get();

토너먼트 나열하기 #

Sagi-shi 플레이어는 다양한 기준으로 토너먼트를 나열하고 필터링할 수 있습니다:

1
2
3
4
5
6
7
int categoryStart = 1;
int categoryEnd = 2;
long startTime = -1;
long endTime = -1;
int limit = 100;
TournamentList tournamentList = client.listTournaments(session, categoryStart, categoryEnd, startTime, endTime, limit, null).get();
tournamentList.getTournamentsList().forEach(tournament -> logger.info("{}:{}", tournament.getId(), tournament.getTitle()));

성능 상의 이유로 카테고리는 개별 숫자가 아닌 범위를 사용하여 필터링됩니다. 이를 활용하기 위해 카테고리를 구성하십시오(예: 1XX 범위의 모든 PvE 토너먼트, 2XX 범위의 모든 PvP 토너먼트 등).

레코드 나열하기 #

Sagi-shi 플레이어는 토너먼트 레코드를 나열할 수 있습니다:

1
2
3
4
5
6
int limit = 20;
String tournamentName = "weekly_top_detective";
int expiry = -1;
String cursor = null;
TournamentRecordList recordList = client.listTournamentRecords(session, tournamentName, expiry, limit, cursor).get();
recordList.getRecordsList().forEach(record -> logger.info("{}:{}", record.getOwnerId(), record.getScore()));

사용자에 대한 레코드 나열하기

순위표와 유사하게 Sagi-shi 플레이어는 다른 플레이어의 스코어를 얻을 수 있습니다:

1
2
3
4
5
int limit = 20;
String tournamentName = "weekly_top_detective";
int expiry = -1;
TournamentRecordList recordList = client.listTournamentRecordsAroundOwner(session, tournamentName, session.getUserId(), expiry, limit).get();
recordList.getRecordsList().forEach(record -> logger.info("{}:{}", record.getOwnerId(), record.getScore()));

점수 제출하기 #

Sagi-shi 플레이어는 점수, 항목별 점수, 메타데이터를 토너먼트에 제출할 수 있습니다:

1
2
3
4
5
6
int score = 1;
int subscore = 0;
Map<String, String> metadata = new HashMap<>();
metadata.put("map", "space_station");

client.writeLeaderboardRecord(session, "weekly_top_detective", score, subscore, new Gson().toJson(metadata, metadata.getClass())).get();

알림 #

게임 서버에서 Nakama 알림을 통해 플레이어에게 실시간 메시지를 전달할 수 있습니다.

알림은 영구적(플레이어가 볼 때까지 남음)이거나 일시적(플레이어가 현재 온라인인 경우에만 수신)일 수 있습니다.

Sagi-shi는 알림을 통해 토너먼트의 승자에게 승리 여부를 알려줍니다.

Sagi-shi notification screen
Sagi-shi notifications

알림 수신하기 #

알림은 서버에서 전송해야 합니다.

Nakama는 알림을 구별하기 위해서 코드를 사용합니다. 0 이하의 코드는 Nakama 내부 직원을 위해 예약된 시스템입니다.

Sagi-shi 플레이어는 소켓 리스너를 사용하여 알림 수신 이벤트를 구독할 수 있습니다. Sagi-shi는 토너먼트 우승 100 코드를 사용합니다:

 1
 2
 3
 4
 5
 6
 7
 8
 9
10
11
@Override
public void onNotifications(NotificationList notificationList) {
    final int rewardCode = 100;
    for (Notification notification : notificationList.getNotificationsList()) {
        if (notification.getCode() == rewardCode) {
            logger.info("Congratulations, you won the tournament!\n{}\n{}", notification.getSubject(), notification.getContent());
        } else {
            logger.info("Other notification: {}:{}\n{}", notification.getCode(), notification.getSubject(), notification.getContent());
        }
    }
}

알림 나열하기 #

Sagi-shi 플레이어는 오프라인 상태였을 때 수신된 알림을 나열할 수 있습니다:

1
2
3
int limit = 100;
NotificationList notificationList = client.listNotifications(session, limit).get();
notificationList.getNotificationsList().forEach(notification -> logger.info("Notification: {}:{}\n{}", notification.getCode(), notification.getSubject(), notification.getContent()));

페이지 지정 및 캐시 가능한 커서

다른 목록 방법과 마찬가지로 알림 결과는 결과에서 커서 또는 캐시 가능한 커서를 사용하여 페이지를 지정할 수 있습니다.

캐시 가능 항목이 저장되었다고 가정하고 다음에 플레이어가 로그인하면 캐시 가능한 커서를 읽지 않은 알림을 나열하는 데 사용할 수 있습니다.

1
2
3
// Assuming this has been saved and loaded
String cacheableCursor = "";
NotificationList nextResults = client.listNotifications(session, limit, cacheableCursor);

알림 삭제하기 #

Sagi-shi 플레이어는 알림을 읽은 후에 삭제할 수 있습니다:

1
client.deleteNotifications(session, "<NotificationId>", "<AnotherNotificationId>");