Making an online multiplayer game in Rust with Nakama

This is a guest blog post written by Fedor Logachev who worked on the Fish Game tutorial.
Fish Game is a 2-4 player online game built in the Macroquad game engine and the Rust programming language. The game was created as a demonstration of Nakama, an open-source scalable game backend.
As you can see, Fish Game is a frenetic platformer arena starring murderous fish - the last fish standing wins! The game design is heavily inspired by the excellent Duck Game.
The game is playable online on itch.io and the Windows/Linux/Mac native version may be built from the source.
In this tutorial, we’re going to walk through each part of the code that interacts with Nakama to cover all the principles and APIs that you need to know to create your own online multiplayer game with Macroquad and Nakama.
We’ll touch on the following Nakama features:
- User authentication
- Matchmaking
- Realtime Multiplayer
- Leaderboards
This tutorial will briefly cover how to create a game with Macroquad. Afterward, it will focus on Nakama integration.
Making a platform game
This part of the tutorial will explain how to create a single-player platformer game in Rust, starting with setting up macroquad. By the end of this section, we will have created a simple but fully functional platformer.
Setting up macroquad
Start an empty Rust project:
> cargo init --bin fishgame
Run it:
> cd fishgame
> cargo run
     Running `target/debug/fishgame`
Hello, world!
Open Cargo.toml and add macroquad as a dependency:
[package]
name = "fishgame"
...
[dependencies]
macroquad = "0.3"
Open src/main.rs and add some macroquad drawing code to check that everything works (took this from macroquad examples):
src/main.rs:
use macroquad::prelude::*;

#[macroquad::main("BasicShapes")]
async fn main() {
    loop {
        clear_background(RED);

        draw_line(40.0, 40.0, 100.0, 200.0, 15.0, BLUE);
        draw_rectangle(screen_width() / 2.0 - 60.0, 100.0, 120.0, 60.0, GREEN);
        draw_circle(screen_width() - 30.0, screen_height() - 30.0, 15.0, YELLOW);

        draw_text("IT WORKS!", 20.0, 20.0, 30.0, DARKGRAY);

        next_frame().await
    }
}
> cargo run
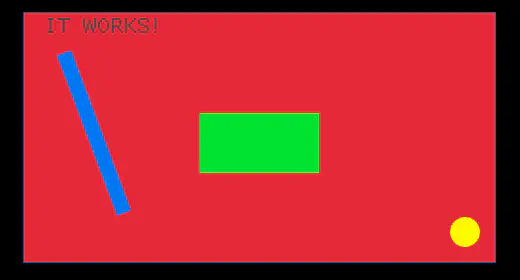
If we got a window with some shapes: All good, the project is set up correctly. Now it’s time to draw more shapes to make it look like a game.
If instead of a window, we have some errors: Maybe some native dependency is missing. Most likely, it is one of these:
apt install libx11-dev libxi-dev libgl1-mesa-dev
For more details, check the build instructions.
Making game levels
The easiest way to do some 2D-level design with macroquad is with the free tiles editor Tiled.
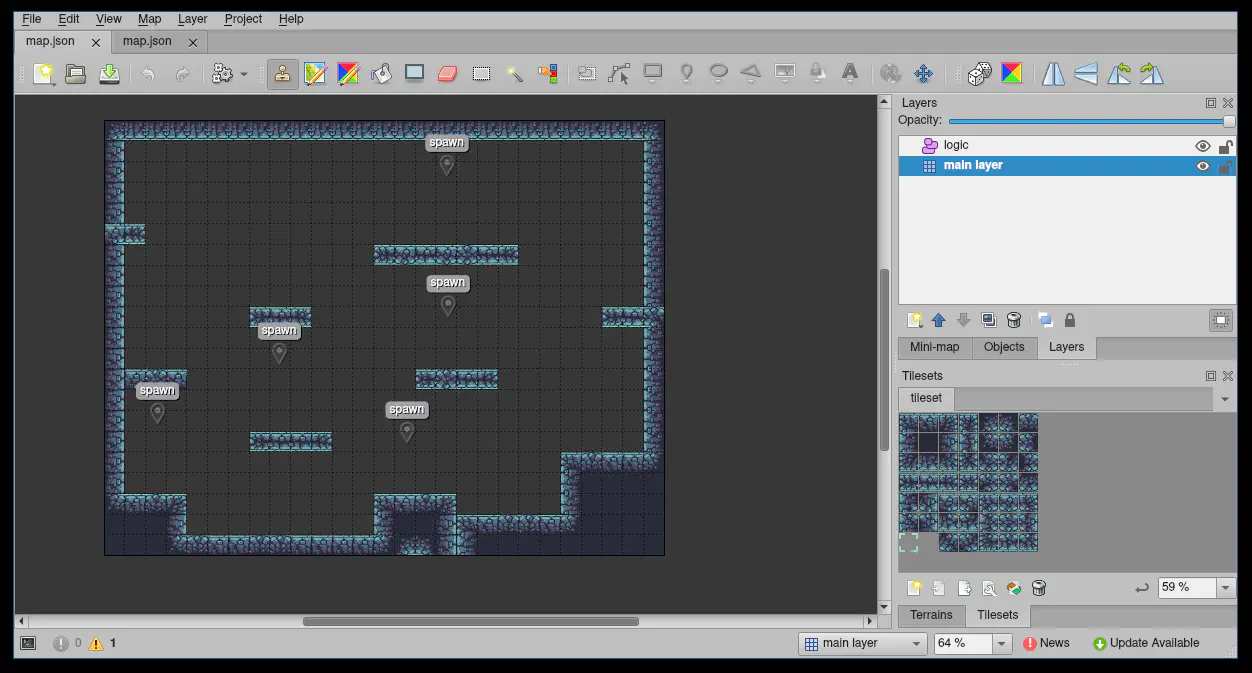 Tiled with Fish Game’s level
We have a crate for reading tiled data in macroquad.
Our Cargo.toml:
...
[dependencies]
macroquad = "0.3"
# the new dependency, macroquad-tiled crate:
macroquad-tiled = "0.1"
Then load the Tiled map to macroquad and draw a level:
src/main.rs, all assets are in the Fish Game repo:
use macroquad::prelude::*;

use macroquad_tiled as tiled;

#[macroquad::main("Fishgame")]
async fn main() {
    let tileset = load_texture("assets/tileset.png").await;
    let decorations = load_texture("assets/decorations1.png").await;

    let tiled_map_json = load_string("assets/map.json").await.unwrap();
    let tiled_map = tiled::load_map(
        &tiled_map_json,
        &[("tileset.png", tileset), ("decorations1.png", decorations)],
        &[],
    )
    .unwrap();

    loop {
        clear_background(BLACK);
        tiled_map.draw_tiles(
            // The name of the layer in assets/map.json
            "main layer",
            Rect::new(0.0, 0.0, screen_width(), screen_height()),
            None,
        );
        next_frame().await;
    }
}
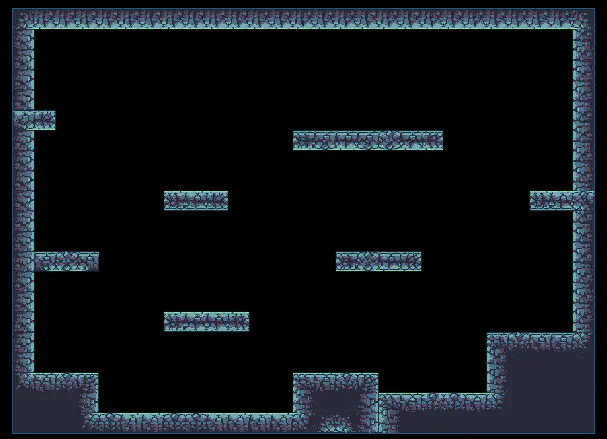
Now we have a level background. For a more polished game, it would be reasonable to invest some time into a more complicated camera, window handling, etc. All of those are implemented in the final Fish Game but will be skipped in the tutorial to get started with Nakama faster.
Character physics
Add a character into the level from the previous chapter:
...
let whale = load_texture("assets/Whale/Whale(76x66)(Orange).png").await;

// for simplicity lets give our world fixed size
let width = 700.;
let height = 500.;
loop {
    tiled_map.draw_tiles(
        // The name of the layer in assets/map.json
        "main layer",
        Rect::new(0.0, 0.0, width, height),
        None,
    );

    draw_texture_ex(
        whale,
        0.,
        0.,
        WHITE,
        DrawTextureParams {
            source: Some(Rect::new(0.0, 0.0, 76., 66.)),
            ..Default::default()
        },
    );

    ...
}
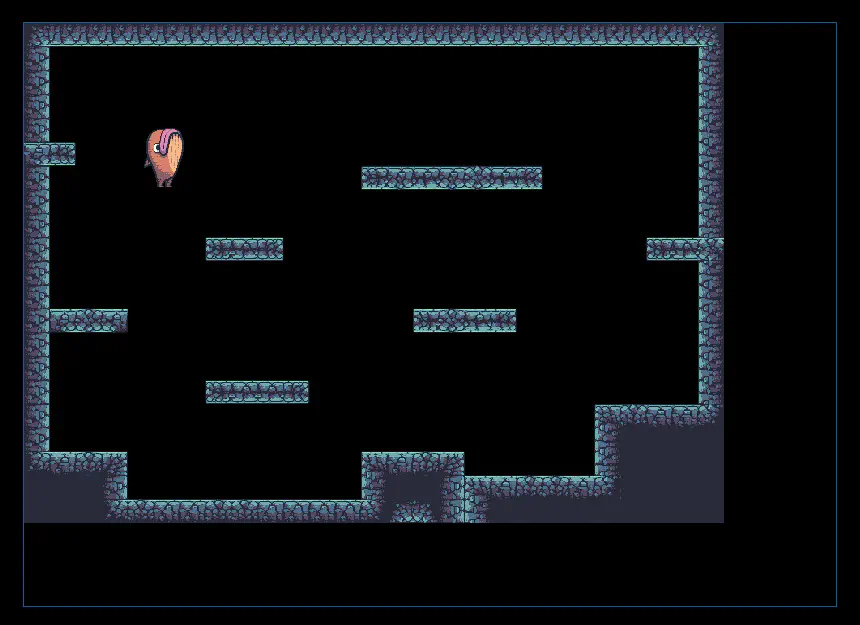
Now we have a character and a level. The next step is to allow the user to move the character.
let mut fish_pos = vec2(200., 100.);

loop {
    ...
    if is_key_down(KeyCode::Right) {
        fish_pos.x += 1.0;
    }
    if is_key_down(KeyCode::Left) {
        fish_pos.x -= 1.0;
    }

    let fish_bottom_point = vec2(fish_pos.x + 76. / 2., fish_pos.y + 66.);
    let fish_tile = vec2(
        fish_bottom_point.x / width * tiled_map.raw_tiled_map.width as f32,
        fish_bottom_point.y / height * tiled_map.raw_tiled_map.height as f32,
    );
    if tiled_map
        .get_tile("main layer", fish_tile.x as u32, fish_tile.y as u32)
        .is_none()
    {
        fish_pos.y += 2.0;
    }
}
There are lots hard-coded corner cases to take into account, but putting all of this together gives us a complete platformer character mechanic.
There is a crate with platformer physics implementation based on the brilliant article on Celeste and Towerfall physics: macroquad-platformer.
Cargo.toml:
[dependencies]
macroquad = "0.3"
macroquad-tiled = "0.1"
macroquad-platformer = "0.1"
With the new crate involved, the code will look like the platformer example.
let mut world = World::new();
world.add_static_tiled_layer(
    static_colliders,
    tiled_map.raw_tiled_map.tilewidth as f32,
    tiled_map.raw_tiled_map.tileheight as f32,
    tiled_map.raw_tiled_map.width as _,
    1,
);

let mut player = world.add_actor(vec2(200.0, 100.0), 36, 66);

loop {
    ...
    // now instead of moving player directly
    // we do it through a crate
    world.move_h(player, speed.x * get_frame_time());
    world.move_v(player, speed.y * get_frame_time());

    // and to draw the player we ask the crate for the player's current position:
    let pos = world.actor_pos(player.collider);
    ...
}
Now the fish can jump!
Nodes
Now we have enough of a game to start adding Nakama networking. Just one final piece missing.
So far, the game code looks like this:
async fn main() {
   // load some resources
   // and initialize more variables
   loop {
       // check input and change some variables
       // make a few draw calls based on the variables content

       // and repeat this forever
       next_frame().await;
   }
}
This may be good enough for a quick prototype. But for the whole Fish Game, we are going to have quite a few things in those variables:
- other players
- weapons
- bullets
- level decorations
- some UI
- some visual effects
Macroquad does not force any specific way to store data or game objects. Macroquad does have some embedded ways for organizing scenes and is friendly for any third-party ECS-like crates.
For Fish Game, we are going to use macroquad’s scenes.
struct Player {
    collider: Actor,
    speed: Vec2,
}

impl Player {
    pub const JUMP_SPEED: f32 = -700.0;
    pub const GRAVITY: f32 = 2000.0;
    pub const MOVE_SPEED: f32 = 300.0;

    fn new() -> Player {
        let mut resources = storage::get_mut::<Resources>().unwrap();

        Player {
            collider: resources.physics.add_actor(vec2(200.0, 100.0), 36, 66),
            speed: vec2(0., 0.),
        }
    }
}

impl Node for Player {
    fn draw(node: RefMut<Self>) {
        let resources = storage::get_mut::<Resources>().unwrap();

        let pos = resources.physics.actor_pos(node.collider);

        draw_texture_ex(
            resources.whale,
            pos.x - 20.,
            pos.y,
            WHITE,
            DrawTextureParams {
                source: Some(Rect::new(0.0, 0.0, 76., 66.)),
                ..Default::default()
            },
        );
    }

    fn update(mut node: RefMut<Self>) {
        let world = &mut storage::get_mut::<Resources>().unwrap().physics;

        let pos = world.actor_pos(node.collider);
        let on_ground = world.collide_check(node.collider, pos + vec2(0., 1.));

        if on_ground == false {
            node.speed.y += Self::GRAVITY * get_frame_time();
        }

        if is_key_down(KeyCode::Right) {
            node.speed.x = Self::MOVE_SPEED;
        } else if is_key_down(KeyCode::Left) {
            node.speed.x = -Self::MOVE_SPEED;
        } else {
            node.speed.x = 0.;
        }

        if is_key_pressed(KeyCode::Space) {
            if on_ground {
                node.speed.y = Self::JUMP_SPEED;
            }
        }

        world.move_h(node.collider, node.speed.x * get_frame_time());
        world.move_v(node.collider, node.speed.y * get_frame_time());
    }
}

async fn main() {
    ...
    // this is it, now it will get its draw/update calls
    scene::add_node(Player::new());
    ...
}
It may not look like a big improvement over the previous approach, but scenes allow building complicated node relationships and applying iteration strategies over scene nodes. We are going to use it a lot more in the upcoming sections.
Networking with Nakama
The “nakama-rs” crate is a pure Rust implementation of the Nakama protocol.
It allows working with Nakama in three different styles.
- nakama-rs can produce raw data with either HTTP or WebSocket requests, but leaves the networking implementation for the user.
- nakama-rs can make Rest/WebSocket calls with that raw data, but with a very low-level interface over requests.
- Very high-level stateful client, which hides implementation details completely.
For Fish Game, we are going to use that high-level client. That client works as a giant state machine - the user makes non-blocking calls, and the client may change some internal state based on those calls.
Than in the main loop game pull changes from the ApiClient and may react accordingly.
Connecting to Nakama
nakama-rs’ ApiClient will be used as a singleton. Once a global object is created, it is persisted throughout the game lifetime and is globally accessible.
In macroquad, we can use the node system for this. It will still be a singleton, but the access and relationship graph with our new Nakama node will be easily traceable and visible.
So we will create a scene node with ApiClient and pass a reference to this node to all nodes communicating with Nakama.
pub struct Nakama {
    pub api_client: ApiClient,
}

impl Nakama {
    pub fn new(key: &str, server: &str, port: u32, protocol: &str) -> Nakama {
        Nakama {
            api_client: ApiClient::new(key, server, port, protocol),
        }
    }
}

impl scene::Node for Nakama {
    fn ready(node: RefMut<Self>) {
        // Once created, nakama node should never be deleted.
        // The persist() call will make nakama node a singleton,
        // alive during all scene reloads.
        node.persist();
    }

    fn update(node: RefMut<Self>) {
        // api_client should be "ticked" once per frame
        self.api_client.tick();
    }
}

async fn main() {
    // now the first node in the scene will be a nakama node
    let nakama = scene::add_node(nodes::Nakama::new(
        credentials::NAKAMA_KEY,
        credentials::NAKAMA_SERVER,
        credentials::NAKAMA_PORT,
        credentials::NAKAMA_PROTOCOL,
    ));
    ...
}
Authentication and registration
Macroquad uses the immediate mode gui concept for UI. Here we will skip GUI style setup (it may be found here), and we will proceed to the UI logic instead.
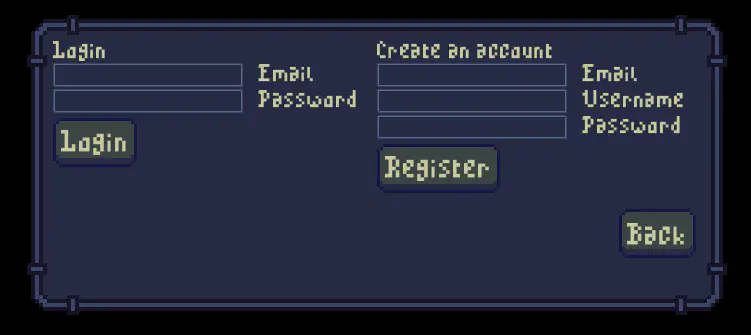
Most UI windows interacting with Nakama are built in the same way:
- get Nakama node
- check if some operation is in progress, and if it is - show loading UI
- check if there is some error to show
- check if Nakama finished the required operation and can proceed to the next window
- draw all input elements and on some button press - make a Nakama request
let mut email = String::new();
let mut password = String::new();
loop {
    let nakama = scene::get_node(nakama).unwrap();

    if nakama.api_client.in_progress() {
        in_progress_gui();
        return;
    }
    if let Some(error) = nakama.api_client.error().as_deref() {
        ui.label(None, error);
    }
    if nakama.api_client.authenticated() {
        // done with authentication, proceeding to matchmaking
        return Scene::MatchmakingLobby;
    }

    widgets::InputText::new(hash!())
        .label("Email")
        .ui(ui, &mut email);

    widgets::InputText::new(hash!())
        .password(true)
        .label("Password")
        .ui(ui, &mut password);
    if ui.button(None, "Login") {
        nakama.api_client.authenticate(&email, &password);
    }

    next_frame().await;
}
Real-time multiplayer
The real-time multiplayer engine makes it easy for users to set up and join matches where they can rapidly exchange data with opponents. Any user can participate in matches with other users. Users can create, join, and leave matches with messages sent from clients. A match exists on the server until its last participant has left. Any data sent through a match is immediately routed to all other participants. The matches are kept in memory and can be persisted as needed. source
Match window code is very similar to the authentication window, as well as all other windows in Fish Game:
loop {
    // check if nakama is in progress
    // check if nakama has errors
    // check if nakama finished and we can return
    // draw some input widgets and maybe make nakama request
}
Now let’s focus on how Nakama’s real-time matches work.
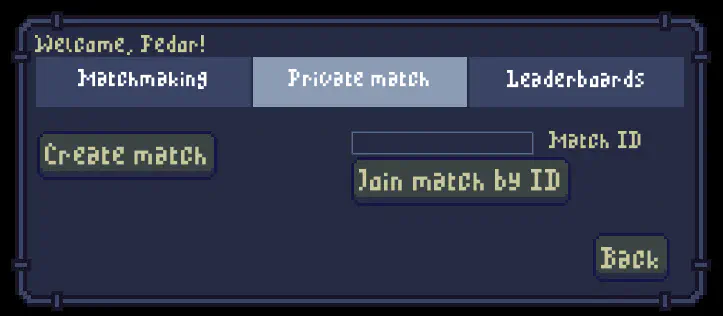
To create a match:
nakama.socket_create_match();
This will start a process that on success will give some id in nakama.match_id().
This ID may be shared to friends to join this exact match later:
nakama.socket_join_match_by_id(&match_id);
We have two problems here:
Match discoverability. Sharing a match id with a friend works for private games, but we need a better solution for public games. This will be addressed in the Matchmaker section.
Nakama considers a match started right after the
create_matchcall, and anyone can join at any moment. While the rules of Fish Game won’t let players join in the middle, and the game starts only when all of the players have pressed the “ready” button. This will be addressed in the Ready window section.
Matchmaker
You can use the Matchmaker to find other players. It is possible to match them using properties and a query that specifies the values the other players’ properties should hold. In nakama-rs the Matchmaker is a struct and can be created using Matchmaker::new(). There are two types of properties, string properties and numeric properties that can be added with matchmaker.add_string_property("name", "value") and matchmaker.add_numeric_property("rank", 1000.0) respectively. Names of properties should be unique across both types.
The query is a space-separated string using the Bleve Query-String-Query Syntax. It is possible to add queries manually using matchmaker.add_query_item("properties.region:Europe") but nakama-rs provides a helper to construct the query string using the builder pattern. For now, terms, numeric ranges, required, optional and exclusion are supported. See examples/matchmaker.rs for more examples.
// By default query items are optional. The Matchmaker will prefer
// players holding the value, but will also match players without it.
// Prefer players from Europe.
let query_item = QueryItemBuilder::new("region")
    .term("Europe")
    .build();

// Only match with players from Europe
let query_item = QueryItemBuilder::new("region")
    .term("Europe")
    .required()
    .build();

// Only match with players not from Europe
let query_item = QueryItemBuilder::new("region")
    .term("Europe")
    .excluded()
    .build();

let query_item = QueryItemBuilder::new("rank")
    .lt(10) // or .gt(10), .leq(10) and .geq(10)
    .build();
In addition, it is possible to specify the minimum and the maximum number of players using matchmaker.min(2) and matchmaker.max(100). The default values are 2 and 100, respectively.
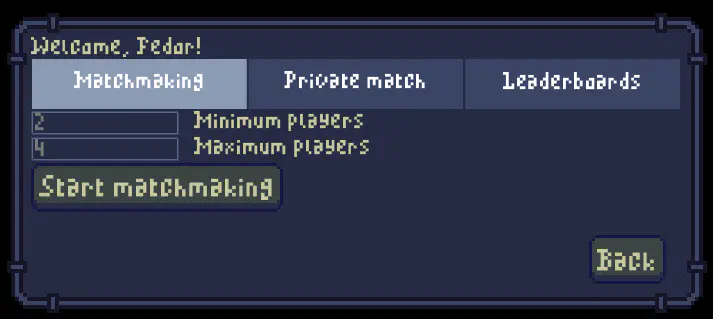
Fish Game only specifies one property called "engine" with the value macroquad_engine. The query only specifies that we also match players holding the same value for that property, allowing us to avoid matchmaking players running a different game on the same Nakama server.
The full matchmaker setup can be seen below:
widgets::InputText::new(hash!())
    .ratio(1. / 4.)
    .filter_numbers()
    .label("Minimum players")
    .ui(ui, &mut minimum_players);

widgets::InputText::new(hash!())
    .ratio(1. / 4.)
    .filter_numbers()
    .label("Maximum players")
    .ui(ui, &mut maximum_players);

if ui.button(None, "Start matchmaking") {
    let mut matchmaker = Matchmaker::new();

    matchmaker
        .min(minimum_players.parse::<u32>().unwrap())
        .max(maximum_players.parse::<u32>().unwrap())
        .add_string_property("engine", "macroquad_matchmaking")
        .add_query_item(
            &QueryItemBuilder::new("engine")
                .required()
                .term("macroquad_matchmaking")
                .build(),
        );

    nakama.api_client.socket_add_matchmaker(&matchmaker);

    next_scene = Some(Scene::WaitingForMatchmaking { private: false });
);
You can add the Matchmaker by calling nakama.socket_add_matchmaker(&matchmaker), adding the user to the server’s matchmaking pool. The user will stay in the pool until matched as long as they are online or until you remove them manually. It is possible to add multiple matchmakers with different queries simultaneously to look for different types of matches.
When the server matches the user, the ApiClient will handle the event and set nakama.matchmaker_token to Some(token). The token is a short-lived entry ticket that you can use to join a match with the other matched players by calling nakama.socket_join_match_by_token(token). The server creates the match as soon as the first player tries to join it and sends an event once the player joined successfully. In the client, nakama.match_id() will then contain a value. It is now possible to send match data between players.
For additional details, check out the Matchmaker documentation.
Exchanging messages
nakama-rs’ApiClient provides two API calls to communicate between each other:
fn socket_send<T: SerBin>(&self, opcode: u32, data: T)socket_sendwill binary serialize given message and broadcast it to each player in the room. Opcode here acts as a tag or discriminant in rust enum - a small descriptor specifiyng what kind of data is being sent.fn try_recv(&self) -> Option<Event>try_recvwill give an Event if someone sent a message or joined/left match since lasttry_recvcall.
A convenient Rust representation of an opcode/data pair may look like this:
mod message {
    #[derive(Debug, Clone, SerBin, DeBin, PartialEq)]
    pub struct State {
        pub pos: (u16, u16),
        pub facing: bool,
    }
    impl State {
        pub const OPCODE: i32 = 1;
    }

    #[derive(Debug, Clone, SerBin, DeBin, PartialEq)]
    pub struct Damage {
        pub target: String,
        pub direction: bool,
    }
    impl Damage {
        pub const OPCODE: i32 = 2;
    }
}
Then, in order to send some message:
nakama.api_client.send(Damage::OPCODE, Damage {
    target: target.network_id,
    direction: false
});
To recieve such a message on other client:
while let Some(event) = nakama.try_recv() {
    ..
}
Event may be either a message from other client or a system even like joined/leaved player. This will be explained in details in Player state syncronization section.
Player state synchronization
Fish Game uses a relayed network synchronization model. Each player simulates its physics and sends its state to other players.
One of the players is called “host” and is responsible for global events and conflict resolution.
Nakama node from previous chapters:
impl scene::Node for Nakama {
    fn update(node: RefMut<Self>) {
        node.api_client.tick();
    }
}
Now it will also take responsibility for state synchronization.
impl scene::Node for Nakama {
    fn update(node: RefMut<Self>) {
        // send our own player state to all the other players
        {
            let player = scene::find_node_by_type::<Player>().unwrap();
            let mut state = message::State {
                pos: (player.pos.x as u16, player.pos.y as u16),
                facing: player.facing(),
                ..
            };
            node.api_client.socket_send(message::State::OPCODE, &message::State(state.0));
        }
        node.api_client.tick();
    }
}
In the final game code, the State structure is slightly more optimized.
Also, in the real game, network fps are different from the rendering fps - with networking lag sending state 60 times per second is too much, and ~15-20 should be enough. Fish Game works on 15.
But the idea is the same - The Nakama node packs all the important parts of the player state and sends it over the network to all the other players in the room.
Next step - receive other players’ data and draw other players.
struct Nakama {
    // now Nakama node is keeping track on all remote players in the scene
    // key here is session_id from nakama presence - the always unique player identifier
    remote_players: HashMap<String, Handle<RemotePlayer>>
}

impl scene::Node for Nakama {
    fn update(node: RefMut<Self>) {
        // send our own player state to all the other players
        {
            ..
        }

        // receive other players updates
        {
            while let Some(event) = nakama.try_recv() {
                // proceed event and modify the scene somehow
                ..
            }
        }
        node.api_client.tick();
    }
}
That is the bare-bones implementation - for each frame, we receive all the Nakama events and apply changes to the scene.
We need to have a list of remote_players to track the scene nodes of remote players and add/remove players on game joins or leaves. And we need to apply the received messages to those remote players.
match event {
    // add or remove RemotePlayer node
    Event::::Presence { joins, leaves } => {
        for joined in joins {
            let joined_id = join.session_id;
            let username = join.username;

            let remote_player = RemotePlayer::new(&username, &joined);
             self.remote_players.insert(
                joined.clone(),
                scene::add_node(remote_player),
            );

        }
        for leaver in leaves {
            let other = self.remote_players.remove(&leaver).unwrap();
            let leaver = scene::get_node::<RemotePlayer>(leaver).unwrap();
            other.delete();
        }

    }
This will keep the list of active remote players accurate, and for each, we will have a RemotePlayer node.
The RemotePlayer node may be very similar to the Player node but with very different logic.
Then continue the event handling match to deal with a data message:
// received opcode/data pair
Event::MatchData {
    user_id,
    opcode,
    data,
} => {
    if let Some(remote_player) = self.remote_players.get(&user_id) {
        let mut remote_player = scene::get_node(*remote_player).unwrap();

        match opcode as i32 {
            message::State::OPCODE => {
                // deserialize message according to opcode
                let message::State(data) = DeBin::deserialize_bin(&data).unwrap();

                // and apply message data to the remote player node
                remote_player.set_pos(data.pos.0 as f32, data.pos.1 as f32);
                remote_player.set_facing(data.facing);
            }
        }
    }
}
src/nodes/nakama/nakama_realtime_game.rs
A note about network performance
While Fish Game has good enough network performance to be fully functional, it is kept intentionally simplistic for demonstration purposes.
Nakama’s real-time Multiplayer API sends data over WebSockets, which means TCP. TCP is reliable (you know if the message you sent arrived or not), but it’s slower.
Fast-paced games commonly use UDP to send synchronization information: it’s unreliable (your message can get lost) but faster. Using unreliable UDP would allow for some network optimizations that we can’t do here. For example, with some kinds of game states, only the most recent message is valid (all older messages are immediately invalid once a newer one arrives), so we could use the faster UDP packets. It’s OK if some get lost, we’d just take the newest one that arrives.
This game is fast-paced enough that it ideally should be using “input prediction and rollback” rather than “input prediction and correction”. When using rollback, rather than applying the corrections you received to the current state of the game, you roll back the local game state to the time when the remote state was generated, apply it, and then roll the game state forward to the current time. This can help eliminate lag and avoid situations where one player sees themselves hitting another player, but it doesn’t register as a hit. However, rollback is a lot more complicated to implement than correction. Fish Game has enough in common with arcade-style Fighting Games that the most optimal networking technique for it might be the GGPO technique.
This would merit further investigation if this was a commercial game.
Global events and conflicts resolution
In Fish Game, we have some global events. Good example: Spawn process of pickable weapon.
There are two ways to simulate such a process:
- Make it deterministic and simulate it on each client.
- Call one of the clients “host”. Simulate such an event only on that client and this client will tell everyone else which weapon spawned where.
With the deterministic approach, we are going to have a problem with conflicts - if two players correctly simulated that they picked the weapon at the very same time, who is right?
With the “host” approach it is way easier - the host may be responsible for such decisions.
While all the players have unique IDs and everyone knows each other’s ID, we can just sort the list of remote_players IDs and whoever’s first is the host.
Now we can create a special node, GlobalEvents:
pub struct GlobalEvents {
    nakama: NodeHandle<Nakama>,
    last_spawn_time: f32,
}

impl scene::Node for GlobalEvents {
    fn update(mut node: RefMut<Self>) {
        let nakama = scene::get_node(node.nakama).unwrap();

        if nakama.is_host() == false {
            return;
        }
        if get_time() - node.last_spawn_time >= Self::SPAWN_INTERVAL as _
            && node.spawned_items.len() < 3 {
            let new_item_pos = ..;
            let new_item_type = ..;

            nakama.spawn_item(new_item_pos, new_item_type);
        }

    }
}
Ready window
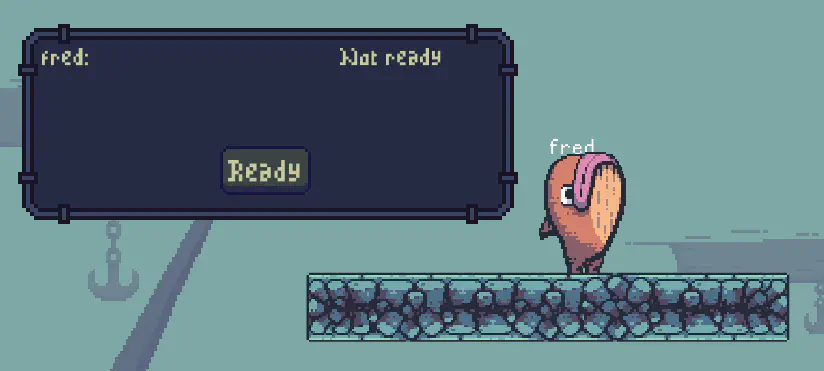
One of our unsolved problems: in Fish Game the game starts only when all the players joined the match, can see each other and has opted in as ready.
After this point, it is impossible to join a match and only one last standing fish will win.
All this logic may be implemented on top of Nakama’s messages.
We can add a flag to our Nakama node:
struct Nakama {
    pub api_client: ApiClient,
    pub game_started: bool
}
And introduce a special message:
mod messages {
    #[derive(Debug, Clone, SerBin, DeBin, PartialEq)]
    pub struct Ready;
    impl Ready {
        pub const OPCODE: i32 = 6;
    }
}
Now it is the game’s responsibility to figure when to start a match. In Fish Game rules are quite simple - before everyone pushed “Ready” and the host confirmed by pushing “Start game” - no loot is spawning and noone is allowed to move. Implementation is in nakama node
But this logic may be totally different depending on game design, and the goal of this little chapter - demonstrate where nakama’s area of responsibility in the matchmaker/match logic ends and game should roll its own logic.
Leaderboards
There’s one last Nakama feature we’re going to look at before ending this tutorial: Leaderboards.
Leaderboards need to be created on the server before your game can write data to them. This is done in Fish Game by adding a small server-side Lua module in nakama/data/modules/fish_game.lua:
local nk = require("nakama")

nk.run_once(function(context)
  nk.leaderboard_create("fish_game_wins", false, "desc", "incr")
end)
This runs on the Nakama server at startup and creates a leaderboard called “fishgamewins”, which we’re going to use to track the total number of wins that each player has gotten.
It’s a non-authoritative leaderboard (the false in the 2nd argument), which means that the game clients can modify the leaderboard themselves, rather than requiring server-side logic to do it. It’s sorted in descending order (the “desc” in the 3rd argument) and is updated by incrementing the score (the “incr” in the 4th argument).
Note: Nakama modules can be written in Lua, Go or (in Nakama 3) JavaScript.
Posting results to the leaderboard
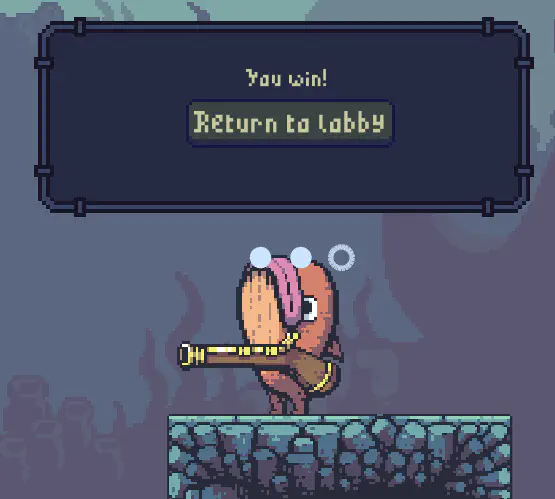
When only one fish is alive and the game has ended, the winner may update the leaderboard record.
nakama.api_client.write_leaderboard_record("fish_game_wins", 1)
We may want to wait for the result status to display some error and retry if we got a network error.
Accessing the leaderboard
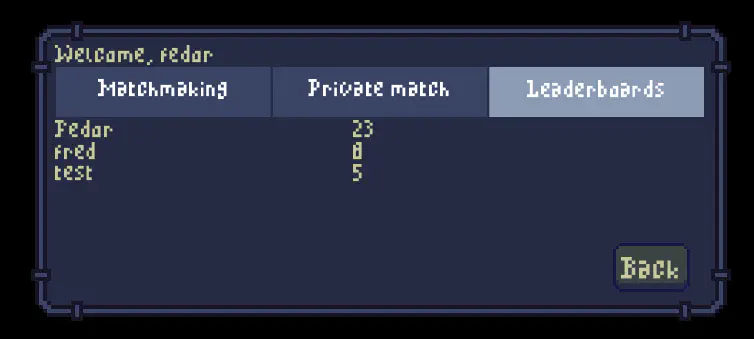
The leaderboard window is not much different from the authentication/matchmaking window.
First, make the Nakama request:
nakama.api_client.list_leaderboard_records("fish_game_wins")
And then on success we will have something in api_client.leaderboard_records
if let Some(leaderboard) = nakama
    .api_client
    .leaderboard_records("fish_game_wins")
{
    for record in &leaderboard.records {
        ui.label(None, &format!("{}: {}", record.username, record.score));
    }
}

Speak to the Heroic Labs team


